> This is part 1 of 2 of the full documentation (pages 1–100 of 141).
> The content is paginated: fetch every part to see all of it.
> Next part: https://docs.erathos.com/llms-full.txt/1
> Page index: https://docs.erathos.com/llms.txt
# Welcome
Use Erathos to move and orchestrate your data in minutes.
## What is Erathos
Erathos is an ELT software that extracts data from multiple sources through instant integrations. With plug-and-play connectors, it centralizes all your data into a single analytical environment, allowing you to build a Data Warehouse in minutes.
## Getting started
To set up the Erathos platform as quickly as possible, follow the tutorial provided in the [**Quickstart**](/introduction/quickstart) section. This step-by-step guide is designed to help you integrate and configure your data workflows efficiently, enabling you to get started in minutes.
## Connectors
# Quickstart
There are two main actions required to configure the Erathos platform effectively:
{% stepper %}
{% step %}
### Connect your data sources
Erathos can seamlessly connect to various data sources, including **SaaS platforms** (via APIs) and **databases**.
Pipelines define how the Extract and Load (EL) process is executed. You can configure the frequency and method of updates, as well as select the specific tables or endpoints to sync.
{% endstep %}
{% step %}
### Connect to your Data warehouse
Connect to the Data Warehouse that will serve as the destination for Erathos integrations.
{% endstep %}
{% endstepper %}
## 1. Connect your data sources
To connect to a data source, navigate to **Connections** and select **+ New connection**.
Choose the relevant connector (if you're unsure, refer to the [connector's documentation page](/connectors/apis) for guidance) and enter your credentials.
Finally, create the jobs that will define the data movement routines, setting up the frequency and method of synchronization.
{% embed url="" %}
## 2. Connect to your Data warehouse
To connect to your Data Warehouse, navigate to **Settings > Data Warehouse** in Erathos and select your desired option.
Erathos supports integration with several major Data Warehouses, including:
* [**BigQuery**](/destinations/what-is-a-destination/bigquery)
* [**PostgreSQL**](/destinations/what-is-a-destination/postgresql)
* [**Redshift**](/destinations/what-is-a-destination/redshift)
* [**Databricks**](/destinations/what-is-a-destination/databricks)
{% embed url="" %}
{% hint style="info" %}
If you dont have a Google BigQuery, we can host for you. Referer to [Hosted by Erathos](/destinations/what-is-a-destination/bigquery/hosted-by-erathos)
{% endhint %}
# Connections
Connect data sources to your warehouse.
Connections are the bridge linking your data sources to your data warehouse, enabling seamless data integration and processing. Each connection can manage one or multiple jobs, which define specific data extraction, transformation, and loading tasks.
To learn more about how jobs work and their role in the data pipeline, refer to the [Jobs Documentation](/platform/connections/jobs).
## How to create a connection
{% embed url="" %}
{% hint style="info" %}
Each connector requires specific credentials for its setup. For detailed information about the credentials needed for a particular connector, refer to its [corresponding documentation](/connectors/apis).
{% endhint %}
# Jobs
A **job** defines how the **Extract and Load (EL)** process is performed between your data sources and your data warehouse. Each job is always linked to a specific table or endpoint, depending on the type of connector used.
## Overview
A **job** includes various configurations that define the EL process, such as:
* [**Sync type**](/platform/connections/sync-types): Specifies how the data will be extracted from the source and written to the target.
* [**Sync schedule**](/platform/connections/sync-schedule): Determines how often the job will run (e.g., hourly, daily).
* **Column Selection**: Allows you to choose which columns will be included in the data extraction.
Within a connection, each **job** can be configured independently, allowing for significant customization and adaptation to your specific use case.
This flexibility ensures that data workflows can be precisely tailored to meet different requirements. However, in API-based connectors, certain jobs may have dependencies on others due to the nature of the API's structure or limitations.
### Dependent Jobs
Dependent jobs occur when information from one job is required for the execution of another.
**Example Scenario**:\
Consider a CRM system with two endpoints:
* `/deals`: Lists all deals, providing IDs for each.
* `/deal-details`: Requires the deal IDs from the first endpoint to fetch detailed records for each deal.
In this case, the **Deals job** must execute first to gather the necessary IDs, which are then passed to the **Deal Details job** for its execution.
**Key Characteristics of Dependent Jobs**:
* **Execution Order**: Dependent jobs always run after their parent job has completed successfully.
* **Sync Type Flexibility**: While the jobs are dependent, the parent and child can have different synchronization types. For example, the parent job might use incremental sync, while the child job performs a full refresh.
This approach ensures accurate data flow between jobs while maintaining flexibility in how each job operates within its dependency hierarchy.
## How to create a job
{% embed url="" %}
### Specify the Columns to Synchronize
To select the columns to be synchronized within a Job, follow these steps:
1. **Navigate to "Manage Jobs"**: Go to the job management section in the platform's interface.
2. **Open the Column Selection Modal**:
* Locate the desired job in the list.
* Click the **"Open"** button associated with that job to access the column configuration modal.
3. **Customize Column Selection**:
* **Select All**: Choose to include all available columns from the data source.
* **Choose Specific Columns**: Select only the columns relevant to your use case.
* **(Optional)** [**Anonymize Columns**](/platform/connections/column-anonymization): Configure columns to be anonymized if sensitive data needs to be protected during synchronization.
{% embed url="" %}
# Sync types
Define the extract and load strategy
A **Sync type** determine how we perform data capture and loading processes. Each strategy has its pros and cons, as well as specific use cases where it brings the most value. On the Erathos platform, we support the following update types:
## Full refresh
The **Full Refresh** strategy involves a complete read and load of the source table, overwriting all values in the destination table.
## Partials
In contrast, **Partial** updates capture only a subset of the table, defined by records with values greater than a specific cursor (such as creation date, update date, or even an ID).
### Understanding cursors
Before moving on, it’s essential to understand what a **cursor** is and how it works.
During the first execution, all the records are loaded into the destination. In subsequent pipeline executions, the cursor helps identify only the records that have been added or updated.
To perform a partial update, at least one column must be selected to help identify which records should be transferred to the destination. From the columns available, we have the following options:
* **Id**: Suitable if it is an integer and auto-incremental.
* **Created\_at**: Suitable, but not recommended as updates in existing records would be missed.
* **Updated\_at**: Suitable as it reflects the latest changes.
* **Name / Gender**: Not meaningful for filtering updates.
For this example, we use **Updated\_at**. From the destination table, we select the highest **Updated\_at** value and use it as a filter, selecting only records where **Updated\_at** is greater than the last loaded value.
You can choose multiple cursors if needed. For instance, if the **updated\_at** column is null when a record is created you could select both **updated\_at** and **created\_at** as cursors. In this way the condition would be **`created_at > 'date' OR updated_at > 'date'`**
### Prerequisites
In general, all jobs have the **Full Refresh** option available. However, for **Partial Refresh** to be enabled, the following prerequisites must be met:
* A **primary key** must exist.
* A column of type `date` or `datetime` must be available to serve as **cursor**.
{% hint style="info" %}
For APIs, Erathos maps and defines which endpoints meet the prerequisites automatically. For databases, we perform an introspection step. Learn more [here](/connectors/databases#introspection).
{% endhint %}
If you're using BigQuery as a destination, ensure it is not operating in *sandbox* mode, as this prevents the use of Partial Refresh. Learn more [here](/destinations/what-is-a-destination/bigquery#sandbox-mode).
### Types of partials
The three variations of partial updates are as follows:
#### Partial Overwrite
In this strategy, new records are inserted as usual, while updated records **overwrite** outdated records in the destination database.
{% hint style="info" %}
This is the suggested **sync type** to be used across Erathos plataform.
{% endhint %}
#### Partial Append
All records are inserted in this approach, resulting in updated records being duplicated (with both original and new values present in the database).
#### Partial Versioned
This strategy is similar to **Partial Append**, but each record is marked with an indicator identifying whether it’s the most recent version to be used.
### Advanced configuration
When performing partial updates, it may occasionally be necessary to execute **Full Refresh** updates to resolve discrepancies between the source and destination datasets.
To address this, you can use the **Enable Full On** parameter, which schedules routine and automatic full executions.
## Using sync types
To choose the **sync type** for a job, navigate to the "**Pipeline Jobs**" page in your desired connection.
### APIs
For APIs, we automatically map the best configurations and apply the optimal cursor for each job, ensuring efficient and accurate data capture.
{% embed url="" %}
### Databases
In contrast, when the data source is a database, it is necessary to manually define the cursor for each job that requires partial execution capabilities.
{% hint style="info" %}
If partial options are unavailable for a specific job, ensure that all [pre requisites](#pre-requisites) are met.
{% endhint %}
{% embed url="" %}
# Sync schedule
Define the schedule on which the jobs will be executed
The primary function of a data pipeline is to keep two environments synchronized. To achieve this, pipelines rely on scheduled data update executions. These schedules are typically based on a specific **time** and an **update frequency**.
## Base hour
The **Base Hour** refers to the specific time of day at which a scheduled pipeline execution begins, serving as the anchor point for the selected update frequency (e.g., weekly, daily, or every 12 hours). All subsequent executions follow this base hour based on the defined frequency.
## Frequency
The available update frequencies on the Alexandria platform are:
* **Manually:** Executes only when trigged by user.
* **Weekly**: Executes once every week.
* **Daily**: Executes every 24 hours.
* **Every 12 Hours**: Executes every 12 hours.
* **Every 6 Hours**: Executes every 6 hours.
* **Every 3 Hours**: Executes every 3 hours.
* **Every Hour**: Executes every 1 hour.
* **Every 30 Minutes**: Executes every 30 minutes.
* **Every 5 Minutes**: Executes every 5 minutes.
## Using sync frequencies and base hour
{% embed url="" %}
# Column Anonymization
Protect sensitive data
## How it works
**Column anonymization** is a data protection technique that modifies data to prevent the exposure or identification of individuals or sensitive information. This technique allows data to be utilized for analysis, reporting, or other purposes without compromising privacy.
## Activating column anonymization
{% embed url="" %}
# Block Window
Prevent executions from occurring during critical time windows.
## How it works
For various reasons, it may be necessary to ensure that no data extractions occur within a defined time window, thereby preserving resources from the source system.
To address this need, we offer the **Block Window** feature, which defines specific time intervals to restrict data extraction jobs. This functionality allows for precise control over execution times, ensuring resource optimization for the source system.
#### Configuration Options
The Block Window allows you to set:
* **Days**: Define specific days when the restriction applies.
* **Start and End Times**: Specify the time range for the block window.
#### Restriction Settings
You can further customize how the restriction is applied:
1. **Cancel running executions**: Choose wheter to cancel previously started jobs executions.
2. **Allow Manual Executions**: Choose whether to permit or block manually triggered jobs during the block window.
This feature provides flexibility and ensures optimal resource usage by aligning data extraction schedules with operational needs.
## Using block windows
{% embed url="" %}
# Custom retry strategy
Customize the number of retries and buffer between attempts to retrieve data on connection and job level.
{% hint style="info" %}
This feature is only available on the PRO and Enterprise plans
{% endhint %}
## How it works?
Retries are the number of attempts our platform will do in order to try to extract the data once it receives an error response. If you set 5 retries, Erathos will make 5 attempts to retrieve data **before** showing you an error message and sending an alert.
Besides the number of retries, you can also customize the backoff multiplier which dictates the buffer time between each attempt and how it varies over time.
You can define a custom retry strategy at Connection level, applying to all jobs, or at job level. Be aware that the job retry strategy will overwrite the connection customization for that specific job.
## Using a custom retry strategy
### On Connection level
* Select a connection
* Go to settings tab
* Click on "Control settings"
{% embed url="" %}
### On Job level
* Go to all jobs page
* Click on `...` under "Actions" column and select "Control Settings"
{% embed url="" %}
# Connect to databases
{% hint style="info" %}
Make sure to include our IP address (**35.212.87.86**) to your firewall’s whitelist.
{% endhint %}
To connect to a database—whether as a [source](/platform/connections) or a [destination](/destinations/what-is-a-destination)—you need to ensure that the database is accessible from the **Erathos infrastructure**. To establish this connection:
1. **Firewall Configuration**:
* Allow the Erathos IP (e.g., **35.212.87.86**) in your database's firewall settings. This step ensures that the infrastructure can reach your database.
2. **Tunneling Credentials**:
* If the connection requires a tunnel (e.g., SSH or VPN), make sure the tunnel credentials are properly registered on the platform.
* This involves providing the necessary details such as host, port, username, and private key (if applicable).
{% embed url="" %}
# Running jobs manually
Jobs can be manually executed outside their scheduled routines. This is particularly useful for working with the most recent data or resolving discrepancies.
#### How to Manually Execute a Job:
1. **Access the Jobs Screen**:
* Navigate to the **Jobs** section of the desired connection.
2. **Select the Job**:
* Locate the specific job you wish to run.
3. **Trigger Execution**:
* Click the **Play** button next to the job.
* The execution will start immediately, bypassing the predefined schedule.
{% embed url="" %}
If the job is configured for a **partial sync**, clicking the **Play** button will start a new execution of this type.
For a **full refresh** execution instead, use the dropdown menu next to the Play button. This allows you to select the desired execution type before initiating the job.
{% embed url="" %}
# Custom Backfill
Manually execute jobs with custom cursor value
{% hint style="info" %}
This feature is only available on PRO and Enterprise plans.
{% endhint %}
## How it works
Custom backfill allows you to customize the [cursor](https://docs.erathos.com/platform/connections/sync-types#understanding-cursors) value for a specific job run. This is valuable when you need to reprocess data without running a [Full Refresh](https://docs.erathos.com/platform/connections/sync-types#full-refresh).
For example, you want to reprocess all the data starting from 01/01/2026 because a new column was added or some records have been deleted.
### Soft delete
You may enable the soft delete option in order to detect cases when records from your data source no longer exist. That is, records that are not found during the custom backfill execution will then be marked as deleted on your data warehouse.
## Using the custom backfill feature
* Go to the jobs page
* Click on `...` to see more Actions and then select Run Custom Backfill
{% embed url="" %}
# Alert Integrations
Receive Notifications.
## Overview
It is possible to configure channels to receive notifications about job activity on the Erathos platform. Currently, the available options include:
* [**Discord**](/platform/alert-integrations/discord)
* [**Email**](/platform/alert-integrations/email)
* [**Slack**](/platform/alert-integrations/slack)
To configure your preferred notification channel, navigate to the **Settings** section of the platform and select the **Communications** option. From there, you can choose your desired integration.
## Take action from notifications
We believe notifications should be actionable. To achieve this, we offer integrated actions directly within messages sent to **Discord** or **Slack**.
These actionable notifications allow you to interact with jobs or workflows directly from the messaging platform. For example, you can:
* Retry failed jobs.
* Jump to execution details.
* Mute notifications for a specific period.
# Discord
To enable Discord integration, follow these steps:
1. **Navigate to Settings**:
1. Go to the **Settings** section of the platform.
2. **Access Communications Settings**:
1. Select the **Communications** tab.
3. **Add a Notification Channel**:
1. Click the **"Add Channel"** button.
4. **Configure Discord Notifications**:
1. In the modal that opens, choose the **Discord** option and give the channel a name.
5. **Add Recipients and Email Details**:
1. Authorize the intregration via OAuth.
2. Select the **discord channel** that the integration will send notifications.
6. **Save**
1. Click the butten **Create channel**.
This will set up your email notifications, allowing you to customize the recipients and the content for the alerts sent by the system.
{% embed url="" %}
# Email
To enable email notifications, follow these steps:
1. **Navigate to Settings**:
1. Go to the **Settings** section of the platform.
2. **Access Communications Settings**:
1. Select the **Communications** tab.
3. **Add a Notification Channel**:
1. Click the **"Add Channel"** button.
4. **Configure Email Notifications**:
1. In the modal that opens, choose the **Email** option and give the channel a name.
5. **Add Recipients and Email Details**:
1. On the next screen, enter the list of email addresses that should receive the notifications.\
Additionally, specify the **email subject** that will appear when the email is sent.
6. **Save**
1. Click the butten **Create channel**.
This will set up your email notifications, allowing you to customize the recipients and the content for the alerts sent by the system.
{% embed url="" %}
# Slack
To enable Slack integration, follow these steps:
1. **Navigate to Settings**:
1. Go to the **Settings** section of the platform.
2. **Access Communications Settings**:
1. Select the **Communications** tab.
3. **Add a Notification Channel**:
1. Click the **"Add Channel"** button.
4. **Configure Discord Notifications**:
1. In the modal that opens, choose the **Slack** option and give the channel a name.
5. **Add Recipients and Email Details**:
1. Authorize the intregration via OAuth.
2. Select the **slack channel** that the integration will send notifications.
6. **Save**
1. Click the butten **Create channel**.
This will set up your email notifications, allowing you to customize the recipients and the content for the alerts sent by the system.
{% embed url="" %}
# Runs history
You can view detailed information about completed job executions by navigating to the **"Runs"** tab of the desired connection or on the **"Runs"** page through the navbar on the left.
#### Steps to Access Execution Details:
1. **Open the "Runs" page**:
* Click on the **"Runs"** page to view a list of all executions.
2. **Filter Executions**:
* Use filters to narrow down the list by:
* **Job Name**
* **Connection**
* **Execution Status** (e.g., success, failure)
* **Date Range.**
3. **View Execution Details**:
* Click on a specific execution from the list.
* A side panel will appear, showing additional information such as execution logs, timestamps, metrics, and any errors encountered.
This feature allows you to efficiently track, analyze, and debug job executions, ensuring smoother data workflows.
{% embed url="" %}
# How we move data
The data synchronization process in Erathos follows the flow illustrated below:
* **Data Source Environment**: The process begins with data extraction from your source system, such as a database (e.g., PostgreSQL) or a SaaS platform like HubSpot, configured in **Connections**.
* **Temporary Storage**: During each job execution, the extracted data is temporarily stored in a cloud bucket (e.g., S3, GCS, or Azure Blob Storage) within Erathos' infrastructure. These temporary files ensure efficient and scalable handling of data.
* **Loading to Data Warehouse**: Once the data is ready for transfer, Erathos uses commands like `COPY` (or equivalent methods specific to the destination) to load the data from the temporary storage into your Data Warehouse.
* **Data Cleanup**: After the process is complete, all temporary files are deleted, ensuring security and optimal use of storage resources.
# MCP Server
Let AI agents interact with your Erathos workspace.
## Overview
Erathos exposes a [Model Context Protocol](https://modelcontextprotocol.io) (MCP) server, letting an AI agent (like Claude) act on your Erathos workspace directly from a conversation — checking on connections and jobs, diagnosing a failed run, finding which field or table holds a piece of data, or setting up a new connection, without switching over to the platform's own UI for every step.
* [**How to Connect**](/platform/mcp/how-to-connect) — add the Erathos MCP server to your AI client and authenticate.
* [**Available Tools**](/platform/mcp/available-tools) — the full reference for everything the server currently exposes.
## What you can do with it
* **Discover your workspace** — list your workspaces, connections, jobs, and runs; find which endpoint or table field holds a piece of data.
* **Diagnose issues** — pull the full detail on a failed run: its logs, execution timeline, and per-model metrics.
* **Set up connections** — create a new source connection or destination; the agent hands you a link back to the platform to finish entering credentials, since it never asks for them directly. If someone without an Erathos account holds the credentials, the agent can create a single-use secure link for them instead. It can then choose the connection's settings (e.g. which ad account it reads from).
* **Configure jobs** — choose which tables or endpoints sync and how, across a whole database in a few steps. You say how fresh the data must be and whether you need each row's latest version or its history of changes; the agent picks the rest, and shows you a preview before saving anything.
* **Manage jobs** — trigger or cancel runs (including full refreshes and custom backfills), and enable or disable jobs.
* **Orchestrate what comes next** — set up webhooks that start your next step elsewhere (an Airflow DAG, a dbt Cloud job) after a job or a whole connection syncs, with rules for when they fire; and check what each webhook did after each run, to see why one didn't fire or whether it's failing. Credentials stay in workspace secrets, never in the conversation.
* **Get human help** — when the agent can't solve a problem, it can open a ticket with Erathos support for you, with the run, job and connection details already filled in. You follow it in the platform's chat.
{% hint style="info" %}
The agent only ever acts within the workspaces your own Erathos account already has access to — every tool call is checked against your real permissions, live, on every request.
{% endhint %}
# How to Connect
Add the Erathos MCP server to your AI client.
The Erathos MCP server is available at:
```
https://mcp.erathos.com/mcp
```
It's a standard remote MCP server authenticated with OAuth against your own Erathos account — any MCP client that supports remote servers will prompt you to sign in via your browser the first time you connect. You never need to generate or paste an API key or token yourself.
{% hint style="info" %}
Once connected, ask the agent to list your workspaces first (or just start asking it something — most tools resolve this for you). Every tool is scoped to one workspace at a time, and the agent only ever sees the workspaces your own Erathos account already has access to.
{% endhint %}
## Add it to your client
{% tabs %}
{% tab title="Claude Code" %}
From your terminal:
```bash
claude mcp add --transport http erathos https://mcp.erathos.com/mcp
```
This saves the server but doesn't sign you in yet. Complete authentication with either:
```bash
claude mcp login erathos
```
or by running `/mcp` inside a Claude Code session and picking **erathos** — either way opens your browser to sign in to Erathos.
Check the connection any time with `claude mcp get erathos` (or `/mcp` in a session), which reports `✔ Connected`, `! Needs authentication`, or `✘ Failed to connect`.
{% endtab %}
{% tab title="Claude Desktop" %}
1. Open **Settings** (`Ctrl`/`Cmd` + `,`, or the menu → **File** → **Settings**) → **Connectors**.
2. Click **Add** (top right) → **Add custom connector**.
3. Paste in the server URL: `https://mcp.erathos.com/mcp`.
4. Leave **Advanced settings** blank unless you're prompted otherwise, and follow the browser prompt to sign in to your Erathos account.
Available on free, Pro, Max, Team, and Enterprise plans (free is limited to one custom connector). Since Claude connects to this server from Anthropic's cloud rather than your device, the URL above must stay reachable over the public internet — which it is.
{% endtab %}
{% tab title="Claude.ai" %}
**Pro/Max:** **Customize** → **Connectors** → **+** → **Add custom connector** → paste `https://mcp.erathos.com/mcp` → leave **Advanced settings** blank unless prompted otherwise → follow the browser sign-in prompt.
**Team/Enterprise:** an owner first adds it once via **Organization settings** → **Connectors** → **Add** → **Custom** → **Web**, using the same URL. Members then go to **Customize** → **Connectors** and click **Connect** on it — no need to re-enter the URL themselves.
{% endtab %}
{% tab title="Codex" %}
Add it to your `~/.codex/config.toml`:
```toml
[mcp_servers.erathos]
url = "https://mcp.erathos.com/mcp"
auth = "oauth"
```
Then sign in with:
```bash
codex mcp login erathos
```
{% endtab %}
{% tab title="Cursor" %}
Add it to your `~/.cursor/mcp.json` (or a project-level `.cursor/mcp.json`):
```json
{
"mcpServers": {
"erathos": {
"url": "https://mcp.erathos.com/mcp"
}
}
}
```
Cursor should prompt you to sign in to Erathos the first time it's used. If it doesn't, check Cursor's own MCP documentation for its `auth` config block — some OAuth servers need one specified explicitly rather than being detected automatically.
{% endtab %}
{% tab title="Other clients" %}
Any MCP client that supports remote (HTTP) servers with OAuth can connect the same way: give it the URL `https://mcp.erathos.com/mcp` and follow its own prompt to sign in. No manual token or API key is needed.
{% endtab %}
{% tab title="VS Code" %}
Open the Command Palette and run **MCP: Add Server**, choose **HTTP**, and paste in `https://mcp.erathos.com/mcp` — or add it directly to your `mcp.json`:
```json
{
"servers": {
"erathos": {
"type": "http",
"url": "https://mcp.erathos.com/mcp"
}
}
}
```
VS Code will prompt you to sign in to Erathos the first time it's used.
{% endtab %}
{% endtabs %}
## See also
* [**Overview**](/platform/mcp) — what the MCP server is for.
* [**Available Tools**](/platform/mcp/available-tools) — the full reference for everything it exposes.
# Available Tools
Reference for every tool the Erathos MCP server exposes.
This page lists every tool the Erathos MCP server exposes to an AI agent, grouped by what they operate on. Every tool is scoped to one workspace unless noted otherwise — get a valid `workspace_id` from **`list_workspaces`** first, then pass it explicitly to any other tool; nothing defaults to "the current workspace." Each entry below is collapsed by default — click a tool's name to expand its full parameters and return fields.
A few conventions hold across every tool:
* **IDs are consistent.** A `job_id`, `connection_id`, `workspace_id` and so on returned by one tool means the same record wherever another tool takes a parameter of that name.
* **List tools paginate the same way.** `limit`/`offset` page through `results`; keep raising `offset` by `limit` while `meta.has_more` is true.
* **`meta.platform_url`** is a best-effort link to the same result in the platform, and **`meta.hint`** carries advice about the result when there is any (e.g. why a list came back empty).
* **Timestamps are in your own timezone.** Every datetime a tool returns carries your UTC offset (the `timezone` `get_me` returns), as the platform shows them. Datetimes you pass in may use any offset.
## Workspace & Identity
list_workspaces
List the workspaces the authenticated user belongs to, with the `workspace_id` every other tool takes. Membership is checked again on every call.
**Example prompts**
* "Which workspaces do I have access to?"
* "What's the workspace ID for Acme Corp?"
**Parameters**
* No parameters.
**Returns**
* **`results`** (list) — one entry per workspace:
* **`workspace_id`** (string)
* **`name`** (string)
get_me
Return the authenticated user's own identity. Useful for tools that act "as me," and for resolving the timezone metric buckets are shown in.
**Example prompts**
* "Who am I logged in as?"
* "What timezone is my account set to?"
**Parameters**
* No parameters.
**Returns**
* **`user_id`** (string)
* **`email`** (string)
* **`timezone`** (string, nullable) — the timezone every tool shows timestamps in, and the one `get_workspace_metrics` buckets times in.
* **`meta.platform_url`** — link to the user's profile settings page.
## Connections & Destinations
list_connections
List the source connections in a workspace, with where each one stands in its setup.
**Example prompts**
* "What connections do I have set up in this workspace?"
* "Which of my connections still need setting up?"
* "Do any of my connections have failing jobs right now?"
**Parameters**
* **`workspace_id`** (string, required)
* **`connection_id`** (string, optional) — filter to one connection, e.g. to check on a setup while it validates.
* **`is_api`** (boolean, optional) — filter to API-type connectors only.
* **`is_database`** (boolean, optional) — filter to database-type connectors only.
**Returns**
* **`results`** (list) — one entry per connection:
* **`connection_id`** (string)
* **`name`** (string)
* **`source_connector_id`** (string) — the connector *type* (e.g. Postgres), as opposed to this one connection instance.
* **`source_connector_name`** (string)
* **`pipeline_id`** (string, nullable)
* **`active_jobs`** (integer) — this connection's count of currently-active jobs.
* **`failed_jobs`** (integer) — how many of those had their last run fail.
* **`show_warning`** (boolean) — `failed_jobs > 0`.
* **`has_valid_credentials`** (boolean, nullable) — null until the credentials are first checked, then whether the last check passed.
* **`last_successful_connection_at`** (datetime, nullable) — null if a check has never passed.
* **`setup_status`** (string) — the connection's next setup step:
* `awaiting_credentials` — someone has to enter or fix its credentials in the platform (or save them again, if its settings' options were never loaded).
* `lost_authentication` — credentials that worked before failed their last check; someone has to fix them in the platform, and its jobs can't run meanwhile.
* `validating` — a background check is running (e.g. reading the schema); just wait.
* `needs_settings` — choose its settings with `configure_connection`.
* `no_options_available` — its credentials work but give access to no options for a setting it needs (e.g. no account visible to them); someone has to sign in with credentials that have access, then save them again.
* `schema_unavailable` — its tables/endpoints, or its settings' options, couldn't be read, or none were found. The error from `configure_connection`/`configure_jobs` says what to check.
* `ready_for_jobs` — create its jobs with `configure_jobs`.
* `no_destination` — its jobs are set up, but the workspace has no working destination to load into (see `get_destination`).
* `configured` — set up and able to run.
* **`running_validation`** (string, nullable) — what the background check currently running is doing, in plain words (e.g. "checking its credentials").
* **`meta.platform_url`** — link to the workspace's connections page.
list_source_connectors
List the connector types (e.g. "HubSpot", "Postgres") a `source_connector_id` can refer to — the discovery entrypoint for that id across `list_jobs`, `list_runs`, `list_connections`, and `list_endpoints`.
**Example prompts**
* "What connector types are available for me to connect as a source?"
* "Is there a HubSpot connector I can use?"
**Parameters**
* **`workspace_id`** (string, required)
* **`connector_id`** (string, optional) — filter to one connector type, e.g. to look up a `source_connector_id` seen in another tool.
* **`name`** (string, optional) — substring search to resolve a connector by name (e.g. `name='hubspot'`).
* **`is_api`** (boolean, optional)
* **`is_database`** (boolean, optional)
* **`limit`** (integer, optional)
* **`offset`** (integer, optional)
**Returns**
* **`results`** (list) — one entry per connector type:
* **`connector_id`** (string)
* **`name`** (string)
* **`description`** (string, nullable)
* **`is_api`** (boolean)
* **`is_database`** (boolean)
* **`is_custom_connector`** (boolean) — true for a connector type private to this workspace, false for one available to every workspace.
* **`release_stage`** (string, nullable) — the connector's own maturity: `SOON`, `BETA`, or `STABLE`.
* **`docs_url`** (string, nullable)
* **`meta.limit`** / **`meta.offset`** / **`meta.has_more`** — pagination.
* **`meta.platform_url`** — link to where a human would pick one of these to start a new connection.
get_destination
Get the workspace's destination — the single data warehouse its pipelines load into. Errors if none has been created yet.
**Example prompts**
* "What's our workspace's destination warehouse?"
* "Are the destination's credentials still valid?"
**Parameters**
* **`workspace_id`** (string, required)
**Returns**
* **`destination_id`** (string)
* **`name`** (string)
* **`connector_id`** (string)
* **`connector_name`** (string)
* **`has_valid_credentials`** (boolean, nullable) — null until the first connection attempt, then true/false for whether the last attempt's credentials worked.
* **`has_valid_schema`** (boolean, nullable) — same idea, but for the destination's schema/database setup. Both must be true for the destination to actually be usable.
* **`last_successful_connection_at`** (datetime, nullable)
* **`meta.platform_url`** — link to the destination in the platform.
list_destination_connectors
List the connector types (e.g. "Snowflake", "BigQuery") that can serve as a workspace's destination/warehouse.
**Example prompts**
* "What warehouse types can I use as a destination?"
* "Is BigQuery available as a destination option?"
**Parameters**
* **`workspace_id`** (string, required)
* **`connector_id`** (string, optional) — filter to one connector type.
* **`name`** (string, optional) — substring search (e.g. `name='snowflake'`).
* **`is_api`** (boolean, optional)
* **`is_database`** (boolean, optional)
* **`limit`** (integer, optional)
* **`offset`** (integer, optional)
**Returns**
* **`results`** (list) — same shape as `list_source_connectors`'s entries: **`connector_id`**, **`name`**, **`description`** (nullable), **`is_api`**, **`is_database`**, **`is_custom_connector`**, **`release_stage`** (nullable), **`docs_url`** (nullable).
* **`meta.limit`** / **`meta.offset`** / **`meta.has_more`** — pagination.
* **`meta.platform_url`** — link to the workspace's destination settings page.
create_connection
Create a new source connection in a workspace. This creates the connection shell only — the tool never accepts credentials as a parameter, since a credential passed as a tool argument would be visible to the agent and to the conversation. The human finishes the setup by entering credentials in the platform, at the link returned in `meta.platform_url`. Until they do, the connection has no valid credentials, and `list_connections`' `setup_status` says when it's ready for the next step.
**Example prompts**
* "Create a new HubSpot connection called 'HubSpot - Marketing'."
* "Set up a Postgres connection for our production database."
**Parameters**
* **`workspace_id`** (string, required)
* **`source_connector_id`** (string, required) — the connector type, from `list_source_connectors`.
* **`name`** (string, required)
**Returns**
* **`connection_id`** (string)
* **`name`** (string)
* **`source_connector_id`** (string)
* **`source_connector_name`** (string)
* **`meta.platform_url`** — link to the platform page where the human enters the connection's credentials.
* **`meta.hint`** — if the credentials will be entered by someone without an Erathos account, use `create_connection_secure_link` instead of sharing `platform_url`.
create_destination
Create the workspace's destination. A workspace can have at most one, so this errors if it already has one (`get_destination` shows it; deleting it is only possible in the platform). Like `create_connection`, this creates the destination shell only and never accepts credentials; the human finishes the setup at `meta.platform_url`. Until they do, the destination has no valid credentials (`has_valid_credentials` is null in `get_destination`) and no pipeline can load into it.
**Example prompts**
* "Set up BigQuery as our destination warehouse."
* "Create a Snowflake destination called 'Analytics Warehouse'."
**Parameters**
* **`workspace_id`** (string, required)
* **`destination_connector_id`** (string, required) — the connector type, from `list_destination_connectors`.
* **`name`** (string, required)
**Returns**
* **`destination_id`** (string)
* **`name`** (string)
* **`connector_id`** (string)
* **`connector_name`** (string)
* **`meta.platform_url`** — link to the workspace's destination settings page, where the human enters the credentials.
* **`meta.hint`** — if the credentials will be entered by someone without an Erathos account, use `create_connection_secure_link` (passing this `destination_id` as `connection_id`) instead of sharing `platform_url`.
create_connection_secure_link
Create a secure link that lets whoever holds it submit credentials for one connection or for the destination, without an Erathos account — for when the person who actually has the credentials (e.g. your company's DBA) isn't a platform user. Works for both credential-form connectors (username/password/API key) and OAuth-based ones; the recipient sees whichever the connector needs.
The link is single-use: it stops working as soon as credentials are submitted successfully, when it's revoked (see `revoke_connection_secure_link`), or when it expires.
**Example prompts**
* "Create a link I can send to our DBA so they can enter the Postgres credentials."
* "Generate a secure link for the Snowflake destination that's valid for 2 hours."
**Parameters**
* **`workspace_id`** (string, required)
* **`connection_id`** (string, required) — a connection from `list_connections`, or the destination's `destination_id` from `get_destination`.
* **`ttl_hours`** (integer, optional, default 24) — how long the link stays valid. Use a shorter value if it will be sent through a less trusted channel, or a longer one if the recipient may not act on it right away.
**Returns**
* **`share_link_id`** (string) — an 8-character id; use it with `list_secure_links` and `revoke_connection_secure_link`.
* **`key`** (string)
* **`expires_at`** (datetime, nullable)
* **`meta.platform_url`** — the link to send to whoever will submit the credentials (not a link for you).
{% hint style="warning" %}
The link is shown only once, in this response. It isn't stored in recoverable form, so `list_secure_links` can't return it later. If it's lost before the recipient uses it, revoke it and create a new one.
{% endhint %}
list_secure_links
List the secure links created in a workspace, across every connection and the destination, or for just one of them. Use it to find a `share_link_id` to revoke, or to check whether a link has been used yet (and from which IP). The raw link itself is never returned.
**Example prompts**
* "Has our DBA used the credentials link I sent yet?"
* "Show me all the secure links still open in this workspace."
**Parameters**
* **`workspace_id`** (string, required)
* **`connection_id`** (string, optional) — limit the list to one connection or the destination.
* **`share_link_id`** (string, optional) — filter to one link, e.g. to check whether a link just sent has been used.
**Returns**
* **`results`** (list) — one entry per link, newest first:
* **`share_link_id`** (string)
* **`connection_id`** (string)
* **`connection_name`** (string)
* **`created_at`** (datetime)
* **`expires_at`** (datetime, nullable)
* **`consumed_at`** (datetime, nullable) — when credentials were submitted through the link; null if it hasn't been used.
* **`consumed_from_ip`** (string, nullable)
* **`revoked`** (boolean)
revoke_connection_secure_link
Revoke a secure link before it's used, so it stops working immediately. Revoking can't be undone — create a new link if one is needed again.
**Example prompts**
* "Revoke the credentials link I sent yesterday."
* "Cancel every unused secure link for the Postgres connection."
**Parameters**
* **`workspace_id`** (string, required)
* **`share_link_id`** (string, required) — from `create_connection_secure_link` or `list_secure_links`.
**Returns**
* **`share_link_id`** (string)
* **`revoked`** (boolean)
## Connection Setup
Setting up a connection goes: `create_connection` → someone enters the credentials in the platform → `configure_connection`, only if the connection has settings to choose → `configure_jobs` → `trigger_run`. `list_connections`' `setup_status` says which step a connection is at.
The agent doesn't need to ask users about sync types or cursors. It asks what they need instead — how fresh the data must be, and whether they want each row's latest version or its history of changes — and passes on the plain-language explanations the tools return.
list_connection_settings
List a connection's own settings (e.g. which Google Ads ad account it reads from, or which Google Sheets files) and, for choice-type settings, the options to pick from.
**Example prompts**
* "Which ad accounts can this Google Ads connection read from?"
* "What settings does the new connection still need?"
**Parameters**
* **`workspace_id`** (string, required)
* **`connection_id`** (string, required)
* **`setting_id`** (string, optional) — narrow the response to one setting.
* **`name`** (string, optional) — search the options by value.
* **`limit`** (integer, optional) / **`offset`** (integer, optional) — page through each setting's options separately.
**Returns**
* **`connection_id`** (string)
* **`is_configured`** (boolean) — whether the settings have been chosen.
* **`running_validation`** (string, nullable) — what a background check still running on the connection is doing, if any (e.g. "loading the options for its settings").
* **`settings`** (list) — one entry per setting:
* **`setting_id`** (string)
* **`name`** (string)
* **`description`** (string, nullable)
* **`example`** (string, nullable)
* **`data_type`** (string)
* **`accept_multiple_values`** (boolean)
* **`is_required`** (boolean)
* **`edit_mode`** (string) — what can still change once chosen: `locked` (never — a different value means a new connection) or `append` (it can only gain values, e.g. more files).
* **`current_values`** (list of strings) — the values chosen so far.
* **`options`** (list, nullable) — for a choice-type setting, each with **`option_id`** and **`value`**.
* **`options_loaded`** (boolean, nullable) — `false` means the options haven't been loaded yet (the connection needs working credentials first), not that there are none. `true` with no options means the source offered none to these credentials; `meta.hint` says what to do.
* **`options_has_more`** (boolean, nullable) — whether this setting has more options past `limit`.
configure_connection
Choose a connection's settings, from `list_connection_settings`. The first call chooses them and creates the connection's pipeline (named by `name`). After that, each setting's `edit_mode` decides what can change: a `locked` setting never can, and an `append` setting only gains values. A setting left out stays as it is, and repeating a call changes nothing. The connection's credentials must be validated first.
{% hint style="warning" %}
Most settings are locked once chosen — a different value later means creating a new connection. Confirm them before the first call, even when there's only one option.
{% endhint %}
**Example prompts**
* "Use the 'Acme - Brazil' ad account for this Google Ads connection."
* "Add these two spreadsheets to the Google Sheets connection."
**Parameters**
* **`workspace_id`** (string, required)
* **`connection_id`** (string, required)
* **`settings`** (list, optional) — one entry per setting to set: **`setting_id`** plus **`values`** (for a choice-type setting, its `option_id`s, or an option's exact text when no other option shares it). For an `append` setting, pass just the new values: saved ones left out are kept, and ones already saved are skipped.
* **`name`** (string, optional) — the pipeline's name, on the first call.
**Returns**
* **`connection_id`** (string)
* **`pipeline_name`** (string)
* **`created`** (boolean) — whether this call created the pipeline.
* **`settings`** (list) — every setting as saved now, each with **`setting_id`**, **`name`**, **`values`**, **`edit_mode`**.
* **`added`** (list) — what this call added, same shape.
* **`background_work_queued`** (boolean) — the platform queued a refresh for the new values (e.g. reading new files as tables); `configure_jobs` waits for it.
configure_jobs
Create or edit a connection's jobs — which tables (database) or endpoints (API) sync, and how — applying one set of settings to a whole selection. Call it again for other groups; later calls refine earlier ones.
It's a **dry run by default**: it returns a preview of exactly what would happen, to show to the user before calling again with `dry_run=false`. The preview goes through the same save the platform's manage-jobs page uses, and is then rolled back.
**Example prompts**
* "Sync every table in the 'public' and 'sales' schemas, daily, keeping just the latest version of each row."
* "Sync the 'deals' endpoint every hour."
* "Stop syncing the 'email' column on the customers table."
**Parameters**
*What to configure* — combined with AND, at least one:
* **`table_ids`** / **`endpoint_ids`** (list of strings, optional) — from `list_tables`/`list_endpoints`.
* **`job_ids`** (list of strings, optional) — existing jobs, from `list_jobs`.
* **`schema_names`** (list, optional) — whole schemas; `null` stands for tables outside any schema, as `list_table_schemas` reports them.
* **`name_contains`** (string, optional)
* **`select_all`** (boolean, optional, default false)
* **`scope`** (string, optional, default `all`) — `existing_only` (only tables/endpoints that already have a job) or `new_only` (only those that don't).
*How* — every setting is optional. On an existing job, leaving one out keeps the current value; a new job gets the recommendation:
* **`sync_frequency_id`** (string, optional) — from `list_sync_frequencies`. New jobs default to daily (or the plan's fastest allowed frequency, if daily isn't).
* **`sync_time`** (string, optional) — `HH:MM` in the user's own timezone. New jobs default to `03:00`.
* **`sync_type`** (string, optional) — `recommended` (the default for new jobs: incremental where the table/endpoint supports it, full elsewhere), `full`, `incremental_append`, `incremental_overwrite`, or `incremental_versioned`.
* **`incremental_mode`** (string, optional, default `overwrite`) — the incremental flavor `recommended` uses: `overwrite` keeps each row's latest version, `versioned` keeps a history of every change, `append` suits tables that only ever get new rows.
* **`cursor_column`** (string or list of strings, optional, tables only) — the column(s) to track changes by. Naming them replaces the cursors of existing jobs too, resetting their progress. `auto` picks a common "last updated" column, and only for jobs that don't have any cursor yet.
* **`cdc`** (boolean, optional) — on a database connection with CDC enabled, incremental tables sync through CDC by default (reading the database's change log, so they need a primary key but no cursor); `cdc=false` uses a cursor instead.
* **`on_incremental_unavailable`** (string, optional, default `skip`) — what happens to tables/endpoints that can't sync incrementally as asked: `skip` reports them in `needs_decision`/`full_only`, and `full` configures them as full refresh on the fallback schedule.
* **`fallback_sync_frequency_id`** / **`fallback_sync_time`** (string, optional) — that fallback schedule.
* **`weekly_run_day`** (string, optional) — the day jobs on the weekly frequency run (default Sunday).
* **`full_reload`** (string, optional) — a periodic full reload of the history, for incremental jobs syncing daily or more often: `never` (the default for new jobs), `every_day`, or a weekday.
* **`columns`** (object, optional) — changes to the column selection, by name: **`exclude`** / **`include`**, **`anonymize`** / **`deanonymize`**.
* **`enabled`** (boolean, optional)
* **`dry_run`** (boolean, optional, default true)
**Returns**
* **`dry_run`** (boolean)
* **`pipeline`** (string) — `existing`, `created`, or `will_create` (a connection without settings gets its pipeline on the first save).
* **`summary`** (list) — the resulting jobs, in groups that share the same settings:
* **`sync_type`** (string), **`cdc`** (boolean), **`enabled`** (boolean), **`is_new`** (boolean)
* **`cursor_columns`** (list of strings) — what changes are tracked by; empty for a full refresh, a CDC job, or a child endpoint that goes through its parent.
* **`updated_through`** (string, nullable) — for a child endpoint without a cursor of its own, the parent endpoint whose filter decides what it fetches.
* **`sync_frequency`** (string, nullable) and **`sync_time`** (string, nullable) — the frequency and the local time it runs at.
* **`schedule`** (string) — when it runs, in plain words (e.g. "Every 6h, at 03:00, 09:00, 15:00 and 21:00").
* **`count`** (integer) and **`names`** (list of strings) — how many tables/endpoints the group has, and which (e.g. `public.orders`).
* **`explanation`** (string) — what this sync does, in plain language.
* **`unchanged`** (integer) — selected jobs already as requested, which are left untouched.
* **`fell_back_to_full`** (object, nullable) — jobs set to a full refresh because they can't sync incrementally: **`count`**, **`reason_counts`**, **`explanation`**.
* **`needs_decision`** (list) — tables left out because they have no column matching the cursor asked for (or, with `auto`, no common "last updated" column) but could use another one. Each has **`entity_id`**, **`name`**, **`reason`**, **`options`** (`full` plus the columns it could track changes by) and **`explanation`**. At most 50 are listed; **`needs_decision_total`** (integer) counts them all, and `list_table_columns` with `cursor_candidates_only=true` lists every usable column.
* **`full_only`** (object, nullable) — tables/endpoints left out because they can only sync in full: **`count`**, **`reason_counts`**, **`explanation`**. Reasons are `no_primary_key`, `no_cursor`, `parent_not_eligible`, or `child_not_eligible`.
* **`impacts`** (list) — side effects on existing jobs, each with **`kind`**, **`count`** and **`explanation`** (e.g. a changed cursor reloads the full history; jobs outside the selection that follow a parent in it).
* **`added_ancestors`** (list of strings) — parent endpoints added because a selected child needs them.
* **`overridden_by_parent`** (integer) — child jobs whose schedule follows their parent instead of the one asked for.
* **`columns_not_present_on`** (integer) — jobs where a column named in `columns` doesn't exist. That's not an error, since `columns` applies to the whole selection.
* **`errors`** (list) — per-job errors, each with **`entity_id`**, **`name`**, **`messages`**.
* **`plan`** — **`active_jobs_after`**, **`jobs_limit`** (nullable) and **`over_limit`**. Applying a change over the plan's job limit fails as a whole.
* **`timezone`** (string) — the user's timezone, which `sync_time` is in.
* **`removed_from_source`** (list) — the connection's jobs whose table/endpoint no longer exists at the source, each with **`job_id`**, **`name`**, **`enabled`**. They can't be configured, and stay active so their failing runs alert the user; `disable_job` stops them.
* **`meta.platform_url`** — link to the connection's jobs in the platform.
## Jobs & Runs
list_jobs
List the jobs (one per synced table/endpoint) in a workspace.
**Example prompts**
* "What jobs are set up in this workspace?"
* "Show me the jobs that are currently inactive."
* "Which jobs haven't synced successfully in the last week?"
**Parameters**
* **`workspace_id`** (string, required)
* **`job_id`** (string, optional) — filter to one specific job.
* **`connection_id`** (string, optional) — filter by one specific connection instance.
* **`source_connector_id`** (string, optional) — filter by connector *type* (e.g. all jobs on any Postgres connection).
* **`api_endpoint_id`** (string, optional)
* **`company_table_id`** (string, optional) — a job has exactly one of `api_endpoint_id`/`company_table_id` set, never both.
* **`is_active`** (boolean, optional)
* **`sync_type`** (string, optional) — one of the values `list_sync_types` returns (e.g. `incremental_overwrite`).
* **`sync_frequency_id`** (string, optional) — see `list_sync_frequencies` for valid values.
* **`trigger_type`** (string, optional) — one of `MANUAL`, `SCHEDULE`, `PARENT`.
* **`next_execution_before`** (datetime, optional)
* **`freshness_before`** (datetime, optional) — jobs that haven't succeeded since this time (also matches jobs that have never succeeded). More expensive than the other filters — only pass it when you actually need to filter by staleness.
* **`latest_error_after`** (datetime, optional) — jobs that have failed since this time. Also more expensive; same caveat as `freshness_before`.
* **`limit`** (integer, optional)
* **`offset`** (integer, optional)
**Returns**
* **`results`** (list) — one entry per job:
* **`job_id`** (string)
* **`name`** (string, nullable)
* **`is_active`** (boolean)
* **`connection_id`** (string, nullable)
* **`connection_name`** (string, nullable)
* **`source_connector_id`** (string, nullable)
* **`source_connector_name`** (string, nullable)
* **`api_endpoint_id`** (string, nullable)
* **`company_table_id`** (string, nullable)
* **`sync_type`** (string, nullable) — the same values `list_sync_types` returns.
* **`cdc`** (boolean) — whether it reads the database's change log instead of cursors.
* **`source_removed`** (boolean) — its table/endpoint no longer exists at the source. It stays active so its failing runs alert the user; `disable_job` stops it.
* **`sync_frequency_id`** (string, nullable)
* **`sync_frequency`** (string, nullable) — its platform-facing description.
* **`sync_time`** (string, nullable) — `HH:MM` in the user's timezone; null for a manually-run job.
* **`schedule`** (string, nullable) — when the job runs, in plain words (e.g. "Every 6h, at 01:30, 07:30, 13:30 and 19:30, with a full reload on Sundays at 01:30").
* **`trigger_type`** (string) — `MANUAL`, `SCHEDULE`, or `PARENT`.
* **`next_execution_at`** (datetime, nullable)
* **`freshness`** (datetime, nullable) — when the job's data was last successfully extracted; null if never.
* **`freshness_run_id`** (string, nullable) — that run, for `get_run`.
* **`latest_error`** (datetime, nullable) — when the job last failed.
* **`latest_error_run_id`** (string, nullable) — that run, for `get_run`.
* **`cursors`** (list) — the column(s)/field(s) its incremental sync tracks changes by (one or several), each with its current bookmark; empty for a full-refresh job or a CDC job. Each entry has **`field_id`** (nullable), **`field_name`**, **`field_type`**, **`value`** (nullable, as text).
* **`meta.limit`** / **`meta.offset`** / **`meta.has_more`** — pagination.
* **`meta.platform_url`** — link to the jobs in the platform.
list_runs
List a workspace's job runs (executions), most recent first.
**Example prompts**
* "Show me the most recent runs for this workspace."
* "Which runs failed today?"
* "Show me all full-refresh runs for this connection."
**Parameters**
* **`workspace_id`** (string, required)
* **`job_id`** (string, optional)
* **`run_id`** (string, optional)
* **`connection_id`** (string, optional)
* **`source_connector_id`** (string, optional)
* **`parent_job_id`** (string, optional)
* **`parent_run_id`** (string, optional)
* **`status`** (string, optional) — one of `BLOCKED`, `WAITING`, `QUEUED`, `EXECUTING`, `FINISHED`, `FAILED`, `CANCELED`. The first four are still in flight; the last three are terminal.
* **`trigger_type`** (string, optional)
* **`is_full_refresh`** (boolean, optional) — whether the run did a full resync rather than an incremental one.
* **`scheduled_after`** (datetime, optional) — filters by when the run was scheduled, not when it started/finished. Clamped to the workspace's plan-based retention window if it asks further back than the plan allows (or is left out).
* **`scheduled_before`** (datetime, optional)
* **`limit`** (integer, optional)
* **`offset`** (integer, optional)
**Returns**
* **`results`** (list) — one entry per run:
* **`run_id`** (string)
* **`job_id`** (string, nullable)
* **`connection_id`** (string, nullable)
* **`connection_name`** (string, nullable)
* **`source_connector_id`** (string, nullable)
* **`source_connector_name`** (string, nullable)
* **`source_connector_type`** (string, nullable) — `API` or `DATABASE`.
* **`name`** (string, nullable)
* **`parent_job_id`** (string, nullable)
* **`parent_run_id`** (string, nullable)
* **`status`** (string)
* **`trigger_type`** (string)
* **`triggered_by`** (string, nullable) — the triggering user's email; internal Erathos staff emails are masked to a generic support address when viewed from a customer workspace.
* **`is_full_refresh`** (boolean)
* **`scheduled_at`** (datetime)
* **`started_at`** (datetime, nullable)
* **`finished_at`** (datetime, nullable)
* **`duration_seconds`** (integer, nullable)
* **`requests`** (integer) — source API requests made.
* **`retries`** (integer)
* **`retry_backoff_seconds`** (number)
* **`rows`** (integer)
* **`errors`** (list) — this run's own error log entries (only meaningful for a FAILED run), each with a **`details`** (string).
* **`meta.limit`** / **`meta.offset`** / **`meta.has_more`** — pagination.
* **`meta.paywalled_since`** (datetime, nullable) — set when `scheduled_after` was clamped forward to the workspace's plan-based retention window.
* **`meta.platform_url`** — link to the workspace's runs page (pagination only; other filters aren't reflected in the link).
get_run
Get the full detail for one run — everything `list_runs` returns for it, plus data too heavy for a list row: a per-model metrics breakdown, every log entry (not just failures), the run's execution timeline, and its cursor bookmark snapshot.
**Example prompts**
* "Why did this run fail? Show me the full details."
* "Give me the complete log and timeline for that run."
**Parameters**
* **`workspace_id`** (string, required)
* **`run_id`** (string, required) — from `list_runs`, `trigger_run`, or a job's `freshness_run_id`/`latest_error_run_id`.
**Returns**
* **`run`** — the same shape as one `list_runs` result entry.
* **`metrics`** (list) — a breakdown per extracted model (the main one plus any nested sub-models, e.g. line items nested under an order — `list_runs`'s own requests/retries/rows only ever reflect the main model). Each entry has **`model_name`**, **`is_nested_model`** (boolean), **`rows`** (integer), **`invalid_datatype_rows`** (integer), **`extract_requests`** (integer), **`load_requests`** (integer), **`extract_retries`** (integer), **`load_retries`** (integer), **`extract_backoff_seconds`** (number), **`load_backoff_seconds`** (number).
* **`logs`** (list) — every log entry for this run, not just failures. If the run failed but has no logs of its own, its parent run's logs are returned instead (marked `is_parent_error`). Each entry has **`log_id`**, **`failed_at`** (datetime), **`failed_after_seconds`** (integer), **`is_parent_error`** (boolean), **`connector_stage`** (string, nullable), **`details`** (string, nullable), **`external_api_http_code`** (integer, nullable).
* **`timeline`** (list) — the run's execution stages in order (e.g. connecting, requesting, parsing, loading). Each entry has **`execution_type`**, **`trace_type_name`**, **`trace_type_description`**, **`table_name`** (nullable), **`started_at`** (nullable), **`finished_at`** (nullable), **`duration_seconds`** (nullable), **`trace_count`** (integer), **`has_errors`** (boolean).
* **`cursors`** (list) — this run's incremental-sync bookmark snapshot(s) as of when it ran (empty for a full-refresh run); same field name as `list_jobs`'s own `cursors`, but for the job's bookmark *at the time of this run* rather than its current one. Each entry has **`field_id`** (nullable), **`field_name`**, **`field_type`**, **`value`** (nullable), **`manual_override`** (boolean).
* **`webhook_deliveries`** (list) — what each [orchestration webhook](#orchestration-webhooks) did after this run, one entry per webhook and table, in the same shape as `list_webhook_deliveries`. Empty when there were none, or when you can see runs but not webhooks.
* **`meta.platform_url`** — link to the run in the platform; null if the run has no connection to link into.
list_sync_types
List the valid `sync_type` values a job can have, with their platform-facing description (e.g. `full` is labeled "Full Refresh") and a plain-language explanation of what each does. Not workspace-scoped — this is a small, fixed reference table.
**Example prompts**
* "What sync types are available for a job?"
* "What does the 'full' sync type mean?"
**Parameters**
* No parameters.
**Returns**
* **`result`** (list):
* **`sync_type`** (string) — `full`, `incremental_append`, `incremental_overwrite`, or `incremental_versioned`; the same values `list_jobs` returns and `configure_jobs` takes.
* **`description`** (string)
* **`explanation`** (string)
list_sync_frequencies
List the valid `sync_frequency_id` values a job can have. Not workspace-scoped.
**Example prompts**
* "What sync frequency options can I choose for a job?"
* "Is there a manual, on-demand frequency option?"
**Parameters**
* No parameters.
**Returns**
* **`result`** (list):
* **`sync_frequency_id`** (string)
* **`description`** (string)
* **`frequency_in_minutes`** (integer, nullable) — null for a manually-triggered, unscheduled frequency.
### Selecting jobs for trigger, cancel, enable, and disable
`trigger_run`, `cancel_run`, `enable_job`, and `disable_job` all choose the jobs they act on the same way. Pass `connection_id`, `job_ids` (from `list_jobs`), or both — at least one is required:
* **`connection_id` only** — acts on the connection's jobs (for `trigger_run`, every active top-level job; for the others, every job in the connection).
* **`job_ids` only** — acts on exactly those jobs, even if they belong to different connections (e.g. every job named "orders" across several connections).
* **Both** — acts on `job_ids`, but rejects the whole call if any of them don't belong to `connection_id`.
A job that can't be acted on is listed in `skipped` with a reason, and the rest of the call still goes through. The call only fails if nothing at all was acted on.
trigger_run
Trigger a manual run of a connection's jobs, or of specific jobs. See [Selecting jobs](#selecting-jobs-for-trigger-cancel-enable-and-disable) above for how `connection_id` and `job_ids` combine.
When only `connection_id` is given and the connection itself can't run (invalid credentials, or an execution window that blocks manual runs), the whole call fails. When `job_ids` are given, jobs whose connection has one of those problems are skipped instead. The call also fails if the workspace has no destination or the destination's credentials are invalid, or if the run would exceed the plan's monthly limit of manual runs.
**Example prompts**
* "Run all the jobs in the HubSpot connection now."
* "Re-run the 'orders' job with a full refresh."
* "Backfill the 'deals' job starting from January 1st."
**Parameters**
* **`workspace_id`** (string, required)
* **`connection_id`** (string, optional)
* **`job_ids`** (list of strings, optional)
* **`force_full_refresh`** (boolean, optional, default false) — re-extract the full history on incremental jobs instead of resuming from their cursor. Can't be combined with `raw_cursor`/`timestamp_cursor`.
* **`raw_cursor`** (string, optional) — override the job's incremental bookmark with this value for this run (custom backfill).
* **`timestamp_cursor`** (datetime, optional) — same as `raw_cursor`, for a timestamp bookmark. Pass only one of the two; both require a plan with custom backfill access.
* **`enable_delete`** (boolean, optional, default false) — also delete destination rows that no longer exist at the source during this run.
**Returns**
* **`triggered`** (list) — one entry per job that was queued: **`job_id`**, **`run_id`** (the new run, for `get_run` or `list_runs`), **`connection_id`**.
* **`skipped`** (list) — one entry per job that wasn't queued: **`job_id`**, **`reason`** — one of `not_found`, `inactive`, `webhook_triggered`, `invalid_connector_auth`, `window_blocked`, `already_running`, `source_removed` (its table/endpoint no longer exists at the source, so a run could only fail).
cancel_run
Cancel the currently queued, waiting, or running executions of a connection's jobs, or of specific jobs. See [Selecting jobs](#selecting-jobs-for-trigger-cancel-enable-and-disable) above for how `connection_id` and `job_ids` combine.
Canceling stops the job's running container (if any) and marks its execution as canceled. Data already written to the destination during the run is kept, and the job can be started again with `trigger_run`.
**Example prompts**
* "Cancel everything that's running on the Postgres connection."
* "Stop the 'orders' job's current run."
**Parameters**
* **`workspace_id`** (string, required)
* **`connection_id`** (string, optional)
* **`job_ids`** (list of strings, optional)
**Returns**
* **`canceled`** (list) — one entry per canceled job: **`job_id`**, **`run_id`** (the run that was canceled), **`connection_id`**.
* **`skipped`** (list) — one entry per job that wasn't canceled: **`job_id`**, **`reason`** — `not_found`, or `not_cancelable` if nothing was queued or running for it.
enable_job
Enable a connection's jobs, or specific jobs, so they run on their schedule again. See [Selecting jobs](#selecting-jobs-for-trigger-cancel-enable-and-disable) above for how `connection_id` and `job_ids` combine.
Enabling a job also enables every disabled job above it in the hierarchy (its parent, the parent's parent, and so on), the same as in the platform. Each job is checked against the workspace plan's limit on active jobs, counting those parent jobs too. Jobs are processed in the order given, so if the limit is reached partway through, the earlier jobs are enabled and the rest are skipped.
Enabling also checks the job's rules again: a CDC job can't be enabled while its connection's CDC is turned off, and a job whose table/endpoint no longer exists at the source isn't enabled, since its runs could only fail.
**Example prompts**
* "Turn the 'orders' and 'customers' jobs back on."
* "Re-enable every job in the Salesforce connection."
**Parameters**
* **`workspace_id`** (string, required)
* **`connection_id`** (string, optional)
* **`job_ids`** (list of strings, optional)
**Returns**
* **`enabled`** (list) — one entry per enabled job: **`job_id`**, **`connection_id`**, **`cascaded_job_ids`** (list of strings — the parent jobs that were enabled along with it).
* **`skipped`** (list) — one entry per job that wasn't enabled: **`job_id`**, **`reason`**, and **`detail`** (nullable, how to fix it, where there is a fix). Reasons:
* `not_found`
* `already_enabled`
* `enabled_via_cascade` — enabled as a parent of an earlier job in the same call, so it ends up enabled too.
* `jobs_limit_exceeded`
* `cdc_unavailable` — a CDC job on a connection whose CDC was turned off.
* `source_removed` — its table/endpoint no longer exists at the source.
disable_job
Disable a connection's jobs, or specific jobs, so they stop running on their schedule. See [Selecting jobs](#selecting-jobs-for-trigger-cancel-enable-and-disable) above for how `connection_id` and `job_ids` combine.
Disabling a job also disables every job below it in the hierarchy, and cancels their queued or waiting next runs. A run that's already executing is left alone — use `cancel_run` to stop it.
**Example prompts**
* "Pause every job in the HubSpot connection."
* "Disable the 'events' job, it's not needed anymore."
**Parameters**
* **`workspace_id`** (string, required)
* **`connection_id`** (string, optional)
* **`job_ids`** (list of strings, optional)
**Returns**
* **`disabled`** (list) — one entry per disabled job: **`job_id`**, **`connection_id`**, **`cascaded_job_ids`** (list of strings — the child jobs that were disabled along with it).
* **`skipped`** (list) — one entry per job that wasn't disabled: **`job_id`**, **`reason`** — one of `not_found`, `already_disabled`, `disabled_via_cascade` (already disabled as a child of another job in the same call).
## Schema Discovery
list_endpoints
List the endpoints (resources/tables, e.g. "deals", "contacts") an API connector exposes.
**Example prompts**
* "What endpoints does our HubSpot connector expose?"
* "Does the 'deals' endpoint have any child endpoints?"
**Parameters**
* **`workspace_id`** (string, required)
* **`source_connector_id`** (string, required)
* **`endpoint_id`** (string, optional) — filter to one endpoint, e.g. to look up an `api_endpoint_id` from `list_jobs`.
* **`parent_endpoint_id`** (string, optional) — filters to the direct children of one endpoint, for walking the hierarchy top-down; omit to see all of them flattened.
* **`name`** (string, optional) — substring search (e.g. `name='deal'`).
* **`limit`** (integer, optional)
* **`offset`** (integer, optional)
**Returns**
* **`results`** (list) — one entry per endpoint:
* **`endpoint_id`** (string)
* **`connector_id`** (string)
* **`name`** (string)
* **`parent_endpoint_id`** (string, nullable)
* **`description`** (string, nullable)
* **`has_children_endpoints`** (boolean) — whether drilling into it with `parent_endpoint_id` is worth it.
* **`has_custom_fields`** (boolean) — whether the endpoint also picks up a connection's own custom fields (see `list_custom_fields`).
* **`meta.limit`** / **`meta.offset`** / **`meta.has_more`** — pagination.
list_endpoint_fields
List the base fields (the connector type's own schema) of one endpoint, or of every endpoint in an API connection. A connection's own custom fields are listed by `list_custom_fields`.
**Example prompts**
* "What fields are on the 'deals' endpoint?"
* "Which fields in this HubSpot connection are dates?"
**Parameters**
* **`workspace_id`** (string, required)
* **`endpoint_id`** (string, optional) — one endpoint, from `list_endpoints`.
* **`connection_id`** (string, optional) — every endpoint of this API connection, when passed without `endpoint_id`. At least one of the two is required.
* **`name`** (string, optional) — substring search (e.g. `name='owner'`).
* **`field_type`** (string, optional) — case-insensitive substring match on the type the connector reports (e.g. `field_type='date'` matches `date` and `datetime`).
* **`limit`** (integer, optional)
* **`offset`** (integer, optional)
**Returns**
* **`results`** (list) — one entry per field:
* **`field_id`** (string)
* **`connector_id`** (string)
* **`endpoint_id`** (string)
* **`endpoint_name`** (string)
* **`name`** (string)
* **`field_type`** (string, nullable) — whatever the connector itself reports; free text, not a fixed set of values.
* **`is_nullable`** (boolean)
* **`example`** (string, nullable)
* **`description`** (string, nullable)
* **`is_primary_key`** (boolean)
* **`is_cursor_available`** (boolean)
* **`meta.limit`** / **`meta.offset`** / **`meta.has_more`** — pagination.
list_custom_fields
List an API connection's own custom fields (e.g. a CRM's custom properties) — fields beyond its connector type's base schema, which `list_endpoint_fields` lists.
**Example prompts**
* "What custom properties does our HubSpot account have?"
* "Which custom fields does the 'deals' endpoint pick up?"
**Parameters**
* **`workspace_id`** (string, required)
* **`connection_id`** (string, required)
* **`endpoint_id`** (string, optional) — narrow to the custom fields that endpoint picks up (none unless `list_endpoints` says `has_custom_fields` is true). Without it, every custom field of the connection is listed.
* **`name`** (string, optional) — substring search.
* **`field_type`** (string, optional) — case-insensitive substring match on the type the source reports.
* **`limit`** (integer, optional)
* **`offset`** (integer, optional)
**Returns**
* **`results`** (list) — one entry per custom field:
* **`field_id`** (string)
* **`connection_id`** (string)
* **`field_key`** (string)
* **`name`** (string)
* **`field_type`** (string, nullable)
* **`is_nullable`** (boolean)
* **`example`** (string, nullable)
* **`description`** (string, nullable)
* **`endpoint`** (string) — the endpoint text the field was recorded against.
* **`meta.limit`** / **`meta.offset`** / **`meta.has_more`** — pagination.
list_table_schemas
Summarize one database connection's tables by schema — a cheap first look at a large database, e.g. to ask which schemas to sync before passing them to `configure_jobs`.
**Example prompts**
* "Which schemas does our Postgres database have, and how big are they?"
**Parameters**
* **`workspace_id`** (string, required)
* **`connection_id`** (string, required)
**Returns**
* **`results`** (list) — one entry per schema:
* **`schema_name`** (string, nullable) — null for tables outside any schema.
* **`table_count`** (integer)
list_tables
List the tables (e.g. "public.orders") one database connection exposes. Only tables whose columns have already been introspected are returned.
**Example prompts**
* "What tables are available in our Postgres connection?"
* "Show me the tables in the 'public' schema."
**Parameters**
* **`workspace_id`** (string, required)
* **`connection_id`** (string, required)
* **`table_id`** (string, optional) — filter to one table, e.g. to look up a `company_table_id` from `list_jobs`.
* **`schema_name`** (string, optional) — filters to one schema (e.g. `'public'`); omit to see tables across all schemas.
* **`name`** (string, optional) — substring search on the table name (e.g. `name='order'`).
* **`limit`** (integer, optional)
* **`offset`** (integer, optional)
**Returns**
* **`results`** (list) — one entry per table:
* **`table_id`** (string)
* **`connection_id`** (string)
* **`schema_name`** (string, nullable)
* **`name`** (string)
* **`meta.limit`** / **`meta.offset`** / **`meta.has_more`** — pagination.
list_table_columns
List the columns of one table, or of every table in a database connection (e.g. to find all its date columns at once). Each column names its table.
**Example prompts**
* "What columns does the 'orders' table have?"
* "Which columns in our database could track when a row last changed?"
**Parameters**
* **`workspace_id`** (string, required)
* **`table_id`** (string, optional) — one table, from `list_tables`.
* **`connection_id`** (string, optional) — every table of this connection, when passed without `table_id`. At least one of the two is required.
* **`name`** (string, optional) — substring search (e.g. `name='email'`).
* **`field_type`** (string, optional) — case-insensitive substring match on the column's type as the database reports it (e.g. `field_type='date'` matches `DATE` and `DATETIME`; `'time'` matches `TIMESTAMP` too).
* **`cursor_candidates_only`** (boolean, optional, default false) — keep only the columns usable to track changes by (the ones `configure_jobs`' `cursor_column` accepts), e.g. to pick one for tables in `needs_decision`.
* **`limit`** (integer, optional)
* **`offset`** (integer, optional)
**Returns**
* **`results`** (list) — one entry per column:
* **`column_id`** (string)
* **`connection_id`** (string)
* **`table_id`** (string)
* **`schema_name`** (string, nullable)
* **`table_name`** (string)
* **`name`** (string)
* **`field_type`** (string)
* **`is_nullable`** (boolean)
* **`example`** (string, nullable)
* **`description`** (string, nullable)
* **`comments`** (string, nullable)
* **`is_primary_key`** (boolean)
* **`is_cursor_available`** (boolean)
* **`meta.limit`** / **`meta.offset`** / **`meta.has_more`** — pagination.
## Metrics
get_workspace_metrics
Aggregate a workspace's metrics over time, broken down by time and by entity (workspace-wide, per connection, or per job).
**Example prompts**
* "How many rows have we processed this month?"
* "Which connections had the most errors last week?"
* "What does our sync activity look like by hour of day?"
**Parameters**
* **`workspace_id`** (string, required)
* **`metric`** (string, required) — what's counted: `rows` (rows processed), `retries` (source API retries), `runs` (runs no longer queued/waiting/executing), `successes` (finished runs), `errors` (failed runs).
* **`time_level`** (string, required) — `hourly`, `daily`, `monthly` (a timeline); or `weekday`/`hour_of_day` (fold the whole range into 7/24 fixed buckets to show a recurring pattern). Buckets use the user's own timezone, not UTC.
* **`entity_level`** (string, required) — `workspace` (one total per bucket), `connection`, or `job` (broken out per connection/job).
* **`entity_id`** (string, optional) — scope to just one connection/job (not valid with `entity_level='workspace'`).
* **`start_date`** (string, optional, ISO 8601) — clamped to the workspace's plan-based retention window if it asks further back than the plan allows.
* **`end_date`** (string, optional, ISO 8601, exclusive) — the range defaults to, and is capped at, a window sized by `time_level`/`entity_level` (tighter for finer buckets and for jobs), even for `weekday`/`hour_of_day`.
* **`entity_limit`** (integer, optional, default 10, max 50) — without `entity_id`, how many entities to return, ranked by their total over the range.
* **`entity_offset`** (integer, optional) — pages further down the same ranking.
* **`rank_order`** (string, optional, default `top`) — `top` for the busiest entities, `bottom` for the least active ones (e.g. finding idle jobs).
**Returns**
* **`results`** (list) — one entry per time bucket (and per entity, if broken out): **`time_bucket`** (string), **`value`** (integer), **`entity_id`** (string, nullable).
* **`entities`** (map) — keyed by `entity_id`, each with **`connection_name`** (nullable), **`job_name`** (nullable), **`connection_id`** (nullable, a job's parent connection), **`rank`** (integer, nullable, its 1-indexed position in the full ranking), **`total`** (integer, nullable, its summed value over the whole range), **`deleted`** (boolean, nullable, true if the connection/job has since been deleted — its history still counts, but it's gone from `list_connections` and the platform).
* **`paywalled_since`** (string, nullable) — set if `start_date` was clamped by the plan's retention window.
* **`meta.start_date`** / **`meta.end_date`** / **`meta.entity_limit`** / **`meta.entity_offset`** / **`meta.timezone`** / **`meta.results_count`** — the values actually applied, not just an echo of your input.
## Orchestration Webhooks
An orchestration webhook is an HTTP request Erathos sends after a job's run finishes, to start the next step in another tool, such as an Airflow DAG or a dbt Cloud job. It's sent once per table the run synced, and only when all of its rules pass. A webhook covers the jobs it's linked to, and every job of the connections it's linked to, including jobs added to them later. See [Trigger jobs outside Erathos](/api/introduction/trigger-jobs-outside-erathos) for how webhooks work.
These tools need your workspace's plan to include orchestration. A few safeguards apply when the agent writes webhooks:
* **Credentials are never typed into the conversation.** A webhook references them as `${{secrets.NAME}}`, and the agent refuses a header or URL with a literal credential in it. Secrets are created through the [developer API](/api/concepts/variables-and-secrets) for now, so their values never pass through the agent.
* **The agent confirms the destination with you** before creating a webhook or changing where it's sent, since the request carries details of your runs.
* **Webhooks only go to public addresses.** A webhook pointing to a private, loopback or link-local address is refused when it's sent.
list_orchestration_webhooks
List a workspace's orchestration webhooks, with each one's last delivery.
**Example prompts**
* "Which webhooks fire after my Postgres connection's jobs?"
* "Are any of my webhooks failing?"
**Parameters**
* **`workspace_id`** (string, required)
* **`job_id`** (string, optional) — webhooks that fire for this job, linked to it or to its connection.
* **`connection_id`** (string, optional) — webhooks linked to this connection or to any of its jobs.
* **`is_active`** (boolean, optional)
* **`webhook_id`** (string, optional) — filter to one webhook.
* **`limit`** (integer, optional)
* **`offset`** (integer, optional)
**Returns**
* **`results`** (list) — one entry per webhook:
* **`webhook_id`** (string)
* **`description`** (string)
* **`is_active`** (boolean)
* **`method`** (string)
* **`target_host`** (string, nullable) — the URL's host as written, which may be a `${{variables.NAME}}` reference.
* **`job_count`** (integer) / **`connection_count`** (integer) — what it's linked to.
* **`rule_count`** (integer)
* **`created_at`** / **`updated_at`** (datetime)
* **`last_delivery_status`** (string, nullable) / **`last_delivery_at`** (datetime, nullable) — its most recent delivery within your plan's history window.
* **`meta.limit`** / **`meta.offset`** / **`meta.has_more`** — pagination.
get_orchestration_webhook
Show one webhook in full: its request, rules, and the jobs and connections it fires for.
**Example prompts**
* "Show me the full configuration of the Airflow webhook."
* "Which rules decide when this webhook is sent?"
**Parameters**
* **`workspace_id`** (string, required)
* **`webhook_id`** (string, required)
**Returns**
* **`webhook_id`**, **`description`**, **`is_active`**, **`method`** — as in `list_orchestration_webhooks`.
* **`url`** (string), **`header`** (object, nullable), **`body`** (object, nullable) — may contain `${{variables.NAME}}`, `${{secrets.NAME}}` and `${{erathos.name}}` references. A credential written literally instead of as a secret reference is replaced by `[redacted]`.
* **`redacted_fields`** (list) — where something was redacted (e.g. `header.Authorization`). The agent can suggest moving it into a secret.
* **`rules`** (list) — each with **`variable_name`**, **`operation`** and **`value`** (a string, or a list for `IN`/`NOT_IN`). Every rule must pass for the webhook to be sent.
* **`job_ids`** (list) / **`connection_ids`** (list) — what it fires for.
* **`created_at`** / **`updated_at`** (datetime)
configure_orchestration_webhook
Create a webhook, or change one. Without `webhook_id` it creates one; with it, only the fields passed change. To stop a webhook firing, disable it with `is_active: false`, which can be undone, rather than deleting it.
**Example prompts**
* "After my orders table syncs successfully, trigger the `daily_orders` DAG in Airflow."
* "Make that webhook fire for every job of the Postgres connection, including new tables."
* "Only send it when rows were loaded."
* "Pause the dbt webhook."
**Parameters**
* **`workspace_id`** (string, required)
* **`webhook_id`** (string, optional) — the webhook to change; omit to create one.
* **`description`** (string, optional) — required when creating.
* **`url`** (string, optional) — required when creating. `http://` or `https://`, and may contain references anywhere, the host included.
* **`method`** (string, optional) — `POST`, `PUT`, `PATCH`, `GET` or `DELETE`. Required when creating.
* **`header`** (object, optional) — e.g. `{"Authorization": "Bearer ${{secrets.AIRFLOW_TOKEN}}"}`. Pass `{}` to clear it.
* **`body`** (object, optional) — pass `{}` to clear it.
* **`rules`** (list, optional) — each `{variable_name, operation, value}`, using the operations and value formats `list_run_metadata_variables` gives. Replaces all current rules when passed; `[]` removes them, so the webhook fires after every run.
* **`job_ids`** (list, optional) / **`connection_ids`** (list, optional) — what it fires for. A webhook needs at least one job or connection. Each replaces the current list when passed.
* **`is_active`** (boolean, optional)
The agent can't save a webhook that has a literal credential, references a variable, secret or metadata field that doesn't exist, has a reference missing its `$`, or points to an obviously non-public address. It explains what to fix instead.
**Returns**
* **`created`** (boolean) — whether a new webhook was created.
* **`target_host`** (string, nullable) — where it sends, as written.
* **`webhook`** — the saved webhook, in the same shape as `get_orchestration_webhook`.
delete_orchestration_webhook
Delete a webhook for good. Your AI client should ask you to confirm before it runs; to only stop a webhook firing, disable it with `configure_orchestration_webhook` instead.
**Example prompts**
* "Delete the old test webhook."
**Parameters**
* **`workspace_id`** (string, required)
* **`webhook_id`** (string, required)
**Returns**
* **`webhook_id`** (string)
* **`description`** (string)
* **`deleted`** (boolean)
list_webhook_deliveries
List what happened to webhooks after each run, newest first: one entry per webhook, run and table. It answers "why didn't my webhook fire?" and "is it failing?".
**Example prompts**
* "Why didn't my Airflow DAG start after last night's sync?"
* "Has the dbt webhook failed this week?"
* "Show me the webhook deliveries for this run."
**Parameters**
* **`workspace_id`** (string, required)
* **`webhook_id`** (string, optional)
* **`job_id`** (string, optional)
* **`connection_id`** (string, optional) — deliveries for any job of this connection.
* **`run_id`** (string, optional) — the same `run_id` the run tools take.
* **`status`** (string, optional) — `SKIPPED`, `SUCCEEDED`, `FAILED` or `BLOCKED`.
* **`target_host`** (string, optional) — the resolved host, e.g. `airflow.acme.com`.
* **`delivered_after`** / **`delivered_before`** (datetime, optional) — clamped to your plan's history window, like runs.
* **`limit`** (integer, optional)
* **`offset`** (integer, optional)
**Returns**
* **`results`** (list) — one entry per delivery:
* **`delivery_id`**, **`webhook_id`**, **`webhook_description`**
* **`status`** (string) — `SKIPPED` (its rules didn't pass), `SUCCEEDED` (sent, 2xx response), `FAILED` (non-2xx response, timeout or network error), or `BLOCKED` (refused because the host isn't a public address).
* **`failed_rules`** (list, nullable) — for `SKIPPED`: each rule that didn't pass, with **`variable_name`**, **`operation`**, **`expected`** and the run's **`actual`** value.
* **`run_id`**, **`job_id`**, **`table`** (string)
* **`delivered_at`** (datetime)
* **`target_host_template`** (string, nullable) — the host as written; **`target_host`** (string, nullable) — the resolved host, null when it came from a secret; **`target_host_ip`** (string, nullable)
* **`http_status`** (integer, nullable), **`error`** (string, nullable), **`duration_ms`** (number, nullable)
* **`meta.limit`** / **`meta.offset`** / **`meta.has_more`** — pagination.
* **`meta.paywalled_since`** (datetime, nullable) — set when your plan's history window hid older deliveries.
list_run_metadata_variables
List the run metadata a webhook can use: each value's `${{erathos.name}}` placeholder for the URL, header or body, and, for those rules can use, the operations and value format a rule takes. Not workspace-scoped.
**Example prompts**
* "What run details can I send in a webhook?"
* "How do I write a rule that only fires on weekdays?"
**Parameters**
* **`usable_in_rules`** (boolean, optional) — only metadata rules can, or can't, use.
**Returns**
* **`results`** (list):
* **`name`** (string) and **`placeholder`** (string), e.g. `${{erathos.rows}}`
* **`description`** (string)
* **`data_type`** (string)
* **`usable_in_rules`** (boolean)
* **`rule_variable_name`** (string, nullable) — the rule's `variable_name`, e.g. `ROWS`.
* **`rule_operations`** (list) — the operations a rule on it accepts.
* **`rule_value_format`** (string, nullable) — how to write the rule's value.
list_workspace_variables
List a workspace's variables: named values webhooks reference as `${{variables.NAME}}`, such as a tool's base URL. Values are shown.
**Example prompts**
* "Which variables are set up in this workspace?"
**Parameters**
* **`workspace_id`** (string, required)
* **`name`** (string, optional) — a substring search on the name.
* **`limit`** (integer, optional)
* **`offset`** (integer, optional)
**Returns**
* **`results`** (list) — **`variable_id`**, **`name`**, **`value`**, **`placeholder`** (e.g. `${{variables.AIRFLOW_HOST}}`), **`created_at`**, **`updated_at`**.
* **`meta.limit`** / **`meta.offset`** / **`meta.has_more`** — pagination.
list_workspace_secrets
List a workspace's secrets by name: credentials webhooks reference as `${{secrets.NAME}}`. Values are never shown, here or anywhere else.
**Example prompts**
* "Is there already a secret for the Airflow token?"
**Parameters**
* **`workspace_id`** (string, required)
* **`name`** (string, optional) — a substring search on the name.
* **`limit`** (integer, optional)
* **`offset`** (integer, optional)
**Returns**
* **`results`** (list) — **`secret_id`**, **`name`**, **`placeholder`** (e.g. `${{secrets.AIRFLOW_TOKEN}}`), **`created_at`**, **`updated_at`** (nullable for older secrets).
* **`meta.limit`** / **`meta.offset`** / **`meta.has_more`** — pagination.
## Support
contact_support
Open a ticket with the Erathos support team on your behalf, for a problem the agent couldn't solve with the other tools. It's the same kind of ticket the chat in the platform opens, so you follow it under **Recent tickets** in the platform's chat, and replies reach you there and by email. They can't be read back through the agent.
The agent calls this only when you ask for human help, or agree to it after it couldn't fix the problem. It should show you the title and message before sending. Erathos adds the details of the run, job and connection involved (status, errors and a link to the platform) itself, so you don't need to copy them in. Values that look like credentials are masked before sending, but don't put passwords or keys in the message.
You can open at most one ticket per run and 5 tickets per day.
**Example prompts**
* "This run keeps failing and I don't know why. Open a ticket with Erathos support."
* "The orders table is missing rows even though the job succeeds. Ask support to look into it."
* "Request a Pipedrive source connector from Erathos."
**Parameters**
* **`workspace_id`** (string, required)
* **`title`** (string, required) — a short summary of the problem, used as the ticket's title (up to 200 characters).
* **`message`** (string, required) — the problem in your words, plus what the agent found (up to 5,000 characters).
* **`category`** (string, optional, default `other`) — picks the ticket type:
* `run_failure` — a failed run. Requires `run_id`.
* `data_inconsistency` — runs succeed but rows are missing, extra or wrong. Requires `job_id`, `run_id` or `connection_id`.
* `connector_request` — a connector Erathos doesn't have yet. Requires `connector_request`.
* `feature_request` — an idea for a new feature.
* `connection_setup`, `billing` or `other` — anything else.
* **`run_id`** (string, optional) — the run the ticket is about, from `list_runs` or `get_run`.
* **`job_id`** (string, optional) — the job the ticket is about, from `list_jobs`.
* **`connection_id`** (string, optional) — the connection the ticket is about, from `list_connections`. When more than one of `run_id`, `job_id` and `connection_id` is given, they must belong to the same connection.
* **`steps_already_tried`** (string, optional) — what was already done, e.g. re-ran the job or refreshed the credentials.
* **`connector_request`** (object, optional) — only for `connector_request`:
* **`connector_name`** (string, required) — the tool or database you want to connect.
* **`kind`** (string, required) — `api` or `database`.
* **`role`** (string, required) — `source` (extract data from it) or `destination` (load data into it).
* **`documentation_url`** (string, optional) — the API's documentation.
* **`endpoints`** (string, optional) — the endpoints you need data from.
**Returns**
* **`ticket_id`** (string) — the ticket number, as shown in the platform's chat.
* **`ticket_type`** (string) — e.g. `Failed job`, `Data inconsistencies`, `Connector request`, `Feature request` or `General ticket`.
* **`status`** (string) — the ticket's status as you see it, e.g. `Submitted`.
# APIs
# ActiveCampaign
Find out how to connect ActiveCampaign to your data warehouse effortlessly.
## Using the Erathos platform
When selecting ActiveCampaign as a new connector on the Erathos platform, you will need to name your connection and fill in the following form:

## How to find my Account Name?
Your **Account Name** can be found directly in the URL after logging in to ActiveCampaign, as is shown on the attachment below:
Based on the example above, you should fill the **account name** information with: **123456demo**
## How to find my API Token?
To find your API Token, follow these steps:
1. Log in to your account
2. Access **Account Settings**
3. Select the **Developer** tab, where the token will be displayed
4. Click on Copy API Key and paste it on the Erathos platform accordingly
.png)
With this connection created you can seemlessly move your ActiveCampaign data to your BigQuery, Redshift or Postgres data-warehouse.
## What endpoints can I access with the Erathos platform?
* accounts
* accounts\_contacts
* accounts\_custom\_fields
* accounts\_custom\_fields\_values
* addresses
* automations
* brandings
* calendar\_feeds
* campaigns
* campaign\_links
* messages
* email\_activities
* contacts\_custom\_fields\_values
* contacts\_custom\_fields
* contacts\_automations
* contacts
* contacts\_scores
* deals
* pipelines
* stages
* deals\_custom\_fields
* deals\_custom\_fields\_values
* forms
* lists
* saved\_responses
* scores
* segments
* tags
* tasks
* tasks\_types
* users
* deal\_roles
* deal\_activities
# Agendor
### Using the Erathos platform
When selecting Agendor as a new connector on the Erathos platform, you will need to name your connection and fill in the following form:
* **Token** — your personal API token from your Agendor account
With this connection created you can seamlessly move your Agendor data to your BigQuery, Redshift or Postgres data warehouse.
### How to find my token?
You can find your API Token by logging into Agendor and navigating to **Menu > Integrações** (Integrations). Your token will be displayed on that page.
Now, paste the value in the Erathos platform Token field. Don't forget to click on **Save and close** to advance to the next steps of the integration.
### What endpoints can I access with the Erathos platform?
* organizations
* people
* deals
* tasks
* users
* categories
* sectors
* lead\_origins
* loss\_reasons
* funnels
* deal\_stages
* deal\_statuses
* metrics
* products
* product\_categories
# Amplitude
Find out how to connect Amplitude to your data warehouse effortlessly.
## Using the Erathos platform
When selecting Amplitude as a new connector on the Erathos platform, you will need to name your connection and fill in the following form:

## How to find the API Key and API Secret credentials?
1. In the Amplitude Analytics web app, access your settings on the upper right corner of the page.
2. Click on projects and select the desired project
3. In the General tab, copy the credencials as in the attachment bellow and paste them on the Erathos platform accordingly
.png)
With this connection established you can seemlessly move your Amplitude data to your BigQuery, Redshift or Postgres data-warehouse.
## What endpoints can I access with the Erathos platform?
* export
# Asaas
Find out how to connect Asaas to your data warehouse effortlessly.
## Using the Erathos platform
When selecting Asaas as a new connector on the Erathos platform, you will need to name your connection and fill in the following form:

## How to find your Asaas API Token?
1. Log in to your account
2. Through the menu access **My Account**
3. Click on **Integration** and then on **Generate new API Key**, as is displayed below:
.png)
Now, paste the generated token on the Erathos platform accordingly. Don't forget to click on **Save and close.**
With this connection created you can seemlessly move your Asaas data to your BigQuery, Redshift or Postgres data-warehouse.
## What endpoints can I access with the Erathos platform?
* customers
* payments
* installments
* subscriptions
* payment\_links
* transfers
* anticipations
* payment\_dunnings
* payment\_dunnings\_history
* payment\_dunnings\_partial\_payments
* bill
* mobile\_phone\_recharge
* credit\_bureau\_report
* financial\_transactions
* payment\_available\_dunnings
* invoices
* pix\_adress\_keys
* pix\_transactions
* accounts
# Asana
Find out how to connect Asana to your data warehouse effortlessly.
## Using the Erathos platform
When selecting Asana as a new connector on the Erathos platform, you will need to authorize the connection by simply logging into the Asana account associated with your browser.
Just click on '**Authorize Asana**' as shown in the attachment below:

Don't forget to click on **Save and close** to advance to the next steps of the integration.
With this connection created you can seemlessly move your Asana data to your BigQuery, Redshift or Postgres data-warehouse.
## What endpoints can I access with the Erathos platform?
* workspaces
* users
* projects
* tasks
* time\_tracking
* goals
* teams
# Bling
Find out how to connect Bling to your data warehouse effortlessly.
## Using the Erathos platform
When selecting Bling as a new connector on the Erathos platform, you will need to name your connection and authorize access to your Bling account.
With this connection created you can seamlessly move your Bling data to your BigQuery, Redshift or Postgres data warehouse.
### How to authorize?
Bling uses OAuth 2.0 for authentication. When setting up the connection on Erathos, you will be redirected to Bling's authorization page. Log in to your Bling account and grant access to allow Erathos to read your data.
After authorizing, you will be redirected back to the Erathos platform automatically. Click **Save and close** to complete the setup. Erathos handles all token management and refreshes on your behalf.
{% hint style="warning" %}
If you see a message like the one shown below, please contact Bling Support and request access to the specific modules that are interfering with the connection. Your Bling plan must be 'Mercúrio' or higher.
{% endhint %}
***
## Endpoints and fields
### categorias\_lojas
Sync type availability: Full-refresh
| Field | Type |
| ------------------- | ------- |
| loja.id | integer |
| descricao | text |
| codigo | text |
| categoriaProduto.id | integer |
| id | integer |
### categorias\_produtos
Sync type availability: Full-refresh
| Field | Type |
| --------------- | ------- |
| id | integer |
| descricao | text |
| categoriaPai.id | integer |
### categorias\_financeiras
Sync type availability: Full-refresh
| Field | Type |
| -------------- | ------- |
| descricao | text |
| tipo | integer |
| id | integer |
| idCategoriaPai | integer |
### contas\_contabeis
Sync type availability: Full-refresh
| Field | Type |
| --------------- | ------- |
| id | integer |
| descricao | text |
| tipo | text |
| aliasIntegracao | text |
### contas\_receber
Sync type availability: Full and incremental refresh
[Cursor](/platform/connections/sync-types#understanding-cursors): `dataEmissao`
Parent of [`contas_receber_detalhes`](#contas_receber_detalhes)
| Field | Type | Cursor |
| --------------------------- | ------- | ------ |
| situacao | integer | |
| vencimento | date | |
| valor | float | |
| contato.id | integer | |
| contato.nome | text | |
| contato.numeroDocumento | text | |
| contato.tipo | text | |
| id | integer | |
| idTransacao | text | |
| linkQRCodePix | text | |
| linkBoleto | text | |
| dataEmissao | date | ✓ |
| formaPagamento.id | integer | |
| formaPagamento.codigoFiscal | integer | |
| contaContabil.id | integer | |
| contaContabil.descricao | text | |
| origem.id | integer | |
| origem.tipoOrigem | text | |
| origem.numero | text | |
| origem.dataEmissao | date | |
| origem.valor | float | |
| origem.situacao | integer | |
| origem.url | text | |
### contas\_receber\_detalhes
Sync type availability: Full-refresh
Child of [`contas_receber`](#contas_receber)
Parent of [`receber_borderos`](#receber_borderos)
| Field | Type |
| --------------------------- | ------- |
| id | integer |
| situacao | integer |
| vencimento | date |
| valor | float |
| idTransacao | text |
| linkQRCodePix | text |
| linkBoleto | text |
| dataEmissao | date |
| contato.id | integer |
| contato.nome | text |
| contato.numeroDocumento | text |
| contato.tipo | text |
| formaPagamento.id | integer |
| formaPagamento.codigoFiscal | integer |
| contaContabil.id | integer |
| contaContabil.descricao | text |
| origem.id | integer |
| origem.tipoOrigem | text |
| origem.numero | text |
| origem.dataEmissao | text |
| origem.valor | float |
| origem.situacao | integer |
| origem.url | text |
| saldo | float |
| vencimentoOriginal | date |
| numeroDocumento | text |
| competencia | date |
| historico | text |
| numeroBanco | text |
| portador.id | integer |
| categoria.id | integer |
| vendedor.id | integer |
| ocorrencia.tipo | integer |
| borderos | json |
### receber\_borderos
Sync type availability: Full-refresh
Child of [`contas_receber_detalhes`](#contas_receber_detalhes)
| Field | Type |
| ------------ | ------- |
| id | integer |
| data | date |
| historico | text |
| portador.id | integer |
| categoria.id | integer |
| pagamentos | json |
### contas\_pagar
Sync type availability: Full and incremental refresh
[Cursor](/platform/connections/sync-types#understanding-cursors): `vencimento`
Parent of [`contas_pagar_detalhes`](#contas_pagar_detalhes)
| Field | Type | Cursor |
| --------------------------- | ------- | ------ |
| situacao | integer | |
| vencimento | date | ✓ |
| valor | float | |
| contato.id | integer | |
| contato.nome | text | |
| contato.numeroDocumento | text | |
| contato.tipo | text | |
| id | integer | |
| idTransacao | text | |
| linkQRCodePix | text | |
| linkBoleto | text | |
| dataEmissao | date | |
| formaPagamento.id | integer | |
| formaPagamento.codigoFiscal | integer | |
| contaContabil.id | integer | |
| contaContabil.descricao | text | |
| origem.id | integer | |
| origem.tipoOrigem | text | |
| origem.numero | text | |
| origem.dataEmissao | date | |
| origem.valor | float | |
| origem.situacao | integer | |
| origem.url | text | |
### contas\_pagar\_detalhes
Sync type availability: Full-refresh
Child of [`contas_pagar`](#contas_pagar)
Parent of [`borderos`](#borderos)
| Field | Type |
| ------------------ | ------- |
| id | integer |
| situacao | integer |
| vencimento | date |
| valor | float |
| contato.id | integer |
| formaPagamento.id | integer |
| saldo | float |
| dataEmissao | date |
| vencimentoOriginal | date |
| numeroDocumento | text |
| competencia | date |
| historico | text |
| numeroBanco | text |
| portador.id | integer |
| categoria.id | integer |
| ocorrencia.tipo | integer |
| borderos | json |
### borderos
Sync type availability: Full-refresh
Child of [`contas_pagar_detalhes`](#contas_pagar_detalhes)
| Field | Type |
| ------------ | ------- |
| id | integer |
| data | date |
| historico | text |
| portador.id | integer |
| categoria.id | integer |
| pagamentos | json |
### contatos
Sync type availability: Full and incremental refresh
[Cursor](/platform/connections/sync-types#understanding-cursors): `id`
Parent of [`contato_detalhes`](#contato_detalhes)
| Field | Type | Cursor |
| --------------- | ------- | ------ |
| id | integer | ✓ |
| nome | text | |
| codigo | text | |
| situacao | text | |
| numeroDocumento | text | |
| telefone | text | |
| celular | text | |
### contato\_detalhes
Sync type availability: Full-refresh
Child of [`contatos`](#contatos)
| Field | Type |
| ------------------------------ | ------- |
| id | integer |
| nome | text |
| codigo | text |
| situacao | text |
| numeroDocumento | text |
| telefone | text |
| celular | text |
| fantasia | text |
| tipo | text |
| indicadorIe | integer |
| ie | text |
| rg | text |
| orgaoEmissor | text |
| email | text |
| endereco.geral.endereco | text |
| endereco.geral.cep | text |
| endereco.geral.bairro | text |
| endereco.geral.municipio | text |
| endereco.geral.uf | text |
| endereco.geral.numero | text |
| endereco.geral.complemento | text |
| endereco.cobranca.endereco | text |
| endereco.cobranca.cep | text |
| endereco.cobranca.bairro | text |
| endereco.cobranca.municipio | text |
| endereco.cobranca.uf | text |
| endereco.cobranca.numero | text |
| endereco.cobranca.complemento | text |
| vendedor.id | integer |
| dadosAdicionais.dataNascimento | text |
| dadosAdicionais.sexo | text |
| dadosAdicionais.naturalidade | text |
| financeiro.limiteCredito | float |
| financeiro.condicaoPagamento | text |
| financeiro.categoria.id | integer |
| pais.nome | text |
| tiposContato | json |
| pessoasContato | json |
### tipos\_contatos
Sync type availability: Full-refresh
| Field | Type |
| --------- | ------- |
| id | integer |
| descricao | text |
### contratos
Sync type availability: Full and incremental refresh
[Cursor](/platform/connections/sync-types#understanding-cursors): `data`
Parent of [`contrato_detalhes`](#contrato_detalhes)
| Field | Type | Cursor |
| ---------- | ------- | ------ |
| descricao | text | |
| data | date | ✓ |
| numero | text | |
| valor | float | |
| situacao | integer | |
| contato.id | integer | |
| id | integer | |
### contrato\_detalhes
Sync type availability: Full-refresh
Child of [`contratos`](#contratos)
| Field | Type |
| --------------------------------- | ------- |
| id | integer |
| categoria.id | integer |
| cobranca.dataBase | date |
| cobranca.contato.id | integer |
| cobranca.vencimento.tipo | integer |
| cobranca.vencimento.dia | integer |
| cobranca.vencimento.periodicidade | integer |
| contaContabil.id | integer |
| contato.id | integer |
| data | date |
| dataFim | date |
| desconto.valor | float |
| desconto.dataFim | date |
| descricao | text |
| emitirOrdemServico | boolean |
| formaPagamento.id | integer |
| numero | text |
| observacoes | text |
| situacao | integer |
| tipoManutencao | integer |
| valor | float |
| vendedor.id | integer |
| vendedor.comissao.aliquota | float |
| vendedor.comissao.numeroParcelas | integer |
| notaFiscal.mes | integer |
| notaFiscal.gerar | integer |
| notaFiscal.descontarImpostoRenda | integer |
| notaFiscal.texto | text |
| notaFiscal.cfop | text |
| notaFiscal.iss.descontar | boolean |
| notaFiscal.iss.aliquota | integer |
| notaFiscal.item.codigoServico | text |
| notaFiscal.item.produto.id | integer |
### depositos
Sync type availability: Full-refresh
| Field | Type |
| ------------------ | ------- |
| id | integer |
| descricao | text |
| situacao | integer |
| padrao | boolean |
| desconsiderarSaldo | boolean |
### formas\_pagamentos
Sync type availability: Full-refresh
Parent of [`formas_pagamentos_detalhes`](#formas_pagamentos_detalhes)
| Field | Type |
| ------------- | ------- |
| id | integer |
| descricao | text |
| tipoPagamento | integer |
| finalidade | integer |
| situacao | integer |
| fixa | boolean |
| padrao | integer |
| juros | float |
| multa | float |
### formas\_pagamentos\_detalhes
Sync type availability: Full-refresh
Child of [`formas_pagamentos`](#formas_pagamentos)
| Field | Type |
| ----------------------------- | ------- |
| id | integer |
| descricao | text |
| destino | integer |
| finalidade | integer |
| tipoPagamento | integer |
| situacao | integer |
| fixa | boolean |
| padrao | integer |
| condicao | text |
| taxas.aliquota | float |
| taxas.valor | float |
| taxas.prazo | integer |
| dadosCartao.bandeira | integer |
| dadosCartao.tipo | integer |
| dadosCartao.cnpjCredenciadora | text |
| juros | float |
| multa | float |
| utilizaDiasUteis | boolean |
### logisticas
Sync type availability: Full-refresh
Parent of [`remessas_logisticas`](#remessas_logisticas)
| Field | Type |
| ---------------- | ------- |
| id | integer |
| descricao | text |
| tipoIntegracao | text |
| integracaoNativa | boolean |
| situacao | text |
| integracao.id | integer |
| servicos | json |
### servicos\_logisticas
Sync type availability: Full-refresh
| Field | Type |
| ----------------- | ------- |
| id | integer |
| descricao | text |
| freteItem | float |
| estimativaEntrega | integer |
| codigo | text |
| logistica.id | integer |
| transportador.id | integer |
| aliases | json |
| ativo | boolean |
| idCodigoServico | text |
### remessas\_logisticas
Sync type availability: Full-refresh
Child of [`logisticas`](#logisticas)
| Field | Type |
| ----------- | ------- |
| id | integer |
| dataCriacao | date |
| descricao | text |
| numeroPlp | text |
| objetos | json |
| situacao | integer |
### naturezas\_operacoes
Sync type availability: Full-refresh
| Field | Type |
| --------- | ------- |
| id | integer |
| situacao | integer |
| padrao | integer |
| descricao | text |
### nfce
Sync type availability: Full and incremental refresh
[Cursor](/platform/connections/sync-types#understanding-cursors): `dataEmissao`
Parent of [`nfce_detalhes`](#nfce_detalhes)
| Field | Type | Cursor |
| ---------------------------- | --------- | ------ |
| id | integer | |
| tipo | integer | |
| situacao | integer | |
| numero | text | |
| dataEmissao | timestamp | ✓ |
| dataOperacao | timestamp | |
| naturezaOperacao.id | integer | |
| loja.id | integer | |
| loja.numero | text | |
| contato.id | integer | |
| contato.nome | text | |
| contato.tipoPessoa | text | |
| contato.numeroDocumento | text | |
| contato.contribuinte | text | |
| contato.ie | text | |
| contato.rg | text | |
| contato.telefone | text | |
| contato.email | text | |
| contato.endereco.endereco | text | |
| contato.endereco.bairro | text | |
| contato.endereco.municipio | text | |
| contato.endereco.numero | text | |
| contato.endereco.complemento | text | |
| contato.endereco.cep | text | |
| contato.endereco.uf | text | |
| contato.endereco.pais | text | |
### nfce\_detalhes
Sync type availability: Full-refresh
Child of [`nfce`](#nfce)
| Field | Type |
| ---------------------------------------- | --------- |
| id | integer |
| tipo | integer |
| situacao | integer |
| numero | text |
| dataEmissao | timestamp |
| dataOperacao | timestamp |
| serie | integer |
| valorNota | float |
| finalidade | text |
| chaveAcesso | text |
| xml | text |
| linkDanfe | text |
| linkPDF | text |
| numeroPedidoLoja | text |
| naturezaOperacao.id | integer |
| loja.id | integer |
| loja.numero | text |
| contato.id | integer |
| contato.nome | text |
| contato.tipoPessoa | text |
| contato.numeroDocumento | text |
| contato.contribuinte | text |
| contato.ie | text |
| contato.rg | text |
| contato.telefone | text |
| contato.email | text |
| contato.endereco.endereco | text |
| contato.endereco.bairro | text |
| contato.endereco.municipio | text |
| contato.endereco.numero | text |
| contato.endereco.complemento | text |
| contato.endereco.cep | text |
| contato.endereco.uf | text |
| contato.endereco.pais | text |
| transporte.fretePorConta | integer |
| transporte.transportador.nome | text |
| transporte.transportador.numeroDocumento | text |
| transporte.volumes | json |
| transporte.etiqueta.nome | text |
| transporte.etiqueta.endereco | text |
| transporte.etiqueta.numero | text |
| transporte.etiqueta.complemento | text |
| transporte.etiqueta.municipio | text |
| transporte.etiqueta.uf | text |
| transporte.etiqueta.cep | text |
| transporte.etiqueta.bairro | text |
| vendedor.id | integer |
| valorFrete | float |
| optanteSimplesNacional | boolean |
| itens | json |
### nfe
Sync type availability: Full and incremental refresh
[Cursor](/platform/connections/sync-types#understanding-cursors): `dataEmissao`
Parent of [`nfe_detalhes`](#nfe_detalhes)
| Field | Type | Cursor |
| ---------------------------- | --------- | ------ |
| id | integer | |
| tipo | integer | |
| situacao | integer | |
| numero | text | |
| dataEmissao | timestamp | ✓ |
| dataOperacao | timestamp | |
| naturezaOperacao.id | integer | |
| loja.id | integer | |
| loja.numero | text | |
| contato.id | integer | |
| contato.nome | text | |
| contato.tipoPessoa | text | |
| contato.numeroDocumento | text | |
| contato.contribuinte | text | |
| contato.ie | text | |
| contato.rg | text | |
| contato.telefone | text | |
| contato.email | text | |
| contato.endereco.endereco | text | |
| contato.endereco.bairro | text | |
| contato.endereco.municipio | text | |
| contato.endereco.numero | text | |
| contato.endereco.complemento | text | |
| contato.endereco.cep | text | |
| contato.endereco.uf | text | |
| contato.endereco.pais | text | |
### nfe\_detalhes
Sync type availability: Full-refresh
Child of [`nfe`](#nfe)
| Field | Type |
| ---------------------------------------- | --------- |
| id | integer |
| tipo | integer |
| situacao | integer |
| numero | text |
| dataEmissao | timestamp |
| dataOperacao | timestamp |
| serie | integer |
| valorNota | float |
| finalidade | text |
| chaveAcesso | text |
| xml | text |
| linkDanfe | text |
| linkPDF | text |
| numeroPedidoLoja | text |
| naturezaOperacao.id | integer |
| loja.id | integer |
| loja.numero | text |
| contato.id | integer |
| contato.nome | text |
| contato.tipoPessoa | text |
| contato.numeroDocumento | text |
| contato.contribuinte | text |
| contato.ie | text |
| contato.rg | text |
| contato.telefone | text |
| contato.email | text |
| contato.endereco.endereco | text |
| contato.endereco.bairro | text |
| contato.endereco.municipio | text |
| contato.endereco.numero | text |
| contato.endereco.complemento | text |
| contato.endereco.cep | text |
| contato.endereco.uf | text |
| contato.endereco.pais | text |
| transporte.fretePorConta | float |
| transporte.transportador.nome | text |
| transporte.transportador.numeroDocumento | text |
| transporte.volumes | json |
| transporte.etiqueta.nome | text |
| transporte.etiqueta.endereco | text |
| transporte.etiqueta.numero | text |
| transporte.etiqueta.complemento | text |
| transporte.etiqueta.municipio | text |
| transporte.etiqueta.uf | text |
| transporte.etiqueta.cep | text |
| transporte.etiqueta.bairro | text |
| vendedor.id | integer |
| valorFrete | float |
| optanteSimplesNacional | boolean |
| itens | json |
| parcelas | json |
### nfse
Sync type availability: Full and incremental refresh
[Cursor](/platform/connections/sync-types#understanding-cursors): `dataEmissao`
Parent of [`nfse_detalhes`](#nfse_detalhes)
| Field | Type | Cursor |
| ----------------------- | ------- | ------ |
| id | integer | |
| numeroRPS | text | |
| serie | text | |
| numero | text | |
| situacao | integer | |
| dataEmissao | date | ✓ |
| valor | float | |
| contato.id | integer | |
| contato.nome | text | |
| contato.numeroDocumento | text | |
| contato.email | text | |
### nfse\_detalhes
Sync type availability: Full-refresh
Child of [`nfse`](#nfse)
| Field | Type |
| ----------------------- | ------- |
| id | integer |
| numeroRPS | text |
| serie | text |
| numero | text |
| situacao | integer |
| dataEmissao | date |
| valor | float |
| link | text |
| codigoVerificacao | text |
| contato.id | integer |
| contato.nome | text |
| contato.numeroDocumento | text |
| contato.email | text |
### propostas\_comerciais
Sync type availability: Full and incremental refresh
[Cursor](/platform/connections/sync-types#understanding-cursors): `data`
Parent of [`propostas_comerciais_detalhes`](#propostas_comerciais_detalhes)
| Field | Type | Cursor |
| ------------- | ------- | ------ |
| id | integer | |
| data | date | ✓ |
| situacao | text | |
| total | float | |
| totalProdutos | float | |
| numero | integer | |
| contato.id | integer | |
| loja.id | integer | |
### propostas\_comerciais\_detalhes
Sync type availability: Full-refresh
Child of [`propostas_comerciais`](#propostas_comerciais)
| Field | Type |
| ------------------------------------- | ------- |
| id | integer |
| data | date |
| situacao | text |
| total | float |
| totalProdutos | float |
| numero | integer |
| contato.id | integer |
| loja.id | integer |
| desconto | float |
| outrasDespesas | float |
| garantia | integer |
| dataProximoContato | date |
| observacoes | text |
| observacaoInterna | text |
| totalOutrosItens | integer |
| aosCuidadosDe | text |
| introducao | text |
| prazoEntrega | text |
| vendedor.id | integer |
| transporte.freteModalidade | integer |
| transporte.frete | float |
| transporte.quantidadeVolumes | float |
| transporte.prazoEntrega | integer |
| transporte.pesoBruto | float |
| transporte.contato.id | integer |
| transporte.contato.nome | text |
| transporte.volumes.id | integer |
| transporte.volumes.servico | text |
| transporte.volumes.codigoRastreamento | text |
| itens | json |
| parcelas | json |
### pedidos\_compras
Sync type availability: Full and incremental refresh
[Cursor](/platform/connections/sync-types#understanding-cursors): `data`
Parent of [`pedidos_compras_detalhes`](#pedidos_compras_detalhes)
| Field | Type | Cursor |
| -------------- | ------- | ------ |
| id | integer | |
| numero | integer | |
| data | date | ✓ |
| dataPrevista | date | |
| totalProdutos | float | |
| total | float | |
| situacao.valor | integer | |
| fornecedor.id | integer | |
### pedidos\_compras\_detalhes
Sync type availability: Full-refresh
Child of [`pedidos_compras`](#pedidos_compras)
| Field | Type |
| ------------------------ | ------- |
| id | integer |
| numero | integer |
| data | date |
| dataPrevista | date |
| totalProdutos | float |
| total | float |
| situacao.valor | integer |
| fornecedor.id | integer |
| ordemCompra | text |
| observacoes | text |
| observacoesInternas | text |
| desconto.valor | float |
| desconto.unidade | text |
| categoria.id | integer |
| tributacao.totalICMS | float |
| tributacao.totalIPI | float |
| transporte.frete | float |
| transporte.transportador | text |
| transporte.fretePorConta | integer |
| transporte.pesoBruto | float |
| transporte.volumes | integer |
| itens | json |
| parcelas | json |
### pedidos\_vendas
Sync type availability: Full and incremental refresh
[Cursor](/platform/connections/sync-types#understanding-cursors): `data`
Parent of [`pedidos_vendas_detalhes`](#pedidos_vendas_detalhes)
| Field | Type | Cursor |
| ----------------------- | ------- | ------ |
| id | integer | |
| numero | integer | |
| numeroLoja | text | |
| data | date | ✓ |
| dataPrevista | date | |
| dataSaida | date | |
| totalProdutos | float | |
| total | float | |
| situacao.id | integer | |
| situacao.valor | integer | |
| loja.id | integer | |
| contato.id | integer | |
| contato.nome | text | |
| contato.tipoPessoa | text | |
| contato.numeroDocumento | text | |
### pedidos\_vendas\_detalhes
Sync type availability: Full-refresh
Child of [`pedidos_vendas`](#pedidos_vendas)
| Field | Type |
| ------------------------------- | ------- |
| id | integer |
| numero | integer |
| numeroLoja | text |
| data | date |
| dataPrevista | date |
| dataSaida | date |
| totalProdutos | float |
| total | float |
| situacao.id | integer |
| situacao.valor | integer |
| loja.id | integer |
| contato.id | integer |
| contato.nome | text |
| contato.tipoPessoa | text |
| contato.numeroDocumento | text |
| numeroPedidoCompra | text |
| outrasDespesas | float |
| observacoes | text |
| observacoesInternas | text |
| desconto.valor | float |
| desconto.unidade | text |
| categoria.id | integer |
| notaFiscal.id | integer |
| tributacao.totalICMS | float |
| tributacao.totalIPI | float |
| transporte.fretePorConta | integer |
| transporte.frete | float |
| transporte.quantidadeVolumes | integer |
| transporte.pesoBruto | float |
| transporte.prazoEntrega | integer |
| transporte.contato.nome | text |
| transporte.contato.id | integer |
| transporte.etiqueta.nome | text |
| transporte.etiqueta.endereco | text |
| transporte.etiqueta.numero | text |
| transporte.etiqueta.complemento | text |
| transporte.etiqueta.municipio | text |
| transporte.etiqueta.uf | text |
| transporte.etiqueta.cep | text |
| transporte.etiqueta.bairro | text |
| transporte.etiqueta.nomePais | text |
| transporte.volumes | json |
| vendedor.id | integer |
| intermediador.cnpj | text |
| intermediador.nomeUsuario | text |
| taxas.taxaComissao | float |
| taxas.custoFrete | float |
| taxas.valorBase | float |
| itens | json |
| parcelas | json |
### produtos
Sync type availability: Full-refresh
Parent of [`produtos_detalhes`](#produtos_detalhes)
| Field | Type |
| ------------------------- | ------- |
| id | integer |
| nome | text |
| tipo | text |
| situacao | text |
| formato | text |
| idProdutoPai | integer |
| codigo | text |
| preco | float |
| precoCusto | float |
| estoque.saldoVirtualTotal | float |
| descricaoCurta | text |
| imagemURL | text |
### produtos\_detalhes
Sync type availability: Full-refresh
Child of [`produtos`](#produtos)
| Field | Type |
| ------------------------------------- | ------- |
| id | integer |
| nome | text |
| tipo | text |
| situacao | text |
| formato | text |
| codigo | text |
| preco | float |
| descricaoCurta | text |
| imagemURL | text |
| dataValidade | date |
| unidade | text |
| pesoLiquido | float |
| pesoBruto | float |
| volumes | integer |
| itensPorCaixa | float |
| gtin | text |
| gtinEmbalagem | text |
| tipoProducao | text |
| condicao | integer |
| freteGratis | boolean |
| marca | text |
| descricaoComplementar | text |
| linkExterno | text |
| observacoes | text |
| descricaoEmbalagemDiscreta | text |
| categoria.id | integer |
| estoque.minimo | float |
| estoque.maximo | float |
| estoque.crossdocking | integer |
| estoque.localizacao | text |
| estoque.saldoVirtualTotal | float |
| fornecedor.id | integer |
| fornecedor.contato.id | integer |
| fornecedor.contato.nome | text |
| fornecedor.codigo | text |
| fornecedor.precoCusto | float |
| fornecedor.precoCompra | float |
| actionEstoque | text |
| dimensoes.largura | float |
| dimensoes.altura | float |
| dimensoes.profundidade | float |
| dimensoes.unidadeMedida | integer |
| tributacao.origem | integer |
| tributacao.nFCI | text |
| tributacao.ncm | text |
| tributacao.cest | text |
| tributacao.codigoListaServicos | text |
| tributacao.spedTipoItem | text |
| tributacao.codigoItem | text |
| tributacao.percentualTributos | float |
| tributacao.valorBaseStRetencao | float |
| tributacao.valorStRetencao | float |
| tributacao.valorICMSSubstituto | float |
| tributacao.codigoExcecaoTipi | text |
| tributacao.classeEnquadramentoIpi | text |
| tributacao.valorIpiFixo | float |
| tributacao.codigoSeloIpi | text |
| tributacao.valorPisFixo | float |
| tributacao.valorCofinsFixo | float |
| tributacao.codigoANP | text |
| tributacao.descricaoANP | text |
| tributacao.percentualGLP | float |
| tributacao.percentualGasNacional | float |
| tributacao.percentualGasImportado | float |
| tributacao.valorPartida | float |
| tributacao.tipoArmamento | float |
| tributacao.descricaoCompletaArmamento | text |
| tributacao.dadosAdicionais | text |
| tributacao.grupoProduto.id | integer |
| midia.video.url | text |
| midia.imagens.externas | json |
| midia.imagens.internas | json |
| linhaProduto.id | integer |
| estrutura.tipoEstoque | text |
| estrutura.lancamentoEstoque | text |
| estrutura.componentes | json |
| camposCustomizados | json |
| variacoes | json |
### vendedores
Sync type availability: Full-refresh
| Field | Type |
| ---------------- | ------- |
| id | integer |
| contato.id | integer |
| contato.nome | text |
| contato.situacao | text |
| descontoLimite | float |
| loja.id | integer |
### canais\_venda
Sync type availability: Full-refresh
| Field | Type |
| --------- | ------- |
| id | integer |
| descricao | text |
| tipo | text |
| situacao | integer |
### grupos\_produtos
Sync type availability: Full-refresh
| Field | Type |
| -------------------- | ------- |
| id | integer |
| nome | text |
| grupoProdutoPai.id | integer |
| grupoProdutoPai.nome | text |
### produtos\_lojas
Sync type availability: Full-refresh
| Field | Type |
| ------------------ | ------- |
| id | integer |
| codigo | text |
| preco | float |
| precoPromocional | float |
| produto.id | integer |
| loja.id | integer |
| fornecedorLoja.id | integer |
| marcaLoja.id | integer |
| categoriasProdutos | json |
### modulos
Sync type availability: Full-refresh
Parent of [`modulos_situacoes`](#modulos_situacoes)
| Field | Type |
| -------------- | ---- |
| id | text |
| nome | text |
| descricao | text |
| criarSituacoes | text |
### modulos\_situacoes
Sync type availability: Full-refresh
Child of [`modulos`](#modulos)
| Field | Type |
| --------- | ---- |
| id | text |
| nome | text |
| idHerdado | text |
| cor | text |
### Entity Relationships
```mermaid
erDiagram
contas_receber ||--o{ contas_receber_detalhes : "id = id_conta_receber"
contas_receber_detalhes ||--o{ receber_borderos : "id = id_bordero"
contas_pagar ||--o{ contas_pagar_detalhes : "id = id_conta_pagar"
contas_pagar_detalhes ||--o{ borderos : "id = id_bordero"
contatos ||--o{ contato_detalhes : "id = id_contato"
contratos ||--o{ contrato_detalhes : "id = id_contrato"
formas_pagamentos ||--o{ formas_pagamentos_detalhes : "id = id_forma_pagamento"
logisticas ||--o{ remessas_logisticas : "id = id_logisticas"
nfce ||--o{ nfce_detalhes : "id = id_nfce"
nfe ||--o{ nfe_detalhes : "id = id_nfe"
nfse ||--o{ nfse_detalhes : "id = id_nfse"
propostas_comerciais ||--o{ propostas_comerciais_detalhes : "id = id_propostas_comerciais"
pedidos_compras ||--o{ pedidos_compras_detalhes : "id = id_pedido_compra"
pedidos_vendas ||--o{ pedidos_vendas_detalhes : "id = id_pedido_venda"
produtos ||--o{ produtos_detalhes : "id = id_produto"
modulos ||--o{ modulos_situacoes : "id = id_modulo"
categorias_lojas { integer id PK }
categorias_produtos { integer id PK }
categorias_financeiras { integer id PK }
contas_contabeis { integer id PK }
contas_receber { integer id PK }
contas_receber_detalhes { integer id PK }
receber_borderos { integer id PK }
contas_pagar { integer id PK }
contas_pagar_detalhes { integer id PK }
borderos { integer id PK }
contatos { integer id PK }
contato_detalhes { integer id PK }
tipos_contatos { integer id PK }
contratos { integer id PK }
contrato_detalhes { integer id PK }
depositos { integer id PK }
formas_pagamentos { integer id PK }
formas_pagamentos_detalhes { integer id PK }
logisticas { integer id PK }
servicos_logisticas { integer id PK }
remessas_logisticas { integer id PK }
naturezas_operacoes { integer id PK }
nfce { integer id PK }
nfce_detalhes { integer id PK }
nfe { integer id PK }
nfe_detalhes { integer id PK }
nfse { integer id PK }
nfse_detalhes { integer id PK }
propostas_comerciais { integer id PK }
propostas_comerciais_detalhes { integer id PK }
pedidos_compras { integer id PK }
pedidos_compras_detalhes { integer id PK }
pedidos_vendas { integer id PK }
pedidos_vendas_detalhes { integer id PK }
produtos { integer id PK }
produtos_detalhes { integer id PK }
vendedores { integer id PK }
canais_venda { integer id PK }
grupos_produtos { integer id PK }
produtos_lojas { integer id PK }
modulos { text id PK }
modulos_situacoes { text id PK }
```
# Blip
Find out how to connect Blip to your data warehouse effortlessly.
## How to find my credentials?
To connect Blip with Erathos, you need to register your Blip domain and token.
To find these details, go to **Settings > Connection Information** (as shown in the image below).
* **Domain**: Copy the value from "URL to send commands" — everything **before** `/commands`.
* **Token**: Copy the value from "Header Authentication" — everything **after** `Key:`.
## What endpoints can I access with the Erathos platform?
* active\_messages
* active\_users
* contacts
* documment
* documment\_collections
* engaged\_users
* last\_messages
* list\_members
* lists
* received\_messages
* reports
* sent\_messages
* threads
# Beehiiv
Find out how to connect Beehiiv to your data warehouse effortlessly.
## Using the Erathos platform
When selecting Beehiiv as a new connector on the Erathos platform, you will need to name your connection and fill in the following form:

## How to find my Access token?
1. On the left panel in your account, scroll down and select **Settings**.
2. Then, click on **Integrations**, which will open up the [API](https://app.beehiiv.com/settings/integrations/api) tab.
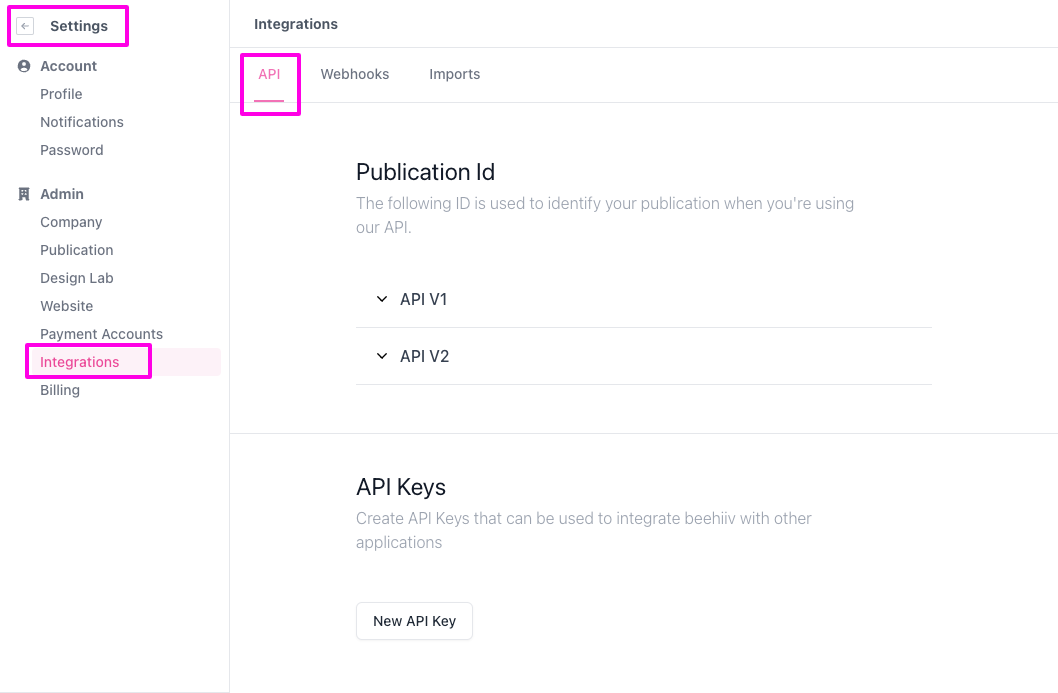
3. To create a new API key that can be used to integrate your beehiiv account, click on the **New API Key** button.
4. A form will appear on the right. You must name your new API key and click on the **Create New Key** button.\
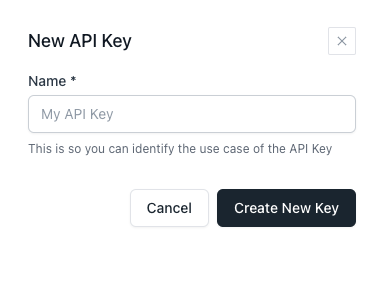
5. You’ll receive a success message at the top of your screen and then you can proceed to copy your new API key.
**Warning:** Remember to save your new API key somewhere safe, it will not be displayed again.
Don't forget to copy and paste the token on the Erathos platform Acces token field and click on **Save and close**.
With this connection created you can seemlessly move your Beehiiv data to your BigQuery, Redshift or Postgres data-warehouse.
## What information can I bring to my data-warehouse with the Erathos platform?
* publications
* posts
* email\_blasts
* referral\_program
* segments
* subscriptions
# BomControle
Find out how to connect BomControle to your data warehouse effortlessly.
## Using the Erathos platform
When selecting BomControle as a new connector on the Erathos platform, you will need to name your connection and fill in the following form:
## How to find my API Key?
1. Log into BomControle platform. Click on the cog icon to open the configuration menu and then select the option **Configuração de API Key** will be available.
2. On the configuration screen, click the button in the bottom right corner **Cadastrar Novo**
3. To create the credential you will need to inform a name to easily identify the purpose of the API key (suggestion: Erathos), which company may use the key, and which access permissions you wish to concede.
4. To finish the process find the created key and click the button **Copiar API Key para o Clipboard** to open a new window where you will be able to copy the key value.
Don't forget to copy and paste the token on the Erathos platform Api Key field and click on **Save and close**.
With this connection created you can seemlessly move your BomControle data to your BigQuery, Redshift or Postgres data-warehouse.
## What information can I bring to my data-warehouse with the Erathos platform?
* categoria\_financeira
* cliente\_detalhes
* conta\_financeira
* departamento
* financeiro
* venda
# Braintrust
### Using the Erathos platform
When selecting Braintrust as a new connector on the Erathos platform, you will need to name your connection and fill in the following form:
* **API Key** — Your Braintrust API key, used to authenticate all requests to the Braintrust API.
With this connection created you can seamlessly move your Braintrust data to your BigQuery, Redshift or Postgres data warehouse.
### How to find my token?
You can find your API Key by navigating to **Settings > API keys** inside the Braintrust dashboard. Click **Create key**, give it a descriptive name, and copy the generated value.
Now, paste the value in the Erathos platform API Key field. Don't forget to click on **Save and close** to advance to the next steps of the integration.
### What endpoints can I access with the Erathos platform?
* organizations
* users
* projects
* roles
* groups
* experiments
* datasets
* prompts
* functions
* experiment\_events
* dataset\_events
# Campaign Monitor
Find out how to connect Campaign Monitor to your data warehouse effortlessly.
## Using the Erathos platform:
When selecting Campaign Monitor as a new connector on the Erathos platform, you will need to authorize the connection by simply logging into the Campaign Monitor account associated with your browser.
Just click on '**Authorize Campaign Monitor**' as shown in the attachment below:

Don't forget to click on **Save and close** to advance to the next steps of the integration.
With this connection created you can seemlessly move your Campaign Monitor data to your BigQuery, Redshift or Postgres data-warehouse.
## What endpoints can I access with the Erathos platform?
* clients
* lists
* listsdetails
* liststats
* listcustomfields
* activesubscribers
* unconfirmedsubscribers
* segments
* suppressionlist
* tags
* sentcampaigns
* campaign\_opens
* campaign\_clicks
* scheduledcampaigns
* journeys
* journeysummary
* emailrecipients
* emailopens
* emailclicks
* emailbounces
* emailunsubscribes
* unsubscribedsubscribers
* bouncedsubscribers
* deletedsubscribers
* campaign\_bounces
* campaign\_recipients
* campaign\_unsubscribes
* campaign\_summary
# ClickUp
Find out how to connect Clickup to your data warehouse effortlessly.
## Using the Erathos platform:
When selecting ClickUp as a new connector on the Erathos platform, you will need to authorize the connection by simply logging into the ClickUp account associated with your browser.
Just click on '**Authorize ClickUp**' as shown in the attachment below:

Don't forget to click on **Save and close** to advance to the next steps of the integration.
With this connection created you can seemlessly move your ClickUp data to your BigQuery, Redshift or Postgres data-warehouse.
## What endpoints can I access with the Erathos platform?
* teams
* spaces
* folders
* lists
* list\_members
* goals
* goal\_folders
* time\_tracking
* tasks
* task\_members
* task\_time\_status
# Cloud Chat (CloudHumans)
Connect your Cloud Chat Data Extract API to your data warehouse. Sync tickets, delivery events, and metrics to BigQuery, Redshift, Postgres, Databricks, and more.
## Using the Erathos platform
When selecting Cloud Chat Data Extract API as a new connector on the Erathos platform, you will need to name your connection and fill in the following form:
* **Cloud Chat Domain** — the domain you use to log into Cloud Chat (e.g. `cloudchat2.cloudhumans.com`). The `https://` prefix is optional, and you can also paste the full URL from your browser. It varies by instance: `cloudchat`, `cloudchat2`, `cloudchat3`…
* **Account ID** — your Cloud Chat account ID
* **API Access Token** — your Cloud Chat API access token
With this connection created you can seamlessly move your Cloud Chat data to your BigQuery, Redshift or Postgres data warehouse.
### How to find my credentials?
**Domain and Account ID:** log into Cloud Chat and look at the browser URL, e.g. `https://cloudchat2.cloudhumans.com/app/accounts/1/dashboard`. The domain is `cloudchat2.cloudhumans.com` and the Account ID is `1`.
**API Access Token:** the token must be generated by a user with an **administrator** or **supervisor** profile. Open your profile settings at `https:///app/accounts//profile/settings` and copy the access token shown there.
Paste the values into the fields on the Erathos platform and click **Save and close** to complete the setup and start syncing your Cloud Chat data.
## Endpoints and fields
### base\_ticket\_metrics
Sync type availability: Full and incremental refresh
[Cursor](https://docs.erathos.com/platform/connections/sync-types#understanding-cursors): `createdAt`
| Field | Type | Cursor |
| ---------------------- | --------- | ------ |
| ticketId | integer | |
| displayTicketId | integer | |
| inboxId | integer | |
| accountId | integer | |
| accountName | text | |
| ticketStatus | text | |
| teamName | text | |
| ticketPriorityName | text | |
| ticketType | text | |
| inboxName | text | |
| ticketTitle | text | |
| channel | text | |
| tags | text | |
| createdAt | timestamp | ✓ |
| firstReplyAt | timestamp | |
| firstReplyTime | float | |
| resolvedAt | timestamp | |
| totalResolutionTimeMin | float | |
| agentId | integer | |
| ticketOwner | text | |
| ticketOwnerEmail | text | |
| contactId | integer | |
| contactName | text | |
| contactEmail | text | |
| contactPhone | text | |
| campaignId | integer | |
| proactivelyInitiated | boolean | |
### ticket\_metrics\_with\_agent\_information
Sync type availability: Full and incremental refresh
[Cursor](https://docs.erathos.com/platform/connections/sync-types#understanding-cursors): `createdAt`
| Field | Type | Cursor |
| ---------------------------- | --------- | ------ |
| ticketId | integer | |
| displayTicketId | integer | |
| inboxId | integer | |
| accountId | integer | |
| accountName | text | |
| ticketStatus | text | |
| teamName | text | |
| ticketPriorityName | text | |
| ticketType | text | |
| inboxName | text | |
| ticketTitle | text | |
| channel | text | |
| tags | text | |
| createdAt | timestamp | ✓ |
| firstReplyAt | timestamp | |
| firstReplyTime | float | |
| resolvedAt | timestamp | |
| totalResolutionTimeMin | float | |
| agentId | integer | |
| ticketOwner | text | |
| ticketOwnerEmail | text | |
| contactId | integer | |
| contactName | text | |
| contactEmail | text | |
| contactPhone | text | |
| campaignId | integer | |
| proactivelyInitiated | boolean | |
| ticketLink | text | |
| agentOnResolutionId | integer | |
| agentOnResolutionName | text | |
| agentOnResolutionEmail | text | |
| firstAgentReplyId | integer | |
| firstAgentReplyName | text | |
| firstAgentReplyEmail | text | |
| firstAgentAssignmentTime | timestamp | |
| firstAgentFirstReplyTime | timestamp | |
| firstAgentReplyTimeMin | float | |
| firstAgentResolutionTimeMin | float | |
| csatScore | float | |
| csatFeedback | text | |
| contactCustomFields | json | |
| conversationCustomFields | json | |
| conversationAdditionalFields | json | |
### ticket\_summary
Sync type availability: Full-refresh
| Field | Type |
| --------------- | ------- |
| ticketId | integer |
| displayTicketId | integer |
| ticketLink | text |
| summary | text |
### campaign\_delivery\_events
Sync type availability: Full and incremental refresh
[Cursor](https://docs.erathos.com/platform/connections/sync-types#understanding-cursors): `updatedAt`
| Field | Type | Cursor |
| ------------------ | --------- | ------ |
| id | integer | |
| campaignId | integer | |
| campaignTitle | text | |
| audience | text | |
| contactId | integer | |
| contactName | text | |
| contactEmail | text | |
| contactPhoneNumber | text | |
| ticketId | integer | |
| displayTicketId | text | |
| messageSent | boolean | |
| sentAt | timestamp | |
| messageReceived | boolean | |
| receivedAt | timestamp | |
| messageRead | boolean | |
| readAt | timestamp | |
| messageReplied | boolean | |
| repliedAt | timestamp | |
| error | text | |
| createdAt | timestamp | |
| updatedAt | timestamp | ✓ |
### single\_contact\_delivery\_events
Sync type availability: Full and incremental refresh
[Cursor](https://docs.erathos.com/platform/connections/sync-types#understanding-cursors): `updatedAt`
| Field | Type | Cursor |
| ------------------ | --------- | ------ |
| id | integer | |
| contactId | integer | |
| contactName | text | |
| contactEmail | text | |
| contactPhoneNumber | text | |
| ticketId | integer | |
| displayTicketId | text | |
| messageSent | boolean | |
| sentAt | timestamp | |
| messageReceived | boolean | |
| receivedAt | timestamp | |
| messageRead | boolean | |
| readAt | timestamp | |
| messageReplied | boolean | |
| repliedAt | timestamp | |
| error | text | |
| createdAt | timestamp | |
| updatedAt | timestamp | ✓ |
## Entity Relationships
```mermaid
erDiagram
ticket_summary ||--o{ base_ticket_metrics : "ticketId = ticketId"
ticket_summary ||--o{ ticket_metrics_with_agent_information : "ticketId = ticketId"
ticket_summary ||--o{ campaign_delivery_events : "ticketId = ticketId"
ticket_summary ||--o{ single_contact_delivery_events : "ticketId = ticketId"
ticket_summary { int ticketId PK }
base_ticket_metrics { int ticketId PK }
ticket_metrics_with_agent_information { int ticketId PK }
campaign_delivery_events { int id PK }
single_contact_delivery_events { int id PK }
```
# Confluence
Connect your Confluence wiki to your data warehouse. Sync spaces, pages, blogposts, comments, labels, and tasks to BigQuery, Redshift, PostgreSQL, Databricks, and more.
## Using the Erathos platform
When selecting Confluence as a new connector on the Erathos platform, you will need to name your connection and fill in the following form:
* **Site** — your Confluence site subdomain (for example, `mycompany` if you access Confluence at `mycompany.atlassian.net`)
* **Token** — your Atlassian API token, validated together with your Atlassian account email to authenticate all requests to the Confluence API
With this connection created you can seamlessly move your Confluence data to your BigQuery, Redshift or PostgreSQL data warehouse.
### How to find my token?
Confluence authenticates with Atlassian API tokens using Basic authentication. To generate one, go to and click **Create API token**. Give the token a label (for example, `Erathos`) and click **Create** — the token value is displayed only once, so copy it right away.
Make sure the Atlassian account you used to generate the token has access to the Confluence site you want to sync. The API token is validated together with your Atlassian account email, and both must belong to the account that can access your `{site}.atlassian.net` Confluence instance.
In the Erathos platform, fill in the **Site** field with your Confluence subdomain (for example, `mycompany`) and paste the API token into the **Token** field. Click **Save and close** to complete the setup.
## Endpoints and fields
### spaces
Sync type availability: Full-refresh
Parent of [space\_detail](#space_detail), [space\_labels](#space_labels), [space\_operations](#space_operations), [space\_permission\_assignments](#space_permission_assignments), [space\_properties](#space_properties), [space\_role\_assignments](#space_role_assignments), [spaces\_blogposts](#spaces_blogposts), [spaces\_content\_labels](#spaces_content_labels), [spaces\_pages](#spaces_pages)
| Field | Type |
| ----------- | ---- |
| id | text |
| key | text |
| name | text |
| type | text |
| status | text |
| authorId | text |
| homepageId | text |
| description | json |
| icon | json |
| \_links | json |
### space\_detail
Sync type availability: Full-refresh
Child of [spaces](#spaces)
| Field | Type |
| --------------- | ---- |
| id | text |
| key | text |
| name | text |
| type | text |
| status | text |
| authorId | text |
| homepageId | text |
| description | json |
| icon | json |
| \_links | json |
| labels | json |
| properties | json |
| operations | json |
| permissions | json |
| roleAssignments | json |
### space\_labels
Sync type availability: Full-refresh
Child of [spaces](#spaces)
| Field | Type |
| ------- | ---- |
| id | text |
| prefix | text |
| name | text |
| \_links | json |
### space\_operations
Sync type availability: Full-refresh
Child of [spaces](#spaces)
| Field | Type |
| ---------- | ---- |
| operation | text |
| targetType | text |
### space\_permission\_assignments
Sync type availability: Full-refresh
Child of [spaces](#spaces)
| Field | Type |
| --------- | ---- |
| id | text |
| principal | json |
| type | text |
### space\_properties
Sync type availability: Full-refresh
Child of [spaces](#spaces)
| Field | Type |
| ------- | ---- |
| id | text |
| key | text |
| value | json |
| version | json |
| \_links | json |
### space\_role\_assignments
Sync type availability: Full-refresh
Child of [spaces](#spaces)
| Field | Type |
| --------- | ---- |
| id | text |
| principal | json |
### spaces\_blogposts
Sync type availability: Full-refresh
Child of [spaces](#spaces)
| Field | Type |
| ----------- | --------- |
| id | text |
| status | text |
| title | text |
| spaceId | text |
| authorId | text |
| ownerId | text |
| lastOwnerId | text |
| createdAt | timestamp |
| version | json |
| \_links | json |
### spaces\_content\_labels
Sync type availability: Full-refresh
Child of [spaces](#spaces)
| Field | Type |
| ------- | ---- |
| id | text |
| prefix | text |
| name | text |
| \_links | json |
### spaces\_pages
Sync type availability: Full-refresh
Child of [spaces](#spaces)
| Field | Type |
| ----------- | --------- |
| id | text |
| status | text |
| title | text |
| spaceId | text |
| parentId | text |
| parentType | text |
| position | text |
| authorId | text |
| ownerId | text |
| lastOwnerId | text |
| createdAt | timestamp |
| version | json |
| \_links | json |
### pages
Sync type availability: Full-refresh
Parent of [pages\_attachments](#pages_attachments), [pages\_footer\_comments](#pages_footer_comments), [pages\_inline\_comments](#pages_inline_comments), [pages\_direct\_children](#pages_direct_children), [pages\_children](#pages_children), [pages\_ancestors](#pages_ancestors), [pages\_descendants](#pages_descendants), [page\_labels](#page_labels), [pages\_versions](#pages_versions), [page\_likes\_count](#page_likes_count), [page\_likes\_users](#page_likes_users), [page\_properties](#page_properties), [page\_operations](#page_operations), [page\_detail](#page_detail)
| Field | Type |
| ----------- | --------- |
| id | text |
| status | text |
| title | text |
| spaceId | text |
| parentId | text |
| parentType | text |
| position | text |
| authorId | text |
| ownerId | text |
| lastOwnerId | text |
| createdAt | timestamp |
| version | json |
| \_links | json |
### pages\_attachments
Sync type availability: Full-refresh
Child of [pages](#pages)
| Field | Type |
| -------------------- | --------- |
| id | text |
| status | text |
| title | text |
| pageId | text |
| blogPostId | text |
| customContentId | text |
| authorId | text |
| createdAt | timestamp |
| fileId | text |
| mediaType | text |
| mediaTypeDescription | text |
| fileSize | integer |
| comment | text |
| version | json |
| \_links | json |
### pages\_footer\_comments
Sync type availability: Full-refresh
Child of [pages](#pages)
| Field | Type |
| ---------- | --------- |
| id | text |
| status | text |
| body | json |
| version | json |
| pageId | text |
| blogPostId | text |
| authorId | text |
| createdAt | timestamp |
| \_links | json |
### pages\_inline\_comments
Sync type availability: Full-refresh
Child of [pages](#pages)
| Field | Type |
| ------------------ | --------- |
| id | text |
| status | text |
| body | json |
| version | json |
| pageId | text |
| blogPostId | text |
| authorId | text |
| createdAt | timestamp |
| resolvedProperties | json |
| \_links | json |
### pages\_direct\_children
Sync type availability: Full-refresh
Child of [pages](#pages)
| Field | Type |
| ----------- | --------- |
| id | text |
| status | text |
| title | text |
| spaceId | text |
| parentId | text |
| parentType | text |
| position | text |
| authorId | text |
| ownerId | text |
| lastOwnerId | text |
| createdAt | timestamp |
| version | json |
| \_links | json |
### pages\_children
Sync type availability: Full-refresh
Child of [pages](#pages)
| Field | Type |
| ----------- | --------- |
| id | text |
| status | text |
| title | text |
| spaceId | text |
| parentId | text |
| parentType | text |
| position | text |
| authorId | text |
| ownerId | text |
| lastOwnerId | text |
| createdAt | timestamp |
| version | json |
| \_links | json |
### pages\_ancestors
Sync type availability: Full-refresh
Child of [pages](#pages)
| Field | Type |
| ----------- | --------- |
| id | text |
| status | text |
| title | text |
| spaceId | text |
| parentId | text |
| parentType | text |
| position | text |
| authorId | text |
| ownerId | text |
| lastOwnerId | text |
| createdAt | timestamp |
| version | json |
| \_links | json |
### pages\_descendants
Sync type availability: Full-refresh
Child of [pages](#pages)
| Field | Type |
| ----------- | --------- |
| id | text |
| status | text |
| title | text |
| spaceId | text |
| parentId | text |
| parentType | text |
| position | text |
| authorId | text |
| ownerId | text |
| lastOwnerId | text |
| createdAt | timestamp |
| version | json |
| \_links | json |
### page\_labels
Sync type availability: Full-refresh
Child of [pages](#pages)
| Field | Type |
| ------- | ---- |
| id | text |
| prefix | text |
| name | text |
| \_links | json |
### pages\_versions
Sync type availability: Full-refresh
Child of [pages](#pages)
| Field | Type |
| --------- | --------- |
| number | integer |
| createdAt | timestamp |
| message | text |
| minorEdit | boolean |
| authorId | text |
### page\_likes\_count
Sync type availability: Full-refresh
Child of [pages](#pages)
| Field | Type |
| ------- | ------- |
| likes | integer |
| likedBy | integer |
### page\_likes\_users
Sync type availability: Full-refresh
Child of [pages](#pages)
| Field | Type |
| -------------- | ---- |
| accountId | text |
| userType | text |
| accountStatus | text |
| email | text |
| publicName | text |
| profilePicture | json |
### page\_properties
Sync type availability: Full-refresh
Child of [pages](#pages)
| Field | Type |
| ------- | ---- |
| id | text |
| key | text |
| value | json |
| version | json |
| \_links | json |
### page\_operations
Sync type availability: Full-refresh
Child of [pages](#pages)
| Field | Type |
| ---------- | ---- |
| operation | text |
| targetType | text |
### page\_detail
Sync type availability: Full-refresh
Child of [pages](#pages)
| Field | Type |
| ------------------------ | --------- |
| id | text |
| status | text |
| title | text |
| spaceId | text |
| parentId | text |
| parentType | text |
| position | text |
| authorId | text |
| ownerId | text |
| lastOwnerId | text |
| createdAt | timestamp |
| version | json |
| \_links | json |
| body | json |
| labels | json |
| properties | json |
| operations | json |
| likes | json |
| versions | json |
| isFavoritedByCurrentUser | boolean |
### blogposts
Sync type availability: Full-refresh
Parent of [blogposts\_attachments](#blogposts_attachments), [blogposts\_footer\_comments](#blogposts_footer_comments), [blogposts\_inline\_comments](#blogposts_inline_comments), [blogpost\_labels](#blogpost_labels), [blogpost\_versions](#blogpost_versions), [blogpost\_likes\_count](#blogpost_likes_count), [blogpost\_likes\_users](#blogpost_likes_users), [blogpost\_properties](#blogpost_properties), [blogpost\_operations](#blogpost_operations), [blogpost\_detail](#blogpost_detail)
| Field | Type |
| ----------- | --------- |
| id | text |
| status | text |
| title | text |
| spaceId | text |
| authorId | text |
| ownerId | text |
| lastOwnerId | text |
| createdAt | timestamp |
| version | json |
| \_links | json |
### blogposts\_attachments
Sync type availability: Full-refresh
Child of [blogposts](#blogposts)
| Field | Type |
| -------------------- | --------- |
| id | text |
| status | text |
| title | text |
| pageId | text |
| blogPostId | text |
| customContentId | text |
| authorId | text |
| createdAt | timestamp |
| fileId | text |
| mediaType | text |
| mediaTypeDescription | text |
| fileSize | integer |
| comment | text |
| version | json |
| \_links | json |
### blogposts\_footer\_comments
Sync type availability: Full-refresh
Child of [blogposts](#blogposts)
| Field | Type |
| ---------- | --------- |
| id | text |
| status | text |
| body | json |
| version | json |
| pageId | text |
| blogPostId | text |
| authorId | text |
| createdAt | timestamp |
| \_links | json |
### blogposts\_inline\_comments
Sync type availability: Full-refresh
Child of [blogposts](#blogposts)
| Field | Type |
| ------------------ | --------- |
| id | text |
| status | text |
| body | json |
| version | json |
| pageId | text |
| blogPostId | text |
| authorId | text |
| createdAt | timestamp |
| resolvedProperties | json |
| \_links | json |
### blogpost\_labels
Sync type availability: Full-refresh
Child of [blogposts](#blogposts)
| Field | Type |
| ------- | ---- |
| id | text |
| prefix | text |
| name | text |
| \_links | json |
### blogpost\_versions
Sync type availability: Full-refresh
Child of [blogposts](#blogposts)
| Field | Type |
| --------- | --------- |
| number | integer |
| createdAt | timestamp |
| message | text |
| minorEdit | boolean |
| authorId | text |
### blogpost\_likes\_count
Sync type availability: Full-refresh
Child of [blogposts](#blogposts)
| Field | Type |
| ------- | ------- |
| likes | integer |
| likedBy | integer |
### blogpost\_likes\_users
Sync type availability: Full-refresh
Child of [blogposts](#blogposts)
| Field | Type |
| -------------- | ---- |
| accountId | text |
| userType | text |
| accountStatus | text |
| email | text |
| publicName | text |
| profilePicture | json |
### blogpost\_properties
Sync type availability: Full-refresh
Child of [blogposts](#blogposts)
| Field | Type |
| ------- | ---- |
| id | text |
| key | text |
| value | json |
| version | json |
| \_links | json |
### blogpost\_operations
Sync type availability: Full-refresh
Child of [blogposts](#blogposts)
| Field | Type |
| ---------- | ---- |
| operation | text |
| targetType | text |
### blogpost\_detail
Sync type availability: Full-refresh
Child of [blogposts](#blogposts)
| Field | Type |
| ------------------------ | --------- |
| id | text |
| status | text |
| title | text |
| spaceId | text |
| authorId | text |
| ownerId | text |
| lastOwnerId | text |
| createdAt | timestamp |
| version | json |
| \_links | json |
| body | json |
| labels | json |
| properties | json |
| operations | json |
| likes | json |
| versions | json |
| isFavoritedByCurrentUser | boolean |
### attachments
Sync type availability: Full-refresh
Parent of [attachments\_labels](#attachments_labels), [attachment\_versions](#attachment_versions), [attachments\_footer\_comments](#attachments_footer_comments), [attachment\_properties](#attachment_properties), [attachment\_operations](#attachment_operations), [attachment\_detail](#attachment_detail)
| Field | Type |
| -------------------- | --------- |
| id | text |
| status | text |
| title | text |
| pageId | text |
| blogPostId | text |
| customContentId | text |
| authorId | text |
| createdAt | timestamp |
| fileId | text |
| mediaType | text |
| mediaTypeDescription | text |
| fileSize | integer |
| comment | text |
| version | json |
| \_links | json |
### attachments\_labels
Sync type availability: Full-refresh
Child of [attachments](#attachments)
| Field | Type |
| ------- | ---- |
| id | text |
| prefix | text |
| name | text |
| \_links | json |
### attachment\_versions
Sync type availability: Full-refresh
Child of [attachments](#attachments)
| Field | Type |
| --------- | --------- |
| number | integer |
| createdAt | timestamp |
| message | text |
| minorEdit | boolean |
| authorId | text |
### attachments\_footer\_comments
Sync type availability: Full-refresh
Child of [attachments](#attachments)
| Field | Type |
| ---------- | --------- |
| id | text |
| status | text |
| body | json |
| version | json |
| pageId | text |
| blogPostId | text |
| authorId | text |
| createdAt | timestamp |
| \_links | json |
### attachment\_properties
Sync type availability: Full-refresh
Child of [attachments](#attachments)
| Field | Type |
| ------- | ---- |
| id | text |
| key | text |
| value | json |
| version | json |
| \_links | json |
### attachment\_operations
Sync type availability: Full-refresh
Child of [attachments](#attachments)
| Field | Type |
| ---------- | ---- |
| operation | text |
| targetType | text |
### attachment\_detail
Sync type availability: Full-refresh
Child of [attachments](#attachments)
| Field | Type |
| -------------------- | --------- |
| id | text |
| status | text |
| title | text |
| pageId | text |
| blogPostId | text |
| customContentId | text |
| authorId | text |
| createdAt | timestamp |
| fileId | text |
| mediaType | text |
| mediaTypeDescription | text |
| fileSize | integer |
| comment | text |
| version | json |
| \_links | json |
| labels | json |
| properties | json |
| operations | json |
| versions | json |
| collaborators | json |
### labels
Sync type availability: Full-refresh
Parent of [label\_pages](#label_pages), [label\_blogposts](#label_blogposts), [label\_attachments](#label_attachments)
| Field | Type |
| ------- | ---- |
| id | text |
| prefix | text |
| name | text |
| \_links | json |
### label\_pages
Sync type availability: Full-refresh
Child of [labels](#labels)
| Field | Type |
| ----------- | --------- |
| id | text |
| status | text |
| title | text |
| spaceId | text |
| parentId | text |
| parentType | text |
| position | text |
| authorId | text |
| ownerId | text |
| lastOwnerId | text |
| createdAt | timestamp |
| version | json |
| \_links | json |
### label\_blogposts
Sync type availability: Full-refresh
Child of [labels](#labels)
| Field | Type |
| ----------- | --------- |
| id | text |
| status | text |
| title | text |
| spaceId | text |
| authorId | text |
| ownerId | text |
| lastOwnerId | text |
| createdAt | timestamp |
| version | json |
| \_links | json |
### label\_attachments
Sync type availability: Full-refresh
Child of [labels](#labels)
| Field | Type |
| -------------------- | --------- |
| id | text |
| status | text |
| title | text |
| pageId | text |
| blogPostId | text |
| customContentId | text |
| authorId | text |
| createdAt | timestamp |
| fileId | text |
| mediaType | text |
| mediaTypeDescription | text |
| fileSize | integer |
| comment | text |
| version | json |
| \_links | json |
### footer\_comments
Sync type availability: Full-refresh
Parent of [footer\_comment\_children](#footer_comment_children), [footer\_comment\_likes\_users](#footer_comment_likes_users), [footer\_comment\_likes\_count](#footer_comment_likes_count), [footer\_comment\_versions](#footer_comment_versions), [footer\_comment\_operations](#footer_comment_operations)
| Field | Type |
| ---------- | --------- |
| id | text |
| status | text |
| body | json |
| version | json |
| pageId | text |
| blogPostId | text |
| authorId | text |
| createdAt | timestamp |
| \_links | json |
### footer\_comment\_children
Sync type availability: Full-refresh
Child of [footer\_comments](#footer_comments)
| Field | Type |
| ---------- | --------- |
| id | text |
| status | text |
| body | json |
| version | json |
| pageId | text |
| blogPostId | text |
| authorId | text |
| createdAt | timestamp |
| \_links | json |
### footer\_comment\_likes\_users
Sync type availability: Full-refresh
Child of [footer\_comments](#footer_comments)
| Field | Type |
| -------------- | ---- |
| accountId | text |
| userType | text |
| accountStatus | text |
| email | text |
| publicName | text |
| profilePicture | json |
### footer\_comment\_likes\_count
Sync type availability: Full-refresh
Child of [footer\_comments](#footer_comments)
| Field | Type |
| ------- | ------- |
| likes | integer |
| likedBy | integer |
### footer\_comment\_versions
Sync type availability: Full-refresh
Child of [footer\_comments](#footer_comments)
| Field | Type |
| --------- | --------- |
| number | integer |
| createdAt | timestamp |
| message | text |
| minorEdit | boolean |
| authorId | text |
### footer\_comment\_operations
Sync type availability: Full-refresh
Child of [footer\_comments](#footer_comments)
| Field | Type |
| ---------- | ---- |
| operation | text |
| targetType | text |
### inline\_comments
Sync type availability: Full-refresh
Parent of [inline\_comment\_children](#inline_comment_children), [inline\_comment\_likes\_users](#inline_comment_likes_users), [inline\_comment\_likes\_count](#inline_comment_likes_count), [inline\_comment\_versions](#inline_comment_versions), [inline\_comment\_operations](#inline_comment_operations)
| Field | Type |
| ------------------ | --------- |
| id | text |
| status | text |
| body | json |
| version | json |
| pageId | text |
| blogPostId | text |
| authorId | text |
| createdAt | timestamp |
| resolvedProperties | json |
| \_links | json |
### inline\_comment\_children
Sync type availability: Full-refresh
Child of [inline\_comments](#inline_comments)
| Field | Type |
| ------------------ | --------- |
| id | text |
| status | text |
| body | json |
| version | json |
| pageId | text |
| blogPostId | text |
| authorId | text |
| createdAt | timestamp |
| resolvedProperties | json |
| \_links | json |
### inline\_comment\_likes\_users
Sync type availability: Full-refresh
Child of [inline\_comments](#inline_comments)
| Field | Type |
| -------------- | ---- |
| accountId | text |
| userType | text |
| accountStatus | text |
| email | text |
| publicName | text |
| profilePicture | json |
### inline\_comment\_likes\_count
Sync type availability: Full-refresh
Child of [inline\_comments](#inline_comments)
| Field | Type |
| ------- | ------- |
| likes | integer |
| likedBy | integer |
### inline\_comment\_versions
Sync type availability: Full-refresh
Child of [inline\_comments](#inline_comments)
| Field | Type |
| --------- | --------- |
| number | integer |
| createdAt | timestamp |
| message | text |
| minorEdit | boolean |
| authorId | text |
### inline\_comment\_operations
Sync type availability: Full-refresh
Child of [inline\_comments](#inline_comments)
| Field | Type |
| ---------- | ---- |
| operation | text |
| targetType | text |
### classification\_levels
Sync type availability: Full-refresh
| Field | Type |
| ----------- | ---- |
| id | text |
| name | text |
| description | text |
### space\_permissions
Sync type availability: Full-refresh
| Field | Type |
| --------- | ---- |
| id | text |
| principal | json |
| type | text |
### space\_roles
Sync type availability: Full-refresh
| Field | Type |
| ----------- | ---- |
| id | text |
| key | text |
| name | text |
| permissions | json |
### tasks
Sync type availability: Full and incremental refresh
[Cursor](https://docs.erathos.com/platform/connections/sync-types#understanding-cursors): `createdAt`
| Field | Type | Cursor |
| ---------------- | --------- | ------ |
| id | text | |
| status | text | |
| body | json | |
| pageId | text | |
| blogPostId | text | |
| inlineCommentId | text | |
| authorId | text | |
| assigneeId | text | |
| createdAt | timestamp | ✓ |
| dueAt | timestamp | |
| completedAt | timestamp | |
| associatedWithId | text | |
| \_links | json | |
## Entity Relationships
```mermaid
erDiagram
spaces ||--o{ spaces_pages : "id = _pk_spaces"
spaces ||--o{ spaces_blogposts : "id = _pk_spaces"
spaces ||--o{ spaces_content_labels : "id = _pk_spaces"
spaces ||--o{ space_labels : "id = _pk_spaces"
spaces ||--o{ space_permission_assignments : "id = _pk_spaces"
spaces ||--o{ space_properties : "id = _pk_spaces"
spaces ||--o{ space_role_assignments : "id = _pk_spaces"
spaces ||--o{ space_operations : "id = _pk_spaces"
spaces ||--o{ space_detail : "id = _pk_spaces"
spaces ||--o{ pages : "id = spaceId"
spaces ||--o{ blogposts : "id = spaceId"
pages ||--o{ pages_attachments : "id = _pk_pages"
pages ||--o{ pages_footer_comments : "id = _pk_pages"
pages ||--o{ pages_inline_comments : "id = _pk_pages"
pages ||--o{ pages_direct_children : "id = _pk_pages"
pages ||--o{ pages_children : "id = _pk_pages"
pages ||--o{ pages_ancestors : "id = _pk_pages"
pages ||--o{ pages_descendants : "id = _pk_pages"
pages ||--o{ page_labels : "id = _pk_pages"
pages ||--o{ pages_versions : "id = _pk_pages"
pages ||--o{ page_likes_count : "id = _pk_pages"
pages ||--o{ page_likes_users : "id = _pk_pages"
pages ||--o{ page_properties : "id = _pk_pages"
pages ||--o{ page_operations : "id = _pk_pages"
pages ||--o{ page_detail : "id = _pk_pages"
pages ||--o{ attachments : "id = pageId"
pages ||--o{ footer_comments : "id = pageId"
pages ||--o{ inline_comments : "id = pageId"
pages ||--o{ tasks : "id = pageId"
blogposts ||--o{ blogposts_attachments : "id = _pk_blogposts"
blogposts ||--o{ blogposts_footer_comments : "id = _pk_blogposts"
blogposts ||--o{ blogposts_inline_comments : "id = _pk_blogposts"
blogposts ||--o{ blogpost_labels : "id = _pk_blogposts"
blogposts ||--o{ blogpost_versions : "id = _pk_blogposts"
blogposts ||--o{ blogpost_likes_count : "id = _pk_blogposts"
blogposts ||--o{ blogpost_likes_users : "id = _pk_blogposts"
blogposts ||--o{ blogpost_properties : "id = _pk_blogposts"
blogposts ||--o{ blogpost_operations : "id = _pk_blogposts"
blogposts ||--o{ blogpost_detail : "id = _pk_blogposts"
blogposts ||--o{ attachments : "id = blogPostId"
blogposts ||--o{ footer_comments : "id = blogPostId"
blogposts ||--o{ inline_comments : "id = blogPostId"
blogposts ||--o{ tasks : "id = blogPostId"
attachments ||--o{ attachments_labels : "id = _pk_attachments"
attachments ||--o{ attachment_versions : "id = _pk_attachments"
attachments ||--o{ attachments_footer_comments : "id = _pk_attachments"
attachments ||--o{ attachment_properties : "id = _pk_attachments"
attachments ||--o{ attachment_operations : "id = _pk_attachments"
attachments ||--o{ attachment_detail : "id = _pk_attachments"
labels ||--o{ label_pages : "id = _pk_labels"
labels ||--o{ label_blogposts : "id = _pk_labels"
labels ||--o{ label_attachments : "id = _pk_labels"
footer_comments ||--o{ footer_comment_children : "id = _pk_footer_comments"
footer_comments ||--o{ footer_comment_likes_users : "id = _pk_footer_comments"
footer_comments ||--o{ footer_comment_likes_count : "id = _pk_footer_comments"
footer_comments ||--o{ footer_comment_versions : "id = _pk_footer_comments"
footer_comments ||--o{ footer_comment_operations : "id = _pk_footer_comments"
inline_comments ||--o{ inline_comment_children : "id = _pk_inline_comments"
inline_comments ||--o{ inline_comment_likes_users : "id = _pk_inline_comments"
inline_comments ||--o{ inline_comment_likes_count : "id = _pk_inline_comments"
inline_comments ||--o{ inline_comment_versions : "id = _pk_inline_comments"
inline_comments ||--o{ inline_comment_operations : "id = _pk_inline_comments"
inline_comments ||--o{ tasks : "id = inlineCommentId"
spaces { text id PK }
space_detail {
text _pk_spaces PK
text id PK
}
space_labels {
text _pk_spaces PK
text id PK
}
space_operations {
text _pk_spaces PK
text operation PK
}
space_permission_assignments {
text _pk_spaces PK
text id PK
}
space_properties {
text _pk_spaces PK
text id PK
}
space_role_assignments {
text _pk_spaces PK
text id PK
}
spaces_blogposts {
text _pk_spaces PK
text id PK
}
spaces_content_labels {
text _pk_spaces PK
text id PK
}
spaces_pages {
text _pk_spaces PK
text id PK
}
pages { text id PK }
pages_attachments {
text _pk_pages PK
text id PK
}
pages_footer_comments {
text _pk_pages PK
text id PK
}
pages_inline_comments {
text _pk_pages PK
text id PK
}
pages_direct_children {
text _pk_pages PK
text id PK
}
pages_children {
text _pk_pages PK
text id PK
}
pages_ancestors {
text _pk_pages PK
text id PK
}
pages_descendants {
text _pk_pages PK
text id PK
}
page_labels {
text _pk_pages PK
text id PK
}
pages_versions {
text _pk_pages PK
integer number PK
}
page_likes_count { text _pk_pages PK }
page_likes_users {
text _pk_pages PK
text id PK
}
page_properties {
text _pk_pages PK
text id PK
}
page_operations {
text _pk_pages PK
text operation PK
}
page_detail {
text _pk_pages PK
text id PK
}
blogposts { text id PK }
blogposts_attachments {
text _pk_blogposts PK
text id PK
}
blogposts_footer_comments {
text _pk_blogposts PK
text id PK
}
blogposts_inline_comments {
text _pk_blogposts PK
text id PK
}
blogpost_labels {
text _pk_blogposts PK
text id PK
}
blogpost_versions {
text _pk_blogposts PK
integer number PK
}
blogpost_likes_count { text _pk_blogposts PK }
blogpost_likes_users {
text _pk_blogposts PK
text id PK
}
blogpost_properties {
text _pk_blogposts PK
text id PK
}
blogpost_operations {
text _pk_blogposts PK
text operation PK
}
blogpost_detail {
text _pk_blogposts PK
text id PK
}
attachments { text id PK }
attachments_labels {
text _pk_attachments PK
text id PK
}
attachment_versions {
text _pk_attachments PK
integer number PK
}
attachments_footer_comments {
text _pk_attachments PK
text id PK
}
attachment_properties {
text _pk_attachments PK
text id PK
}
attachment_operations {
text _pk_attachments PK
text operation PK
}
attachment_detail {
text _pk_attachments PK
text id PK
}
labels { text id PK }
label_pages {
text _pk_labels PK
text id PK
}
label_blogposts {
text _pk_labels PK
text id PK
}
label_attachments {
text _pk_labels PK
text id PK
}
footer_comments { text id PK }
footer_comment_children {
text _pk_footer_comments PK
text id PK
}
footer_comment_likes_users {
text _pk_footer_comments PK
text id PK
}
footer_comment_likes_count { text _pk_footer_comments PK }
footer_comment_versions {
text _pk_footer_comments PK
integer number PK
}
footer_comment_operations {
text _pk_footer_comments PK
text operation PK
}
inline_comments { text id PK }
inline_comment_children {
text _pk_inline_comments PK
text id PK
}
inline_comment_likes_users {
text _pk_inline_comments PK
text id PK
}
inline_comment_likes_count { text _pk_inline_comments PK }
inline_comment_versions {
text _pk_inline_comments PK
integer number PK
}
inline_comment_operations {
text _pk_inline_comments PK
text operation PK
}
tasks { text id PK }
classification_levels { text id PK }
space_permissions { text id PK }
space_roles { text id PK }
```
# Conta Azul
Find out how to connect Conta Azul to your data warehouse effortlessly.
## Using the Erathos platform:
When selecting Conta Azul as a new connector on the Erathos platform, you will need to authorize the connection by simply logging into the Conta Azul account associated with your browser.
Just click on '**Authorize Conta Azul**' as shown in the attachment below:

Don't forget to click on **Save and close** to advance to the next steps of the integration.
With this connection created you can seemlessly move your Conta Azul data to your BigQuery, Redshift or Postgres data-warehouse.
## What information can I bring to my data-warehouse with the Erathos platform?
* products
* services
* sales
* sale\_items
* customers
* suppliers
* plans
* Finance
# Convenia
Find out how to connect Convenia to your data warehouse effortlessly.
## Using the Erathos platform
When selecting Convenia as a new connector on the Erathos platform, you will need to name your connection and fill in the following form:
.png)
## **How to find your token?**
1. Click on your profile picture (or inicials) and select **Settings**.
2. Click on **API**.
3. Select the **Add new token** option.
.png)
1. Name the token
.png)
2. Select the permissions and level os access to information of the token you wish to create.(they must be selected in the endpoint category that is beign used)
.png)
3. Click on add to save the token and it will be available to use!
Now paste the token value in the Token field in the Erathos platform. Don't forget to click on **Save and close** to advance to the next steps of the integration.
With this connection created you can seemlessly move your Convenia data to your BigQuery, Redshift or Postgres data-warehouse.
## What endpoints can I access with the Erathos platform?
* colaboradores
* historico\_salarial
* ferias\_solicitadas
* ferias\_periodos
* colaboradores\_alteracoes
* colaboradores\_faltas
* colaboradores\_dependentes
* colaboradores\_desligados
* ferias\_coletivas
* departamentos
* centro\_custo
* cargos
* folhas\_de\_pagamentos
* etnias
* nacionalidades
* vinculos\_empregaticios
* estado\_civil
* escolaridade
* conta\_bancaria
* bancos
* estados
* cidades
* tipos\_de\_desligamento
* tipos\_aviso\_previos
* identidade\_genero
* relacionamento\_contato\_emergencia
# CustomerX
Find out how to connect CustomerX to your data warehouse effortlessly.
## Using Erathos platform
When selecting CustomerX as a new connector on the Erathos platform, you will need to name your connection and fill in the following form:
## How to find my API Token?
Each user has a unique `api_token`, which can be found in the system registration at:
* **Top right menu** → **User**
* **View Profile**
* **API Token field**
For further information check out [CustomerX documentation](https://doc.api.customerx.com.br/#intro).
## What endpoints can I access with Erathos platform?
| Endpoints |
| --------- |
| clients |
| csat |
| tasks |
# Delighted
Find out how to connect Delighted to your data warehouse effortlessly.
## Using the Erathos platform
When selecting Delighted as a new connector on the Erathos platform, you will need to name your connection and fill in the following form:

## Como encontrar o User API Token no Delighted?
To find your project's API token, head to **Integrations >API**
Don't forget that limited users can't view the API token and each project has it own key.
# Facebook Ads
Find out how to connect Facebook Ads to your data warehouse effortlessly.
## Using the Erathos platform:
When selecting Facebook Ads as a new connector on the Erathos platform, you will need to authorize the connection by simply logging into the Facebook Ads account associated with your browser.
Just click on '**Authorize Facebook Ads**' as shown in the attachment below:

Don't forget to click on **Save and close** to advance to the next steps of the integration.
With this connection created you can seemlessly move your Facebook Ads data to your BigQuery, Redshift or Postgres data-warehouse.
## What endpoints can I access with the Erathos platform?
* adcampaigns
* adstudies
* adsets
* ads
* adcreatives
* adimages
* advideos
* custom\_audiences
* users
* insights\_canvas\_action
* insights\_reaction\_action
* insights\_device\_action
* insights\_product\_action
* insights\_delivery\_purchase\_roas
* insights\_carousel\_card\_action
* insights\_video\_view\_type\_action
* insights\_campaigns
* insights\_delivery\_platform\_device
* insights\_ad
* insights\_adset
* insights\_all\_levels
* insights\_delivery\_platform
* insights\_video\_sound\_action
* insights\_age\_gender\_demographics
* insights\_gender\_demographics
* insights\_region\_demographics
* insights\_dma\_region\_demographics
* insights\_country\_demographics
* insights\_age\_demographics
* insights\_delivery\_device
# Feedz
### Using the Erathos platform
When selecting Feedz as a new connector on the Erathos platform, you will need to name your connection and fill in the following form:
* **Token** — your Feedz API v2 integration key, used to authenticate all requests to the Feedz API
With this connection created you can seamlessly move your Feedz data to your BigQuery, Redshift or Postgres data warehouse.
### How to find my token?
To generate your Feedz API token, you must be a **System Administrator** on your Feedz account. Navigate to **Settings → Integrations → API Integration Key v2** and generate a new key.
Once the token is generated, copy it and paste it into the **Token** field on the Erathos platform. Then click **Save and close** to complete the setup.
Note: if you need to test the integration before connecting to production data, Feedz provides a Sandbox environment at `sandbox.feedz.dev` — request access through your Feedz account manager.
## Endpoints and fields
### employees
Sync type availability: Full-refresh
| Field | Type |
| ---------------- | --------- |
| employeeId | text |
| name | text |
| full\_name | text |
| email | text |
| cpf | text |
| admission\_at | timestamp |
| birth\_at | timestamp |
| status | text |
| department | text |
| job\_description | text |
| direct\_manager | text |
| company | text |
| branch | text |
| role | text |
| origin | text |
| team | text |
| groups | text |
### departments
Sync type availability: Full-refresh
| Field | Type |
| ----- | ---- |
| id | text |
| name | text |
### branches
Sync type availability: Full-refresh
| Field | Type |
| ----- | ---- |
| id | text |
| name | text |
### profile\_job\_descriptions
Sync type availability: Full-refresh
| Field | Type |
| -------------- | ---- |
| id | text |
| title | text |
| description | text |
| id\_job\_group | text |
### profile\_job\_groups
Sync type availability: Full-refresh
| Field | Type |
| ----------- | --------- |
| id | text |
| title | text |
| description | text |
| idCompany | text |
| createdAt | timestamp |
| updatedAt | timestamp |
### turnovers
Sync type availability: Full-refresh
| Field | Type |
| --------------------- | --------- |
| id | text |
| reason | text |
| type | text |
| department | text |
| last\_day\_working | timestamp |
| profile.id | text |
| profile.name | text |
| profile.email | text |
| profile.dt\_admission | timestamp |
| profile.status | text |
### digital\_admission
Sync type availability: Full-refresh
| Field | Type |
| ------------------- | --------- |
| id | text |
| name | text |
| email | text |
| deadline\_at | timestamp |
| created\_at | timestamp |
| updated\_at | timestamp |
| profile\_department | text |
| profile\_job | text |
| status | text |
### celebrations
Sync type availability: Full and incremental refresh
[Cursor](/platform/connections/sync-types#understanding-cursors): `dt_create`
| Field | Type | Cursor |
| ----------------- | --------- | ------ |
| id | text | |
| id\_profile\_from | text | |
| id\_profile\_to | text | |
| comment | text | |
| dt\_create | timestamp | ✓ |
### mood
Sync type availability: Full and incremental refresh
[Cursor](/platform/connections/sync-types#understanding-cursors): `date`
| Field | Type | Cursor |
| ----------- | ----- | ------ |
| mood | text | |
| description | text | |
| department | text | |
| branch | text | |
| name | text | |
| average | float | |
| date | date | ✓ |
### objectives
Sync type availability: Full-refresh
| Field | Type |
| ------------------ | ----- |
| id | text |
| id\_parent | text |
| id\_owner | text |
| id\_company | text |
| id\_department | text |
| objective | text |
| percentage\_status | float |
### complete\_survey
Sync type availability: Full-refresh
Parent of [`complete_survey_answers`](#complete_survey_answers)
| Field | Type |
| -------------------- | ---- |
| id | text |
| id\_company | text |
| id\_profile\_created | text |
| title | text |
### complete\_survey\_answers
Sync type availability: Full-refresh
Child of [`complete_survey`](#complete_survey)
| Field | Type |
| ----------------------- | ---- |
| id | text |
| id\_company | text |
| id\_survey | text |
| id\_question | text |
| id\_profile | text |
| id\_profile\_department | text |
### fast\_survey
Sync type availability: Full-refresh
Parent of [`fast_survey_answers`](#fast_survey_answers)
| Field | Type |
| -------------------- | ---- |
| id | text |
| id\_company | text |
| id\_profile\_created | text |
| question | text |
### fast\_survey\_answers
Sync type availability: Full-refresh
Child of [`fast_survey`](#fast_survey)
| Field | Type |
| ---------------- | ----- |
| id | text |
| id\_fast\_survey | text |
| id\_profile | text |
| score | float |
| answer | text |
| answer\_option | text |
### pulse
Sync type availability: Full-refresh
| Field | Type |
| --------------- | ---- |
| id | text |
| id\_company | text |
| id\_profile | text |
| id\_departments | text |
| name | text |
| description | text |
### enps
Sync type availability: Full-refresh
| Field | Type |
| ----------- | --------- |
| dt\_create | timestamp |
| dt\_final | timestamp |
| departments | text |
| detractors | integer |
| passives | integer |
| promoters | integer |
### notifications
Sync type availability: Full and incremental refresh
[Cursor:](/platform/connections/sync-types#understanding-cursors) `dt_created`
| Field | Type | Cursor |
| --------------- | --------- | ------ |
| id | text | |
| link | text | |
| custom\_message | text | |
| dt\_created | timestamp | ✓ |
| message | text | |
## Entity Relationships
```mermaid
erDiagram
complete_survey ||--o{ complete_survey_answers : "id = id_survey"
fast_survey ||--o{ fast_survey_answers : "id = id_fast_survey"
profile_job_groups ||--o{ profile_job_descriptions : "id = id_job_group"
departments ||--o{ objectives : "id = id_department"
departments ||--o{ complete_survey_answers : "id = id_profile_department"
departments ||--o{ pulse : "id = id_departments"
employees { string employeeId PK }
departments { string id PK }
branches { string id PK }
profile_job_descriptions { string id PK }
profile_job_groups { string id PK }
turnovers { string id PK }
digital_admission { string id PK }
celebrations { string id PK }
mood { string mood }
objectives { string id PK }
complete_survey { string id PK }
complete_survey_answers { string id PK }
fast_survey { string id PK }
fast_survey_answers { string id PK }
pulse { string id PK }
enps { timestamp dt_create }
notifications { string id PK }
```
# FreshChat
Find out how to connect FreshChat to your data warehouse effortlessly.
## Using the Erathos platform
When selecting FreshChat as a new connector on the Erathos platform, you will need to name your connection and fill in the following form:

## How to find my FreshChat Domain URL?
For independent Freshchat accounts the URL to access product resources through API requests usually follows the format below:
**https\://\.freshchat.com/v2/\**
Example:
## How to find my FreshChat API Token?
1. Access the **Administrador** tab
2. Click on **configurate**
3. Enter the **API Tokens** page
4. Click on **Generate Token**
5. The authentication server exhibits the access token (API Token)
For integrated FreshChat accounts, available as part of a Freshsales Suite account, the URL will follow this format:
****
## To obtain the API Token:
1. Go to **Settings**
2. Select **Administrator Settings**
3. Then access **Website and API Tracking**
4. Enter the **API Configurations** page
5. Go to the **API Details for chat** section
6. In the **Your API Key** field, the API Token will be exhibited.
With this connection created you can seemlessly move your FreshChat data to your BigQuery, Redshift or Postgres data-warehouse.
## What end´points can I access with the Erathos platform?
* users
* groups
* channels
* roles
* agents
* user\_conversations
* conversations
* messages
# Freshdesk
Find out how to connect Freshdesk to your data warehouse effortlessly.
## Using the Erathos platform
When selecting Freshdesk as a new connector on the Erathos platform, you will need to name your connection and fill in the following form:
.png)
## How to find my Freshdesk API Token?
1. Log in to your account
2. Click on your profile picture in the upper right corner and select Profile settings as in the attachment below:
.png)
3. On the right, click on **View API Key** and complete the captcha verification.
.png)
4. Copy and paste the value exhibited in the Erathos platform API Token field.
## How to find my Freshdesk Domain URL?
1. Log in to your account
2. Access the apps icon in the bottom left
.png)
3. In the left side bar, your Domain URL will be displayed
.png)
Now copy and paste the Domain URL found in the Domain URL field in the Erathos platfom. Don't forget to click on **Save and close** to advance to the next steps of the integration.
With this connection created you can seemlessly move your Freshdesk data to your BigQuery, Redshift or Postgres data-warehouse.
## What endpoints can I access with the Erathos platform?
* tickets
* ticket\_forms
* contacts
* agents
* roles
* groups
* group\_agents
* companies
* time\_entries
* mailboxes
* products
# Gainsight
Find out how to connect Gainsight to your data warehouse effortlessly.
## Using the Erathos platform
When selecting Gainsight as a new connector on the Erathos platform, you will need to name your connection and fill in the following form:

## How to find my API key?
1. Enable the app and navigate to the **Apps** page from the navigation bar.
2. Click on **Configure Next** to API Access.
3. Select the API key in the API details section.
For additional documentation on the API, [*click here*](https://developers.northpass.com/)*.*
Don't forget to copy and paste the key on the Erathos platform API key field and click on **Save and close**.
With this connection created you can seemlessly move your Gainsight data to your BigQuery, Redshift or Postgres data-warehouse.
## What endpoints can I access with the Erathos platform?
* accounts
* engagement\_events
* custom\_events
* engagement\_view\_events
* feature\_match\_events
* form\_submit\_events
* identify\_events
* lead\_events
* page\_view\_events
* segment\_match\_events
* session\_events
* features
* segments
* survey\_responses
* users
# Github
### Using the Erathos platform
When selecting GitHub as a new connector on the Erathos platform, you will need to name your connection and fill in the following form:
* **Token** — your GitHub Personal Access Token used to authenticate API requests
* **Org** — the GitHub organization name whose repositories and members you want to sync
With this connection created you can seamlessly move your GitHub data to your BigQuery, Redshift or Postgres data warehouse.
### How to find my token?
You can generate a Personal Access Token by navigating to **Settings > Developer settings > Personal access tokens > Tokens (classic)** inside your GitHub account. Click **Generate new token**, give it a descriptive name, set the desired expiration, and select the scopes your integration requires — at minimum `repo` (to read repository data) and `read:org` (to read organization members).
Once generated, copy the token value immediately — GitHub will not show it again. Paste the value into the Erathos platform **Token** field. For the **Org** field, enter your organization's name exactly as it appears in your GitHub organization URL (e.g. `my-company` from `github.com/my-company`). Don't forget to click on **Save and close** to advance to the next steps of the integration.
### What endpoints can I access with the Erathos platform?
* repositories
* members
* issues
* pull\_requests
* commits
# Google Ads
Find out how to connect Google Ads to your data warehouse effortlessly.
## Using the Erathos platform:
When selecting Google Ads as a new connector on the Erathos platform, you will need to authorize the connection by simply logging into the Google Ads account associated with your browser.
Just click on '**Authorize Google Ads**'.
Don't forget to click on **Save and close** to advance to the next steps of the integration.
With this connection created you can seemlessly move your Google Ads data to your BigQuery, Redshift or Postgres data-warehouse.
## What endpoints have metrics information?
In the Google Ads connection, all jobs with the `_stats` suffix contain performance metrics such as **CTA, CTR, spend, CPA**, and others.
These jobs are organized according to the Google Ads hierarchy, including levels such as **ad**, **ad group**, and **campaign**.
**Examples:**
* `campaign`
* `campaign_stats`
* `adgroup`
* `adgroup_stats`
* `ad_group_ad`
* `ad_group_ad_stats`
# Hotmart
Find out how to connect Hotmart to your data warehouse effortlessly.
## Using the Erathos platform
When selecting Hotmart as a new connector on the Erathos platform, you will need to name your connection and fill in the following form:
## How to generate Hotmart credentials?
* On Hotmart platform, go to **Tools >** [**Developer Credentials**](https://app-vlc.hotmart.com/tools/credentials)
* Click the **Create Credential** button and give your credential a name. This name is just to better organize your credentials.
* If you are going to use this Credential for our test environment **sandbox**, check the sandbox option in the *Type* field. If the Credential is for the production environment, just leave the box blank and click the Confirm button. Once created, you won't be able to change the type of a credential, but you must create a new one with the desired type.
* If everything goes well, three pieces of information will be generated: `client_id`, `client_secret` and `token` of the Basic type.
\
For further support, go to the [hotmart documentation](https://developers.hotmart.com/docs/en/start/app-auth).
## What endpoints can I access with Erathos platform?
| Endpoints |
| ------------------- |
| coupons |
| modules |
| pages |
| price\_details |
| products |
| sales\_comission |
| sales\_history |
| sales\_participants |
| subscriptions |
| user\_progress |
| users |
# HubSpot
Find out how to connect HubSpot to your data warehouse effortlessly.
## Using the Erathos platform:
### Creating a data pipeline with HubSpot data
#### Connect to HubSpot
* Using Erathos click in **explore** **data sources** or in connectors on the left side menu (the second icon).
* Select HubSpot connector and name your connection
When selecting HubSpot as a new connector on the Erathos platform, you will need to authorize the connection by simply logging into the HubSpot account associated with your browser.
Just click on '**Authorize integration**' as shown in the attachment below:
* Select the proper HubSpot account
* Connect app
Don't forget to click on **Save and test** to advance to the next steps of the integration.
#### Manage Jobs
With this connection created you can seemlessly move your HubSpot data to your BigQuery, Redshift or Postgres data-warehouse.
* Click in manage jobs to select endpoints and schedule pipeline runs.
* Name your schema
* Your schema name is where all the tables will be created (you won't be able to change this later)
* Activate jobs
* Select a [sync frequency](https://docs.erathos.com/platform/connections/sync-schedule#frequency)
* Select a [sync type](https://docs.erathos.com/platform/connections/sync-types)
* Select a [sync time](https://docs.erathos.com/platform/connections/sync-schedule#frequency)
* Select fields (optional)
* Click "Open" beside the endpoint name to see all the fields available
* If you don't to this, all the fields will be selected automatically.
* All the tables in your data warehouse will be the same as the endpoint name
#### Create a destination
* Click in settings on the left side menu
* Go to destination in the workspace menu
* Select the chosen destination and fill the necessary information to connect
* [BigQuery self hosted](https://docs.erathos.com/destinations/bigquery)
* [BigQuery hosted by Erathos](/destinations/what-is-a-destination/bigquery/hosted-by-erathos) (in case that you don't have a data warehouse yet)
* [Databricks](https://docs.erathos.com/destinations/databricks)
* [PostgreSQL](https://docs.erathos.com/destinations/postgresql)
* [Redshift](https://docs.erathos.com/destinations/redshift)
* [S3 Iceberg](https://docs.erathos.com/destinations/s3-iceberg)
{% hint style="warning" %}
If you use 'bulk actions' to change properties in HubSpot, we recommend manually executing a Full Refresh afterward. The HubSpot API does not properly update the 'updated\_at' field when bulk actions are performed, which can lead to inconsistencies in the API response."
{% endhint %}
### Disconnect the app
* Login and click on the HubSpot connection
* Go to the settings tab
* Delete connection
**Note:** If you delete the connection you will still have access to the data in your destination, but it will not be up-to-date anymore.
* You can also uninstall the app in HubSpot, please check the "Uninstall an app" topic on the following documentation: [Uninstall an app](https://knowledge.hubspot.com/integrations/connect-apps-to-hubspot?_ga=2.94035293.1315053923.1752660941-1718272043.1752660941#uninstall-an-app)
## What endpoints can I access with the Erathos platform?
* communications
* deal\_history
* contacts\_tickets\_associations
* contacts\_deals\_associations
* feedback\_submissions
* line\_items
* products
* quotes
* goal\_targets
* calls
* emails
* meetings
* notes
* postal\_mail
* tasks
* owners
* deals\_pipelines
* tickets\_pipelines
* companies
* deals\_tickets\_associations
* deals
* contacts
* tickets
* companies\_tasks\_associations
* companies\_calls\_associations
* deals\_tasks\_associations
* deals\_calls\_associations
* companies\_contacts\_associations
* companies\_deals\_associations
* companies\_tickets\_associations
* contacts\_meetings\_associations
* contacts\_calls\_associations
* contacts\_emails\_associations
* contacts\_communications\_associations
* tickets\_meetings\_associations
* tickets\_calls\_associations
* tickets\_emails\_associations
* tickets\_communications\_associations
* analytics\_reports\_sources
* analytics\_reports\_sources\_breakdowns
* marketing\_emails
* form\_submission
# Intelipost
### Using the Erathos platform
When selecting Intelipost as a new connector on the Erathos platform, you will need to name your connection and fill in the following form:
* **API Key** — Your Intelipost API key, used to authenticate all requests to the API
With this connection created you can seamlessly move your Intelipost data to your BigQuery, Redshift or Postgres data warehouse.
### How to find my token?
You can find your API Key inside the Intelipost platform by navigating to **Settings → Integrations → API Keys** in your account.
Now, paste the value in the Erathos platform API Key field. Don't forget to click on **Save and close** to advance to the next steps of the integration.
### What endpoints can I access with the Erathos platform?
* delivery\_methods
* shipment\_order
# Intercom
Find out how to connect Intercom to your data warehouse effortlessly.
## Using the Erathos platform
When selecting Intercom as a new connector on the Erathos platform, you will need to name your connection and fill in the following form:

## How to find my token?
You can find your Access Token following this path **Configure > Authentication** inside Intercom's Developer Hub.

Now, paste the value in the Erathos platform Token field. Don't forget to click on **Save and close** to advance to the next steps of the integration.
With this connection created you can seemlessly move your Intercom data to your BigQuery, Redshift or Postgres data-warehouse.
## What endpoints can I access with the Erathos platform?
* company\_attached\_contacts
* help\_centers
* segments
* companies
* admins
* articles
* contacts
* notes
* conversations
* collections
* subscription\_types
* tags
* teams
* tickets
* activity\_logs
# Jira
Find out how to connect Jira to your data warehouse effortlessly.
## Using the Erathos platform
When selecting Jira as a new connector on the Erathos platform, you will need to name your connection and fill in the following form:

### How to find my Domain URL?
1. Access Jira Software on your browser
2. Copy the URL displayed on your search bar. You may have to click on the bar to see the complete URL.
3. If you're on the dashboard page, the URL will be everything up until **/secure/Dashboard.jspa**
4. If you're observing an isse, the URL will be everything up until **/browse**
5. If you're accessing a project or board, the URL will be everything up until **project** or **/secure/RapidBoard.jspa**
⚠️ In case your URL looks something like [mycompany.atlassian.net](http://mycompany.atlassian.net), that means you'reusing Jira Cloud, therefore you must download the Jira Cloud app.
### How to generate an API Token?
1. Access .
2. Click on Create API Token.
3. A text box will appear, in which you must insert a short and memorable name for the token you wish to create.
4. Copy the new token and paste it on the User API Token field in the Erathos platform.

Don't forget to click on **Save and close** to proceed to the next steps of the integration!
With this connection created you can seemlessly move your Jira data to your BigQuery, Redshift or Postgres data-warehouse.
## What endpoints can I access with the Erathos platform?
* projects
* project\_details
* project\_status
* project\_categories
* users
* user\_groups
* groups
* issue\_worklogs
* dashboards
* issues
* issue\_subtasks
* issue\_comments
* issue\_components
* issue\_links
* issue\_changelogs
* events
# LangSmith
### Using the Erathos platform
When selecting LangSmith as a new connector on the Erathos platform, you will need to name your connection and fill in the following form:
* **Token** — Your LangSmith personal API key, used to authenticate all requests to the LangSmith API.
### How to find my token?
You can find your API key by navigating to **Settings → API Keys** inside the LangSmith platform at [smith.langchain.com](https://smith.langchain.com). Click **Create API Key**, give it a name, and copy the generated value.
Now, paste the value in the Erathos platform Token field. Don't forget to click on **Save and close** to advance to the next steps of the integration.
With this connection created you can seamlessly move your LangSmith data to your BigQuery, Redshift or Postgres data warehouse.
### What endpoints can I access with the Erathos platform?
* sessions
* datasets
* examples
* feedback
* repos
* runs
# Linear
Find out how to connect Linear to your data warehouse effortlessly.
### Using the Erathos platform
When selecting Linear as a new connector on the Erathos platform, you will need to name your connection and fill in the following form:
* **Token** — your Linear Personal API Key
With this connection created you can seamlessly move your Linear data to your BigQuery, Redshift or Postgres data warehouse.
### How to find my token?
You can generate a Personal API Key by navigating to **Settings > API > Personal API keys** inside your Linear workspace.
Click **Create key**, give it a name, and copy the generated key. Paste the value into the Erathos platform **Token** field. Don't forget to click on **Save and close** to advance to the next steps of the integration.
### What endpoints can I access with the Erathos platform?
* issues
* teams
* users
* projects
* workflow\_states
* cycles
* issue\_labels
* comments
# Linkedin Ads
Find out how to connect Linkedin Ads to your data warehouse effortlessly.
## Using the Erathos platform:
When selecting Linkedin Ads as a new connector on the Erathos platform, you will need to authorize the connection by simply logging into the Linkedin Ads account associated with your browser.
Just click on '**Authorize Linkedin Ads**' as shown in the attachment below:

Don't forget to click on **Save and close** to advance to the next steps of the integration.
With this connection created you can seemlessly move your Linkedin Ads data to your BigQuery, Redshift or Postgres data-warehouse.
## What endpoints can I access with the Erathos platform?
* ad\_accounts
* account\_users
* campaign\_groups
* campaigns
* creatives
* organizations
* industries
* metrics\_campaign\_creative\_projection
* metrics\_creative\_content\_projection
* metrics\_member\_industry\_projection
* metrics\_campaign\_conversion
* metrics\_member\_company\_projection
# MailChimp
Find out how to connect MailChimp to your data warehouse effortlessly.
## Using the Erathos platform
When selecting MailChimp as a new connector on the Erathos platform, you will need to name your connection and fill in the following form:

## How to find my MailChimp API Token?
1. Log in to your account
2. Click on your profile to expand the account pannel and select **Account settings**.
3. Click on the **Extras** menu and select **API Keys**. Copy an existent API key or click on Create a Key.
Now paste the found value on the Erathos platform Token field. Don't forget to click on **Save and close** to advance to the next steps of the integration.
With this connection created you can seemlessly move your MailChimpdata to your BigQuery, Redshift or Postgres data-warehouse.
## What endpoints can I access with the Erathos platform?
* allowlists
* exports
* ip\_addresses
* ip\_pools
* inbound\_domains
* mailbox\_routes
* scheduled\_emails
* denylisted\_emails
* account\_senders
* sender\_domains
* subaccounts
* tags
* templates
* tracking\_domains
* senders
* allowlisted\_emails
# MailGun
Find out how to connect MailGun to your data warehouse effortlessly.
## Using the Erathos platform
When selecting MailGun as a new connector on the Erathos platform, you will need to name your connection and fill in the following form:

## How to find my MailGun API Token?
1. Access the Mail Gun control panel
2. Click on Account Settings, located on the upper right corner of the page
3. Click on API Security
## How to find my MailGun Domain Name?
1. Access the Mail Gun controle panel
2. Then, on the **navigation panel to the left**, click on the option **Sending** to expand your suboption list
3. Click on the **Domains** suboption to view them
Now paste the API Token and Domain Name values found on the Erathos platform form. Don't forget to click on **Save and close** to advance to the next steps of the integration.
With this connection created you can seemlessly move your MailGun data to your BigQuery, Redshift or Postgres data-warehouse.
## What endpoints can I access with the Erathos platform?
* ips
* events
* routes
# MeetRox
Find out how to connect MeetRox to your data warehouse effortlessly.
## How to find my API Key?
1. Log in to the [MeetRox platform](https://app.meetrox.ai/) and navigate to **Manage > Settings > API Keys** to generate your key.
2. Only users with **manager** permissions can generate an API key.
## What endpoints can I access with the Erathos platform?
* calls
* call\_details
# MercadoLibre
Find out how to connect MercadoLibre to your data warehouse effortlessly.
## Using the Erathos platform
When selecting MercadoLibre as a new connector on the Erathos platform, you will need to authorize the connection by simply logging into the MercadoLibre account associated with your browser.
Just click on '**Authorize MercadoLibre**' as shown in the attachment below:
Follow the steps in the pop-up window to confirm authorization.
Don't forget to click on **Save and close** to advance to the next steps of the integration.
With this connection created you can seemlessly move your MercadoLibre data to your [data warehouse](/destinations/what-is-a-destination).
{% hint style="danger" %}
You must be logged in as the **owner** of the MercadoLibre account.
{% endhint %}
### What endpoints can I access with the Erathos platform?
| MercadoLibre endpoints |
| ---------------------- |
| inventory\_stock |
| items |
| orders |
{% hint style="info" %}
You can suggest new endpoints and connectors [here](https://erathos.notion.site/1370250b751080bcbdc7de95225f6008?pvs=105).
{% endhint %}
# Mixpanel
Find out how to connect Mixpanel to your data warehouse effortlessly.
## Using the Erathos platform
When selecting Mixpanel as a new connector on the Erathos platform, you will need to name your connection and fill in the following form:

## How to find my Password and Username credentials?
To create a service account you must:
1. Access the Project Settings or Organization Settings page
2. Select the Service Account option
3. Copy the exhibited values (in this case **Password** can appear as **Secret**)

## How to find my Project ID credenctial?
To find the project informations you must:
1. Enter the Organtization Settings page
2. Select the Projects option
3. Click on the project which you need the informations from
Now paste the three credential values found on the Erathos platform form. Don't forget to click on **Save and close** to advance to the next steps of the integration.
With this connection created you can seemlessly move your Mixpanel data to your BigQuery, Redshift or Postgres data-warehouse.
## What endpoints can I access with the Erathos platform?
* export
# Monday
Find out how to connect Monday to your data warehouse effortlessly.
## Using the Erathos platform
When selecting Monday as a new connector on the Erathos platform, you will need to name your connection and fill in the following form:

## How to find my API Token?
### Through the Admin Tab:
1. Log in to your account
2. Click on your profile picture in the top right corner.
3. Select **Administration** > **Connections** > **API**.
4. Copy your personal token.
**Warning**: you can always regenerate a new token, but doing so will cause any previous tokens to expire.
### Through the Developer tab:
1. Log in to your account
2. Click on your profile picture in the top right corner.
3. Select **Developers**. This will open the *Developer Center* in another tab.
4. Click **My Access Tokens** > **Show**.
**Warning**: you can always regenerate a new token, but doing so will cause any previous tokens to expire.
Don't forget to copy and paste the token on the Erathos platform Token field and click on **Save and close**.
With this connection created you can seemlessly move your Monday data to your BigQuery, Redshift or Postgres data-warehouse.
## What endpoints can I access with the Erathos platform?
* boards
* activity\_logs
* groups
* items
* folders
* teams
* users
* workspaces
* docs
# Movidesk
Find out how to connect Movidesk to your data warehouse effortlessly.
## Using the Erathos platform
When selecting Movidesk as a new connector on the Erathos platform, you will need to name your connection and fill in the following form:

## How to find my API Token?
1. Log in to your account;
2. Go to **Settings > Account > Parameters**
3. In the environment guide, click on **Generate new key**
You can follow these steps as many times as you need, but keep in mind that by generating a new key all integrations that use the past key will stop.
Don't forget to copy and paste the token on the Erathos platform Token field and click on **Save and close**.
With this connection created you can seemlessly move your Movidesk data to your BigQuery, Redshift or Postgres data-warehouse.
## What information can I bring to my data-warehouse with the Erathos platform?
* persons
* tickets
* timeAgreement
* surveys\_questions
* surveys\_responses
* activities
* timeAgreementConsumption
* tickets\_past
# Nomus ERP
### Using the Erathos platform
When selecting Nomus ERP as a new connector on the Erathos platform, you will need to name your connection and fill in the following form:
* **Empresa** — the company subdomain used in your Nomus ERP URL (e.g. `mycompany` from `mycompany.nomus.com.br`)
* **API Key** — the REST integration key from your Nomus ERP general configuration screen
With this connection created you can seamlessly move your Nomus ERP data to your BigQuery, Redshift or Postgres data warehouse.
### How to find my token?
You can find your API Key inside Nomus ERP by navigating to **Configurações Gerais** (General Configuration). Look for the field labelled **chave-integração-rest** — this is the static REST integration key used to authenticate all API requests.
Copy the value of **chave-integração-rest** and paste it into the **API Key** field on the Erathos platform. Don't forget to click on **Save and close** to advance to the next steps of the integration.
### What endpoints can I access with the Erathos platform?
* pessoas
* representantes
* vendedores
* clientes
* produtos
* familias\_produto
* grupos\_produto
* tipos\_produto
* unidades\_medida
* atributos\_produto
* tabelas\_preco
* pedidos
* propostas
* notas\_credito\_cliente
* pedidos\_compra
* solicitacoes
* notas\_credito\_fornecedor
* contas\_receber
* contas\_pagar
* boletos
* recebimentos
* pagamentos
* condicoes\_pagamentos
* formas\_pagamento
* contas\_bancarias
* tipos\_movimentacao
* nfes
* nfses
* setor\_estoque
* movimentacoes\_estoque
* documentos\_estoque
* ordens
* apontamentos
* empenhos
* operacoes\_roteiro\_ordem
* inventarios
* atividades
* centros\_trabalho
* centros\_custo
* recursos
* causas\_problemas
* componentes\_lista\_materiais
* roteiros\_produto
* processos
* contratos\_servico
* empresas
* usuarios
# Notion
Connect your Notion workspace to your data warehouse. Sync pages, blocks, users, and comments to BigQuery, Redshift, Postgres, Databricks, and more.
## Using the Erathos platform
When selecting Notion as a new connector on the Erathos platform, you will need to name your connection and fill in the following form:
* **Token** — your Notion internal integration token, used to authenticate all requests to the Notion API
With this connection created you can seamlessly move your Notion data to your BigQuery, Redshift or Postgres data warehouse.
### How to find my token?
To generate a Notion integration token, go to and click **New integration**. Give it a name, select the workspace you want to connect, and click **Submit**.
After creating the integration, copy the **Internal Integration Token** shown on the integration settings page. Then go to each Notion page or database you want to sync and add the integration under **Share → Invite**, granting it the appropriate access level.
Paste the token into the **Token** field on the Erathos platform and click **Save and close** to complete the setup.
## Endpoints and fields
### users
Sync type availability: Full-refresh
| Field | Type |
| ----------- | ---- |
| id | text |
| name | text |
| type | text |
| avatar\_url | text |
### pages
Sync type availability: Full and incremental refresh
[Cursor](https://docs.erathos.com/platform/connections/sync-types#understanding-cursors): `last_edited_time`
Parent of [blocks](#blocks), [comments](#comments)
| Field | Type | Cursor |
| ------------------ | --------- | ------ |
| id | text | |
| created\_time | timestamp | |
| last\_edited\_time | timestamp | ✓ |
| archived | boolean | |
| url | text | |
| parent.type | text | |
### blocks
Sync type availability: Full-refresh
Child of [pages](#pages)
| Field | Type |
| ------------------ | --------- |
| id | text |
| type | text |
| created\_time | timestamp |
| last\_edited\_time | timestamp |
| has\_children | boolean |
| archived | boolean |
### comments
Sync type availability: Full-refresh
Child of [pages](#pages)
| Field | Type |
| ------------------ | --------- |
| id | text |
| discussion\_id | text |
| created\_time | timestamp |
| last\_edited\_time | timestamp |
| created\_by.id | text |
| parent.type | text |
## Entity Relationships
```mermaid
erDiagram
pages ||--o{ blocks : "id = page_id"
pages ||--o{ comments : "id = page_id"
users ||--o{ comments : "id = created_by.id"
users { text id PK }
pages { text id PK }
blocks { text id PK }
comments { text id PK }
```
# Nuvia API
Connect your Nuvia API to your data warehouse. Sync conversations, contacts, campaigns, and knowledge data to BigQuery, Redshift, Postgres, Databricks, and more.
## Using the Erathos platform
When selecting Nuvia API as a new connector on the Erathos platform, you will need to name your connection and fill in the following form:
* **Token** — your Nuvia API bearer token used to authenticate API requests
With this connection created you can seamlessly move your Nuvia API data to your BigQuery, Redshift or Postgres data warehouse.
### How to find my token?
To obtain your Nuvia API token, log in to your Nuvia account and navigate to **Settings → Integrations → API Keys**. If you don't already have an API key, create a new one by clicking the appropriate button and copying the generated value.
Paste the token into the **Token** field on the Erathos platform connection form.
Click **Save and close** to complete setup. Your Nuvia API connection is now ready to sync data to your data warehouse.
## Endpoints and fields
### agents
Sync type availability: Full-refresh
| Field | Type |
| ----------- | --------- |
| id | integer |
| name | text |
| description | text |
| model | text |
| status | text |
| createdAt | timestamp |
| updatedAt | timestamp |
### campaigns
Sync type availability: Full-refresh
Parent of [campaign\_enrollments](#campaign_enrollments)
| Field | Type |
| --------- | --------- |
| id | integer |
| name | text |
| status | text |
| type | text |
| createdAt | timestamp |
| updatedAt | timestamp |
### campaign\_enrollments
Sync type availability: Full-refresh
Child of [campaigns](#campaigns)
| Field | Type |
| ---------- | --------- |
| id | integer |
| campaignId | integer |
| contactId | integer |
| status | text |
| createdAt | timestamp |
| updatedAt | timestamp |
### contacts
Sync type availability: Full-refresh
| Field | Type |
| --------- | --------- |
| id | integer |
| name | text |
| email | text |
| phone | text |
| status | text |
| createdAt | timestamp |
| updatedAt | timestamp |
### conversations
Sync type availability: Full and incremental refresh
[Cursor](https://docs.erathos.com/platform/connections/sync-types#understanding-cursors): `createdAt`
Parent of [messages](#messages)
| Field | Type | Cursor |
| --------- | --------- | ------ |
| id | integer | |
| subject | text | |
| status | text | |
| agentId | integer | |
| contactId | integer | |
| createdAt | timestamp | ✓ |
| updatedAt | timestamp | |
### inboxes
Sync type availability: Full-refresh
| Field | Type |
| --------- | --------- |
| id | integer |
| name | text |
| email | text |
| type | text |
| createdAt | timestamp |
| updatedAt | timestamp |
### knowledge
Sync type availability: Full-refresh
| Field | Type |
| --------- | --------- |
| id | integer |
| title | text |
| type | text |
| status | text |
| createdAt | timestamp |
| updatedAt | timestamp |
### messages
Sync type availability: Full-refresh
Child of [conversations](#conversations)
| Field | Type |
| -------------- | --------- |
| id | integer |
| conversationId | integer |
| content | text |
| type | text |
| sender | text |
| createdAt | timestamp |
| updatedAt | timestamp |
### tables
Sync type availability: Full and incremental refresh
[Cursor](https://docs.erathos.com/platform/connections/sync-types#understanding-cursors): `updatedAt`
Parent of [table\_rows](#table_rows)
| Field | Type | Cursor |
| ----------- | --------- | ------ |
| id | integer | |
| name | text | |
| description | text | |
| createdAt | timestamp | |
| updatedAt | timestamp | ✓ |
### table\_rows
Sync type availability: Full-refresh
Child of [tables](#tables)
| Field | Type |
| --------- | --------- |
| id | integer |
| tableId | integer |
| data | json |
| createdAt | timestamp |
| updatedAt | timestamp |
## Entity Relationships
```mermaid
erDiagram
campaigns ||--o{ campaign_enrollments : "id = campaignId"
contacts ||--o{ campaign_enrollments : "id = contactId"
conversations ||--o{ messages : "id = conversationId"
agents ||--o{ conversations : "id = agentId"
contacts ||--o{ conversations : "id = contactId"
tables ||--o{ table_rows : "id = tableId"
agents {
integer id PK
text name
text description
text model
text status
timestamp createdAt
timestamp updatedAt
}
campaigns {
integer id PK
text name
text status
text type
timestamp createdAt
timestamp updatedAt
}
campaign_enrollments {
integer id PK
integer campaignId
integer contactId
text status
timestamp createdAt
timestamp updatedAt
}
contacts {
integer id PK
text name
text email
text phone
text status
timestamp createdAt
timestamp updatedAt
}
conversations {
integer id PK
text subject
text status
integer agentId
integer contactId
timestamp createdAt
timestamp updatedAt
}
inboxes {
integer id PK
text name
text email
text type
timestamp createdAt
timestamp updatedAt
}
knowledge {
integer id PK
text title
text type
text status
timestamp createdAt
timestamp updatedAt
}
messages {
integer id PK
integer conversationId
text content
text type
text sender
timestamp createdAt
timestamp updatedAt
}
tables {
integer id PK
text name
text description
timestamp createdAt
timestamp updatedAt
}
table_rows {
integer id PK
integer tableId
json data
timestamp createdAt
timestamp updatedAt
}
```
# Octadesk
### Using the Erathos platform
When selecting Octadesk as a new connector on the Erathos platform, you will need to name your connection and fill in the following form:
* **URL** — The base URL of your Octadesk account (e.g. `https://yourcompany.octadesk.services`)
* **Token** — Your Octadesk API key, used to authenticate all requests
* **Agent Email** — The email address of the Octadesk agent associated with the API key
With this connection created you can seamlessly move your Octadesk data to your BigQuery, Redshift or Postgres data warehouse.
### How to find my token?
You can find your API Key inside your Octadesk account by navigating to **Settings > WhatsApp API > Generate API Key** (Gerar apiKey). Copy the key that is displayed.
Paste the value into the Erathos platform **Token** field. In the **Agent Email** field, enter the email address of the Octadesk agent under whose credentials the API key was generated. In the **URL** field, enter your account's base URL, which can also be found under **Settings > WhatsApp API > Base URL**. Don't forget to click on **Save and close** to advance to the next steps of the integration.
### What endpoints can I access with the Erathos platform?
* chats
* messages
* events
* contacts
* tickets
* ticket\_interactions
* ticket\_tags
* ticket\_groups
* ticket\_forms
* ticket\_priorities
* ticket\_types
* ticket\_channels
* ticket\_status
* organizations
* survey\_submissions
# Omie
Find out how to connect Omie to your data warehouse effortlessly.
## Using the Erathos platform
When selecting **Omie** as a new connector on the Erathos platform, you will need to name your connection and fill in the following form:

## Obtaining these informations through **My Apps**
1. Log in to your account
.png)
2. Click on the Settings button and select App Summary
.png)
3. Navigate to the end of the page to find your **Integration Key**
.png)
## Obtaining these informations through **Developer**
1. Log in to your account
2. In your browser, open another tab and access this link: to the Developer Area
3. Click on **Apps** to find the credentials
.png)
4. Copy the App Key and App Secret
.png)
Now paste the copied values in the Erathos platform accordingly. Don't forget to click on **Save and close** to advance to the next steps of the integration.
With this connection created you can seemlessly move your Omie data to your BigQuery, Redshift or Postgres data-warehouse.
## What endpoints can I access with the Erathos platform?
* tabela\_precos\_itens
* formas\_pagamento\_vendas
* caracteristicas\_produtos
* etapas\_faturamento
* meios\_pagamento
* origem\_pedidos
* notas\_fiscais
* pedidos
* etapas\_pedidos
* remessas
* servicos
* ordens\_servicos
* contratos\_servicos
* servicos\_municipio
* formas\_pagamento\_servicos
* tipo\_contrato
* classificao\_servico
* notas\_fiscais\_servicos
* posicao\_estoque
* clientes
* projetos
* empresas
* departamentos
* categorias
* parcelas
* tipo\_atividade
* cnaes
* cidades
* paises
* tipos\_anexos
* tipos\_entrega
* tipo\_assinante
* crm\_contas
* crm\_contatos
* crm\_oportunidades
* crm\_tarefas
* crm\_solucoes
* crm\_fases
* crm\_usuarios
* crm\_status
* crm\_motivos
* crm\_tipos
* crm\_parceiros
* crm\_finders
* crm\_origens
* crm\_concorrentes
* crm\_verticais
* crm\_tipostarefa
* conta\_corrente
* conta\_corrente\_lancamentos
* conta\_pagar
* conta\_receber
* movimento\_financeiro
* bancos
* tipos\_documentos
* tipos\_contas\_correntes
* dre
* finalidade\_transferencia
* origem\_lancamento
* produtos
* produtos\_caracteristicas
* produtos\_estruturas
* ordem\_de\_producao
* notas\_de\_entrada
* recebimentos
* familias\_produtos
* unidades\_produtos
* compradores
* fornecedores
* formas\_pagamentos\_compras
* ncms
* cfop
* cst
* ajuste\_estoque
* movimento\_estoque
* locais\_estoque
* cupons\_fiscais
* cupons\_fiscais\_itens
* tabela\_precos
* pedidos\_lista\_parcelas\_parcelas
* pedidos\_det
* notas\_fiscais\_det
# OpenAI Ads
Connect your OpenAI Ads to your data warehouse. Sync campaigns, ads, insights, conversions, and feeds to BigQuery, Redshift, Postgres, Databricks, and more.
## Using the Erathos platform
When selecting OpenAI Ads as a new connector on the Erathos platform, you will need to name your connection and fill in the following form:
* **Token** — your OpenAI Ads API key, a bearer token scoped to a single ad account, used to authenticate all requests to the OpenAI Ads API
With this connection created you can seamlessly move your OpenAI Ads data to your BigQuery, Redshift or Postgres data warehouse.
### How to find my token?
OpenAI Ads authenticates with a bearer API key issued from Ads Manager. Sign in to the ad account you want to sync, go to **Settings → Integrations → API Keys**, and create a new API key. Note that each key is scoped to a single ad account — generate it from the account whose data you want to bring into Erathos.
Copy the generated key and keep it secure. The authentication scheme is documented in the [OpenAI Ads API reference](https://developers.openai.com/ads/api-reference/authentication), where you can also verify your key's scopes and permissions.
Paste the key into the **Token** field on the Erathos platform and click **Save and close** to complete the setup.
## Endpoints and fields
### ad\_account
Sync type availability: Full-refresh
Parent of [lead\_sync\_subscriptions](#lead_sync_subscriptions)
| Field | Type |
| -------------- | --------- |
| id | text |
| name | text |
| status | text |
| currency | text |
| country | text |
| timezone\_name | text |
| business\_id | text |
| created\_at | timestamp |
| updated\_at | timestamp |
### ad\_account\_insights
Sync type availability: Full and incremental refresh
[Cursor](https://docs.erathos.com/platform/connections/sync-types#understanding-cursors): `updated_at`
| Field | Type | Cursor |
| ----------- | ------- | ------ |
| impressions | integer | |
| clicks | integer | |
| spend | float | |
| conversions | integer | |
| currency | text | |
| updated\_at | date | ✓ |
### ad\_accounts
Sync type availability: Full-refresh
| Field | Type |
| -------------- | --------- |
| id | text |
| name | text |
| status | text |
| currency | text |
| country | text |
| timezone\_name | text |
| created\_at | timestamp |
| updated\_at | timestamp |
### ad\_group\_insights
Sync type availability: Full and incremental refresh
[Cursor](https://docs.erathos.com/platform/connections/sync-types#understanding-cursors): `updated_at`
Child of [ad\_groups](#ad_groups)
| Field | Type | Cursor |
| ------------- | ------- | ------ |
| ad\_group\_id | text | |
| impressions | integer | |
| clicks | integer | |
| spend | float | |
| conversions | integer | |
| currency | text | |
| updated\_at | date | ✓ |
### ad\_groups
Sync type availability: Full-refresh
Parent of [ad\_group\_insights](#ad_group_insights)
| Field | Type |
| ------------- | --------- |
| id | text |
| name | text |
| campaign\_id | text |
| status | text |
| daily\_budget | float |
| bid\_strategy | text |
| start\_time | timestamp |
| end\_time | timestamp |
| created\_at | timestamp |
| updated\_at | timestamp |
### ad\_insights
Sync type availability: Full and incremental refresh
[Cursor](https://docs.erathos.com/platform/connections/sync-types#understanding-cursors): `updated_at`
Child of [ads](#ads)
| Field | Type | Cursor |
| ----------- | ------- | ------ |
| ad\_id | text | |
| impressions | integer | |
| clicks | integer | |
| spend | float | |
| conversions | integer | |
| currency | text | |
| updated\_at | date | ✓ |
### ads
Sync type availability: Full-refresh
Parent of [ad\_insights](#ad_insights)
| Field | Type |
| ------------- | --------- |
| id | text |
| name | text |
| ad\_group\_id | text |
| status | text |
| format | text |
| created\_at | timestamp |
| updated\_at | timestamp |
### bulk\_mutation\_job
Sync type availability: Full-refresh
Parent of [bulk\_mutation\_job\_operations](#bulk_mutation_job_operations)
| Field | Type |
| ---------------- | --------- |
| id | text |
| status | text |
| operation\_count | integer |
| created\_at | timestamp |
| completed\_at | timestamp |
| updated\_at | timestamp |
### bulk\_mutation\_job\_operations
Sync type availability: Full-refresh
Child of [bulk\_mutation\_job](#bulk_mutation_job)
| Field | Type |
| -------------- | --------- |
| id | text |
| type | text |
| status | text |
| entity\_id | text |
| error\_message | text |
| created\_at | timestamp |
### campaign\_insights
Sync type availability: Full and incremental refresh
[Cursor](https://docs.erathos.com/platform/connections/sync-types#understanding-cursors): `updated_at`
Child of [campaigns](#campaigns)
| Field | Type | Cursor |
| ------------ | ------- | ------ |
| campaign\_id | text | |
| impressions | integer | |
| clicks | integer | |
| spend | float | |
| conversions | integer | |
| currency | text | |
| updated\_at | date | ✓ |
### campaigns
Sync type availability: Full-refresh
Parent of [campaign\_insights](#campaign_insights)
| Field | Type |
| ---------------- | --------- |
| id | text |
| name | text |
| objective | text |
| status | text |
| daily\_budget | float |
| lifetime\_budget | float |
| start\_time | timestamp |
| end\_time | timestamp |
| created\_at | timestamp |
| updated\_at | timestamp |
### conversions\_event\_settings
Sync type availability: Full-refresh
| Field | Type |
| -------------- | --------- |
| id | text |
| event\_name | text |
| status | text |
| default\_value | float |
| currency | text |
| created\_at | timestamp |
| updated\_at | timestamp |
### conversions\_events
Sync type availability: Full-refresh
Child of [conversions\_pixels](#conversions_pixels)
| Field | Type |
| ------------------ | --------- |
| id | text |
| event\_name | text |
| event\_time | timestamp |
| event\_source\_url | text |
| value | float |
| currency | text |
### conversions\_insights
Sync type availability: Full and incremental refresh
[Cursor](https://docs.erathos.com/platform/connections/sync-types#understanding-cursors): `updated_at`
| Field | Type | Cursor |
| ----------------- | ------- | ------ |
| event\_name | text | |
| conversions | integer | |
| conversion\_value | float | |
| currency | text | |
| updated\_at | date | ✓ |
### conversions\_pixels
Sync type availability: Full-refresh
Parent of [conversions\_events](#conversions_events)
| Field | Type |
| ----------- | --------- |
| id | text |
| name | text |
| status | text |
| created\_at | timestamp |
| updated\_at | timestamp |
### custom\_audience\_operations
Sync type availability: Full-refresh
Child of [custom\_audiences](#custom_audiences)
| Field | Type |
| -------------- | --------- |
| id | text |
| type | text |
| status | text |
| payload\_count | integer |
| created\_at | timestamp |
| updated\_at | timestamp |
### custom\_audiences
Sync type availability: Full-refresh
Parent of [custom\_audience\_operations](#custom_audience_operations)
| Field | Type |
| ----------------- | --------- |
| id | text |
| name | text |
| type | text |
| description | text |
| approximate\_size | integer |
| status | text |
| created\_at | timestamp |
| updated\_at | timestamp |
### feed\_products\_query
Sync type availability: Full-refresh
Child of [feeds](#feeds)
| Field | Type |
| ------------ | --------- |
| id | text |
| title | text |
| price | float |
| currency | text |
| availability | text |
| brand | text |
| updated\_at | timestamp |
### feed\_sftp\_access
Sync type availability: Full-refresh
Child of [feeds](#feeds)
| Field | Type |
| ----------- | --------- |
| username | text |
| host | text |
| port | integer |
| directory | text |
| expires\_at | timestamp |
### feed\_uploads
Sync type availability: Full-refresh
| Field | Type |
| ------------- | --------- |
| id | text |
| feed\_id | text |
| status | text |
| started\_at | timestamp |
| completed\_at | timestamp |
| item\_count | integer |
| created\_at | timestamp |
| updated\_at | timestamp |
### feeds
Sync type availability: Full-refresh
Parent of [feed\_products\_query](#feed_products_query), [feed\_sftp\_access](#feed_sftp_access)
| Field | Type |
| ----------- | --------- |
| id | text |
| name | text |
| type | text |
| status | text |
| item\_count | integer |
| created\_at | timestamp |
| updated\_at | timestamp |
### geo\_lookup\_search
Sync type availability: Full-refresh
| Field | Type |
| ------------- | ---- |
| name | text |
| code | text |
| type | text |
| country\_code | text |
| parent\_code | text |
### lead\_sync\_subscriptions
Sync type availability: Full-refresh
Child of [ad\_account](#ad_account)
| Field | Type |
| ------------- | --------- |
| id | text |
| callback\_url | text |
| event\_type | text |
| status | text |
| created\_at | timestamp |
| updated\_at | timestamp |
### partner\_data\_upload
Sync type availability: Full-refresh
| Field | Type |
| ------------- | --------- |
| id | text |
| status | text |
| file\_name | text |
| record\_count | integer |
| created\_at | timestamp |
| updated\_at | timestamp |
### spend\_limit\_windows
Sync type availability: Full-refresh
| Field | Type |
| ------------ | --------- |
| spend\_limit | float |
| currency | text |
| start\_time | timestamp |
| end\_time | timestamp |
| status | text |
## Entity Relationships
```mermaid
erDiagram
ad_account ||--o{ lead_sync_subscriptions : "id = ad_account_id"
campaigns ||--o{ ad_groups : "id = campaign_id"
ad_groups ||--o{ ads : "id = ad_group_id"
ad_groups ||--o{ ad_group_insights : "id = ad_group_id"
ads ||--o{ ad_insights : "id = ad_id"
campaigns ||--o{ campaign_insights : "id = campaign_id"
bulk_mutation_job ||--o{ bulk_mutation_job_operations : "id = job_id"
conversions_pixels ||--o{ conversions_events : "id = pixel_id"
custom_audiences ||--o{ custom_audience_operations : "id = custom_audience_id"
feeds ||--o{ feed_products_query : "id = feed_id"
feeds ||--o{ feed_sftp_access : "id = feed_id"
feeds ||--o{ feed_uploads : "id = feed_id"
ad_account { text id PK }
ad_account_insights { date updated_at }
ad_accounts { text id PK }
ad_group_insights { text ad_group_id }
ad_groups { text id PK }
ad_insights { text ad_id }
ads { text id PK }
bulk_mutation_job { text id PK }
bulk_mutation_job_operations { text id PK }
campaign_insights { text campaign_id }
campaigns { text id PK }
conversions_event_settings { text id PK }
conversions_events { text id PK }
conversions_insights { date updated_at }
conversions_pixels { text id PK }
custom_audience_operations { text id PK }
custom_audiences { text id PK }
feed_products_query { text id PK }
feed_sftp_access { text username }
feed_uploads { text id PK }
feeds { text id PK }
geo_lookup_search { text code }
lead_sync_subscriptions { text id PK }
partner_data_upload { text id PK }
spend_limit_windows { timestamp start_time }
```
# Pipefy
Find out how to connect Pipefy to your data warehouse effortlessly.
## Using the Erathos platform
When selecting Pipefy as a new connector on the Erathos platform, you will need to name your connection and fill in the following form with a Service Account:
## How to create a Pipefy Service Account?
{% hint style="info" %}
Make sure you are a Super Admin in the organization before following those steps.
{% endhint %}
1. Click on the **name of your company** or your **profile image** at the top of the page. Then, click on **Members and Permissions**\

2. Click on the **Service Accounts tab**\

3. Click on **Create Service Account**\

4. Enter the Account Name. This will be used to create the email address and needs to be up to 20 characters.\
If you’d like, add a description. Up to 140 characters.
5. Define the role that this account will have on the organization.
6. Define how long tokens generated for this service account will work before they expire. The minimum time is 5 minutes and the maximum is 30 days.
7. Click on the Service Account on the list and get the Client ID, the Client Secret, and the token endpoint. **This is sensitive information,** so beware when sharing or storing it.
Don't forget to click on **Save and close** to advance to the next steps of the integration.
With this connection created you can seemlessly move your Pipefy data to your BigQuery, Redshift, Databricks or Postgres data-warehouse.
## What endpoints can I access with the Erathos platform?
* organizations
* pipes
* cards
* phases
* cards\_phases\_history
* tables
* tables\_records
# Piperun
### Using the Erathos platform
When selecting Piperun as a new connector on the Erathos platform, you will need to name your connection and fill in the following form:
* **Token:** Your Piperun personal API token used to authenticate requests to the Piperun API
With this connection created you can seamlessly move your Piperun data to your BigQuery, Redshift or Postgres data warehouse.
### How to find my token?
Your Piperun API token can be found in your account settings. Log in to Piperun, click on your profile icon in the top-right corner, and navigate to **Settings → Integrations → API**. Your personal API token will be listed there.
Once you have copied your token, paste it into the **Token** field on the Erathos platform and click **Save and close**.
### What endpoints can I access with the Erathos platform?
* companies
* persons
* deals
* activities
* pipelines
* stages
* notes
* files
* custom\_fields
# Ploomes
Find out how to connect Ploomes to your data warehouse effortlessly.
## How to find my User Key?
1. In your Ploomes account, navigate to Administration
2. In the integrations section, select Integrations Users.
2. Create a new user and copy the API Key.
## What endpoints can I access with the Erathos platform?
* accounts
* cities
* countries
* states
* contacts
* contact\_number\_of\_employees
* contact\_origins
* contact\_lines\_of\_business
* contact\_relationships
* contact\_status
* contact\_types
* currencies
* deals
* deal\_stages
* deals\_status
* deals\_loss\_reasons
* deal\_pipelines
* documents
* document\_templates
* documentdepartments\_templates
* interaction\_records
* phone\_types
* roles
* tags
* teams
* users
* tasks
* task\_types
* task\_interval\_units
* task\_email\_reminders
* quotes
* quotes\_approval\_status
* products
* product\_families
* product\_groups
* product\_parts
* orders
* order\_stages
* fields
* field\_entity
# PostHog
Connect your PostHog analytics to your data warehouse. Sync events, persons, feature flags, and experiments to BigQuery, Redshift, Postgres, Databricks, and more.
## Using the Erathos platform
When selecting PostHog as a new connector on the Erathos platform, you will need to name your connection and fill in the following form:
* **Token** — Your PostHog personal API key used for authentication
With this connection created you can seamlessly move your PostHog data to your BigQuery, Redshift or Postgres data warehouse.
### How to find my token?
To authenticate with PostHog, you need a personal API key. Log in to your PostHog instance, click on your profile in the top-right corner, and navigate to **Settings → Personal API keys**. Click **+ Create personal API key**, give it a name (e.g. "Erathos"), and copy the generated key.
Paste the personal API key into the **Token** field on the Erathos platform connection form. Click **Save and close** to complete setup.
## Endpoints and fields
### actions
Sync type availability: Full-refresh
| Field | Type |
| --------------- | --------- |
| id | integer |
| name | text |
| description | text |
| created\_at | timestamp |
| updated\_at | timestamp |
| created\_by\_id | integer |
| deleted | boolean |
### annotations
Sync type availability: Full-refresh
| Field | Type |
| --------------- | --------- |
| id | integer |
| content | text |
| created\_at | timestamp |
| date\_marker | timestamp |
| created\_by\_id | integer |
### cohorts
Sync type availability: Full-refresh
| Field | Type |
| --------------- | --------- |
| id | integer |
| name | text |
| description | text |
| created\_at | timestamp |
| updated\_at | timestamp |
| is\_static | boolean |
| created\_by\_id | integer |
### dashboards
Sync type availability: Full-refresh
| Field | Type |
| --------------- | --------- |
| id | integer |
| name | text |
| description | text |
| created\_at | timestamp |
| updated\_at | timestamp |
| created\_by\_id | integer |
| deleted | boolean |
### events
Sync type availability: Full and incremental refresh
[Cursor](https://docs.erathos.com/platform/connections/sync-types#understanding-cursors): `created_at`
| Field | Type | Cursor |
| ------------ | --------- | ------ |
| id | text | |
| event | text | |
| distinct\_id | text | |
| timestamp | timestamp | |
| properties | text | |
| elements | text | |
| created\_at | timestamp | ✓ |
### experiments
Sync type availability: Full-refresh
| Field | Type |
| --------------- | --------- |
| id | integer |
| name | text |
| description | text |
| created\_at | timestamp |
| updated\_at | timestamp |
| created\_by\_id | integer |
### feature\_flags
Sync type availability: Full-refresh
| Field | Type |
| --------------- | --------- |
| id | integer |
| key | text |
| name | text |
| active | boolean |
| created\_at | timestamp |
| created\_by\_id | integer |
| deleted | boolean |
### persons
Sync type availability: Full-refresh
| Field | Type |
| -------------- | --------- |
| id | text |
| distinct\_id | text |
| properties | text |
| created\_at | timestamp |
| is\_identified | boolean |
| name | text |
| email | text |
### session\_recordings
Sync type availability: Full-refresh
| Field | Type |
| ------------ | --------- |
| id | text |
| session\_id | text |
| distinct\_id | text |
| viewed | boolean |
| start\_time | timestamp |
| end\_time | timestamp |
| duration | float |
| created\_at | timestamp |
### surveys
Sync type availability: Full-refresh
| Field | Type |
| --------------- | --------- |
| id | integer |
| name | text |
| description | text |
| created\_at | timestamp |
| updated\_at | timestamp |
| created\_by\_id | integer |
## Entity Relationships
```mermaid
erDiagram
actions {
integer id PK
text name
text description
timestamp created_at
timestamp updated_at
integer created_by_id
boolean deleted
}
annotations {
integer id PK
text content
timestamp created_at
timestamp date_marker
integer created_by_id
}
cohorts {
integer id PK
text name
text description
timestamp created_at
timestamp updated_at
boolean is_static
integer created_by_id
}
dashboards {
integer id PK
text name
text description
timestamp created_at
timestamp updated_at
integer created_by_id
boolean deleted
}
events {
text id PK
text event
text distinct_id
timestamp timestamp
text properties
text elements
timestamp created_at
}
experiments {
integer id PK
text name
text description
timestamp created_at
timestamp updated_at
integer created_by_id
}
feature_flags {
integer id PK
text key
text name
boolean active
timestamp created_at
integer created_by_id
boolean deleted
}
persons {
text id PK
text distinct_id
text properties
timestamp created_at
boolean is_identified
text name
text email
}
session_recordings {
text id PK
text session_id
text distinct_id
boolean viewed
timestamp start_time
timestamp end_time
float duration
timestamp created_at
}
surveys {
integer id PK
text name
text description
timestamp created_at
timestamp updated_at
integer created_by_id
}
```
# Qulture.Rocks
Find out how to connect Qulture.Rocks to your data warehouse effortlessly.
## Using the Erathos platform
When selecting Qulture.Rocks as a new connector on the Erathos platform, you will need to name your connection and fill in the following form:

## How to find my Qulture.Rocks Company ID?
## How to find my Qulture.Rocks API Token?
1. Log in to your account as **administrator**
2. Enter the **Organization** page
3. Click on **Integrations**
4. Select **Platform API**
5. Click on **generate token again**
6. Copy and paste the token value on the Erathos platform connection form
With this connection created you can seemlessly move your Qulture.Rocks data to your BigQuery, Redshift or Postgres data-warehouse.
## What endpoints can I access with the Erathos platform?
* surveys
* topics\_with\_questions
* survey\_participations
* list\_answers\_survey\_participation
* participants
* team\_results
* list\_answers\_survey
* boxes
* box\_calibrations
* box\_participations
* box\_participation\_calibrations
* feedbacks
* idp\_cycles
* idp
* idp\_goals
* idp\_actions
* teams
* contracts
* contract\_records
* one\_on\_one\_employee
* contract\_feelings
* contract\_priorities
* team\_members
* cycles
* okr
* key\_results
* key\_result\_tasks
* one\_on\_one\_reports
* one\_on\_one\_tasks
* feelings
* praises
* job\_title
* job\_positions
# RD Station CRM
Find out how to connect RD Station CRM to your data warehouse effortlessly.
## Using the Erathos platform
When selecting RD Sttaion CRM as a new connector on the Erathos platform, you will need to name your connection and fill in the following form:

## How to find my RD Station Token?
1. Log in to your RD Station CRM **account**
2. Click on **username**, in the top right corner
3. In the dropdown menu, click on **Profile**
4. If you have already generated a token, you can use the same one, which will be shown in the texto **Instance Token** field
5. In case there is no token inthe field mentioned, click on **Generate Token**
Warning: The Disable Token button will irreversibly undo all API or webhook integrations for the user. Even if the user clicks the Generate Token button again afterward, a different code will be generated, and the integrations will need to be set up again. Therefore, only use this button if you really want to undo the integrations!
With this connection created you can seemlessly move your RD Station CRM data to your BigQuery, Redshift or Postgres data-warehouse.
## What endpoints can I access with the Erathos platform?
* tasks
* activities
* deals
* deal\_contacts
* deal\_products
* users
* teams
* organizations
* contacts
* products
* pipelines
* pipeline\_stages
* sources
* campaigns
* deal\_details
# RD Station CRM v2
Connect your RD Station CRM v2 to your data warehouse. Sync contacts, deals, organizations, products, tasks, meetings, and pipeline data to BigQuery, Redshift, Postgres, Databricks, and more.
## Using the Erathos platform
When selecting RD Station CRM v2 as a new connector on the Erathos platform, you will need to name your connection and fill in the following form:
* **Client ID** — the public identifier of your RD Station app, used to start the OAuth authorization flow
* **Client Secret** — the secret key of your RD Station app, used together with the Client ID to exchange the authorization code for tokens
* **OAuth** — the OAuth2 connection you authorize with your RD Station account; Erathos automatically obtains and renews the access and refresh tokens
With this connection created you can seamlessly move your RD Station CRM v2 data to your BigQuery, Redshift or Postgres data warehouse.
### How to find my token?
RD Station CRM v2 uses the OAuth2 authorization code flow. First, create an app in the [RD Station developer portal](https://developers.rdstation.com/) and register a redirect URI. The app's details page will show your **Client ID** and **Client Secret** — copy both values into the corresponding fields on the Erathos platform.
Next, click the OAuth field to start the authorization flow. You will be redirected to RD Station's consent screen; log in with your RD Station account and approve the requested permissions. Erathos stores the resulting tokens and automatically renews them — access tokens last 2 hours and are refreshed on demand, so no manual token management is required.
Click **Save and close** to complete the setup.
## Endpoints and fields
### campaigns
Sync type availability: Full-refresh
| Field | Type |
| ----- | ---- |
| id | text |
| name | text |
### contacts
Sync type availability: Full and incremental refresh
[Cursor](https://docs.erathos.com/platform/connections/sync-types#understanding-cursors): `updated_at`
| Field | Type | Cursor |
| ---------------- | --------- | ------ |
| id | text | |
| name | text | |
| email | text | |
| phone | text | |
| mobile | text | |
| title | text | |
| website | text | |
| linkedin | text | |
| street | text | |
| city | text | |
| state | text | |
| country | text | |
| postal\_code | text | |
| organization\_id | text | |
| owner\_id | text | |
| custom\_fields | json | |
| created\_at | timestamp | |
| updated\_at | timestamp | ✓ |
### custom\_fields
Sync type availability: Full-refresh
| Field | Type |
| ----------- | --------- |
| id | text |
| slug | text |
| label | text |
| type | text |
| entity | text |
| required | boolean |
| unique | boolean |
| opts | json |
| created\_at | timestamp |
| updated\_at | timestamp |
### deal\_files
Sync type availability: Full-refresh
Child of [deals](#deals)
| Field | Type |
| ----------- | --------- |
| id | text |
| name | text |
| url | text |
| created\_at | timestamp |
| updated\_at | timestamp |
### deal\_notes
Sync type availability: Full and incremental refresh
[Cursor](https://docs.erathos.com/platform/connections/sync-types#understanding-cursors): `updated_at`
Child of [deals](#deals)
| Field | Type | Cursor |
| -------------- | --------- | ------ |
| id | text | |
| content | text | |
| user\_id | text | |
| registered\_at | timestamp | |
| created\_at | timestamp | |
| updated\_at | timestamp | ✓ |
### deal\_products
Sync type availability: Full-refresh
Child of [deals](#deals)
| Field | Type |
| ----------- | --------- |
| id | text |
| product\_id | text |
| amount | float |
| discount | float |
| quantity | integer |
| created\_at | timestamp |
| updated\_at | timestamp |
### deal\_proposals
Sync type availability: Full and incremental refresh
[Cursor](https://docs.erathos.com/platform/connections/sync-types#understanding-cursors): `updated_at`
Child of [deals](#deals)
| Field | Type | Cursor |
| ----------- | --------- | ------ |
| id | text | |
| name | text | |
| status | text | |
| url | text | |
| created\_at | timestamp | |
| updated\_at | timestamp | ✓ |
### deals
Sync type availability: Full and incremental refresh
[Cursor](https://docs.erathos.com/platform/connections/sync-types#understanding-cursors): `updated_at`
Parent of [deal\_files](#deal_files), [deal\_notes](#deal_notes), [deal\_products](#deal_products), [deal\_proposals](#deal_proposals)
| Field | Type | Cursor |
| -------------------- | --------- | ------ |
| id | text | |
| name | text | |
| amount | float | |
| status | text | |
| rating | integer | |
| stage\_id | text | |
| organization\_id | text | |
| contact\_id | text | |
| owner\_id | text | |
| campaign\_id | text | |
| source\_id | text | |
| loss\_reason\_id | text | |
| closed\_at | timestamp | |
| deal\_custom\_fields | json | |
| created\_at | timestamp | |
| updated\_at | timestamp | ✓ |
### lost\_reasons
Sync type availability: Full-refresh
| Field | Type |
| ----- | ---- |
| id | text |
| name | text |
### meeting\_availabilities
Sync type availability: Full-refresh
| Field | Type |
| -------------- | ---- |
| id | text |
| user\_id | text |
| timezone | text |
| week\_schedule | json |
### meetings
Sync type availability: Full and incremental refresh
[Cursor](https://docs.erathos.com/platform/connections/sync-types#understanding-cursors): `updated_at`
| Field | Type | Cursor |
| ----------- | --------- | ------ |
| id | text | |
| title | text | |
| status | text | |
| starts\_at | timestamp | |
| ends\_at | timestamp | |
| user\_id | text | |
| contact\_id | text | |
| deal\_id | text | |
| created\_at | timestamp | |
| updated\_at | timestamp | ✓ |
### organizations
Sync type availability: Full and incremental refresh
[Cursor](https://docs.erathos.com/platform/connections/sync-types#understanding-cursors): `updated_at`
| Field | Type | Cursor |
| -------------- | --------- | ------ |
| id | text | |
| name | text | |
| custom\_fields | json | |
| created\_at | timestamp | |
| updated\_at | timestamp | ✓ |
### pipelines
Sync type availability: Full-refresh
Parent of [stages](#stages)
| Field | Type |
| ----- | ---- |
| id | text |
| name | text |
### products
Sync type availability: Full-refresh
| Field | Type |
| ------------------ | --------- |
| id | text |
| name | text |
| amount | float |
| billing\_frequency | text |
| custom\_fields | json |
| created\_at | timestamp |
| updated\_at | timestamp |
### segments
Sync type availability: Full-refresh
| Field | Type |
| ----- | ---- |
| id | text |
| name | text |
### sources
Sync type availability: Full-refresh
| Field | Type |
| ----- | ---- |
| id | text |
| name | text |
### stages
Sync type availability: Full-refresh
Child of [pipelines](#pipelines)
| Field | Type |
| -------- | ------- |
| id | text |
| name | text |
| position | integer |
### tasks
Sync type availability: Full and incremental refresh
[Cursor](https://docs.erathos.com/platform/connections/sync-types#understanding-cursors): `updated_at`
| Field | Type | Cursor |
| ------------- | --------- | ------ |
| id | text | |
| type | text | |
| description | text | |
| status | text | |
| due\_date | timestamp | |
| completed\_at | timestamp | |
| deal\_id | text | |
| user\_id | text | |
| created\_at | timestamp | |
| updated\_at | timestamp | ✓ |
### teams
Sync type availability: Full-refresh
| Field | Type |
| ----- | ---- |
| id | text |
| name | text |
### users
Sync type availability: Full-refresh
| Field | Type |
| ----------- | --------- |
| id | text |
| name | text |
| email | text |
| created\_at | timestamp |
| updated\_at | timestamp |
## Entity Relationships
```mermaid
erDiagram
deals ||--o{ deal_files : "id = deal_id"
deals ||--o{ deal_notes : "id = deal_id"
deals ||--o{ deal_products : "id = deal_id"
deals ||--o{ deal_proposals : "id = deal_id"
pipelines ||--o{ stages : "id = pipeline_id"
users ||--o{ contacts : "id = owner_id"
organizations ||--o{ contacts : "id = organization_id"
users ||--o{ deals : "id = owner_id"
organizations ||--o{ deals : "id = organization_id"
contacts ||--o{ deals : "id = contact_id"
stages ||--o{ deals : "id = stage_id"
campaigns ||--o{ deals : "id = campaign_id"
sources ||--o{ deals : "id = source_id"
lost_reasons ||--o{ deals : "id = loss_reason_id"
users ||--o{ deal_notes : "id = user_id"
products ||--o{ deal_products : "id = product_id"
users ||--o{ meeting_availabilities : "id = user_id"
users ||--o{ meetings : "id = user_id"
contacts ||--o{ meetings : "id = contact_id"
deals ||--o{ meetings : "id = deal_id"
deals ||--o{ tasks : "id = deal_id"
users ||--o{ tasks : "id = user_id"
users { text id PK }
organizations { text id PK }
contacts { text id PK }
deals { text id PK }
deal_files { text id PK }
deal_notes { text id PK }
deal_products { text id PK }
deal_proposals { text id PK }
pipelines { text id PK }
stages { text id PK }
campaigns { text id PK }
sources { text id PK }
lost_reasons { text id PK }
products { text id PK }
meetings { text id PK }
meeting_availabilities { text id PK }
tasks { text id PK }
custom_fields { text id PK }
segments { text id PK }
teams { text id PK }
```
# RD Station Marketing
Find out how to connect RD Station Marketing to your data warehouse effortlessly.
## Using the Erathos platform:
When selecting RD Station Marketing as a new connector on the Erathos platform, you will need to authorize the connection by simply logging into the RD Station Marketing account associated with your browser.
Just click on '**Authorize RD Station Marketing**' as shown in the attachment below:

Don't forget to click on **Save and close** to advance to the next steps of the integration.
With this connection created you can seemlessly move your RD Station Marketing data to your BigQuery, Redshift or Postgres data-warehouse.
## What endpoints can I access with the Erathos platform?
* custom\_fields
* segmentations
* segmentation\_contacts
* contact\_details
* contact\_conversion\_events
* contact\_opportunity\_events
* contact\_funnels
* workflows
* emails
* landing\_pages
* popups
* forms
* webhook\_subscriptions
# Reviews.io
Connect your Reviews.io account to your data warehouse. Sync reviews, invitations, product ratings, surveys, UGC, and webhooks to BigQuery, Redshift, PostgreSQL, Databricks, and more.
## Using the Erathos platform
When selecting Reviews.io as a new connector on the Erathos platform, you will need to name your connection and fill in the following form:
* **Store** — your Reviews.io store identifier, used to select which store the data is pulled from
* **API key** — your Reviews.io API key, used to authenticate all requests to the API
With this connection created you can seamlessly move your Reviews.io data to your BigQuery, Redshift or PostgreSQL data warehouse.
### How to find my token?
Log in to your Reviews.io dashboard and go to **Settings → API Keys** (under the Integrations section). Here you will find the API key associated with your store — copy it if you already have one, or generate a new key by clicking the option to create an API key.
Note the **store** name/identifier as configured in your Reviews.io account, since both the store and the API key are required to authenticate requests.
Paste the store identifier into the **Store** field and the key into the **API key** field on the Erathos platform, then click **Save and close** to complete the setup.
## Endpoints and fields
### company\_invitations
Sync type availability: Full-refresh
| Field | Type |
| --------------- | --------- |
| id | text |
| order\_id | text |
| customer\_name | text |
| customer\_email | text |
| email\_sent | text |
| status | text |
| date\_send | timestamp |
| resent | integer |
### product\_invitations
Sync type availability: Full-refresh
| Field | Type |
| --------------- | --------- |
| id | text |
| order\_id | text |
| customer\_name | text |
| customer\_email | text |
| email\_sent | text |
| status | text |
| date\_send | timestamp |
| resent | integer |
| product | json |
### product\_ratings
Sync type availability: Full-refresh
| Field | Type |
| --------------- | ----- |
| sku | text |
| average\_rating | text |
| num\_ratings | float |
### review\_nuggets
Sync type availability: Full-refresh
| Field | Type |
| --------------------- | --------- |
| id | integer |
| type | text |
| text | text |
| rating | text |
| review\_id | text |
| date\_created\_nugget | timestamp |
### reviews
Sync type availability: Full-refresh
| Field | Type |
| ------------------- | ------- |
| id | text |
| type | text |
| type\_label | text |
| source | text |
| rating | integer |
| title | text |
| comments | text |
| author | json |
| date\_created | text |
| time\_ago | text |
| order\_id | text |
| sku | text |
| helpful\_count | text |
| attributes | json |
| photos | json |
| unpublished\_photos | json |
| videos | json |
| tags | json |
| replies | json |
### survey\_responses
Sync type availability: Full-refresh
Child of [surveys](#surveys)
| Field | Type |
| ---------------- | --------- |
| id | integer |
| user\_id | integer |
| completion\_time | integer |
| href | text |
| browser | text |
| ip\_address | text |
| date\_created | timestamp |
| date\_updated | timestamp |
| country\_code | text |
| total\_price | text |
| order\_count | integer |
| tags | text |
| responses | json |
### surveys
Sync type availability: Full-refresh
Parent of [survey\_responses](#survey_responses)
| Field | Type |
| ---------------- | --------- |
| id | integer |
| title | text |
| question\_count | integer |
| responses\_count | integer |
| active | integer |
| date\_created | timestamp |
| date\_updated | timestamp |
### ugc
Sync type availability: Full-refresh
| Field | Type |
| ---------------- | ------- |
| type | text |
| type\_label | text |
| source | text |
| rating | integer |
| comments | text |
| author | text |
| date\_created | text |
| order\_id | text |
| sku | text |
| helpful\_count | text |
| is\_video | integer |
| image\_raw | text |
| image\_sm | text |
| image\_md | text |
| image\_lg | text |
| attributes | json |
| tagged\_products | json |
| replies | json |
### unsubscribed\_users
Sync type availability: Full-refresh
| Field | Type |
| ----- | ---- |
| email | text |
### webhooks
Sync type availability: Full-refresh
| Field | Type |
| ----- | ---- |
| id | text |
| type | text |
| url | text |
## Entity Relationships
```mermaid
erDiagram
surveys ||--o{ survey_responses : "id = _pk_surveys"
reviews ||--o{ review_nuggets : "id = review_id"
company_invitations {
text id PK
}
product_invitations {
text id PK
}
product_ratings {
text sku PK
}
review_nuggets {
integer id PK
}
reviews {
text id PK
}
survey_responses {
text _pk_surveys PK
integer id PK
}
surveys {
integer id PK
}
unsubscribed_users {
text email PK
}
webhooks {
text id PK
}
```
# Runrun.it
Connect your Runrun.it platform to your data warehouse. Sync tasks, projects, clients, users, and boards to BigQuery, Redshift, Postgres, Databricks, and more.
## Using the Erathos platform
When selecting Runrun.it as a new connector on the Erathos platform, you will need to name your connection and fill in the following form:
* **App-Key** — your Runrun.it application key, used to identify your account
* **User-Token** — your personal API token, used to authenticate API requests on your behalf
With this connection created you can seamlessly move your Runrun.it data to your BigQuery, Redshift or Postgres data warehouse.
### How to find my token?
To authenticate with the Runrun.it API, you need two credentials: an **App-Key** and a **User-Token**.
To find your **App-Key**, log in to Runrun.it and navigate to **Manage → Integrations → API Integration**. The App-Key identifies your Runrun.it account and will be displayed on the integrations page.
To generate your **User-Token**, click on your profile avatar in the top-right corner, then select **My Account → API**. Generate a new personal token if you haven't already and copy it.
Paste both credentials into the **App-Key** and **User-Token** fields on the Erathos platform and click **Save and close** to complete the setup.
## Endpoints and fields
### boards
Sync type availability: Full-refresh
Parent of [board\_stages](#board_stages)
| Field | Type |
| ----------- | --------- |
| id | integer |
| name | text |
| created\_at | timestamp |
| updated\_at | timestamp |
### board\_stages
Sync type availability: Full-refresh
Child of [boards](#boards)
| Field | Type |
| ----------- | --------- |
| id | integer |
| name | text |
| board\_id | integer |
| created\_at | timestamp |
| updated\_at | timestamp |
### clients
Sync type availability: Full-refresh
| Field | Type |
| ---------------- | --------- |
| id | integer |
| name | text |
| is\_active | boolean |
| organization\_id | integer |
| created\_at | timestamp |
| updated\_at | timestamp |
### manual\_work\_periods
Sync type availability: Full and incremental refresh
[Cursor](https://docs.erathos.com/platform/connections/sync-types#understanding-cursors): `created_at`
| Field | Type | Cursor |
| ----------------- | --------- | ------ |
| id | integer | |
| user\_id | integer | |
| task\_id | integer | |
| started\_at | timestamp | |
| ended\_at | timestamp | |
| duration\_seconds | integer | |
| created\_at | timestamp | ✓ |
| updated\_at | timestamp | |
### projects
Sync type availability: Full-refresh
| Field | Type |
| ----------- | --------- |
| id | integer |
| name | text |
| client\_id | integer |
| is\_active | boolean |
| is\_public | boolean |
| created\_at | timestamp |
| updated\_at | timestamp |
### tags
Sync type availability: Full-refresh
| Field | Type |
| ----------- | --------- |
| id | integer |
| name | text |
| created\_at | timestamp |
| updated\_at | timestamp |
### task\_types
Sync type availability: Full-refresh
| Field | Type |
| ----------- | --------- |
| id | integer |
| name | text |
| is\_active | boolean |
| created\_at | timestamp |
| updated\_at | timestamp |
### tasks
Sync type availability: Full and incremental refresh
[Cursor](https://docs.erathos.com/platform/connections/sync-types#understanding-cursors): `updated_at`
| Field | Type | Cursor |
| -------------------------- | --------- | ------ |
| id | integer | |
| title | text | |
| desired\_date | timestamp | |
| desired\_start\_date | timestamp | |
| desired\_delivery\_date | timestamp | |
| delivered\_at | timestamp | |
| current\_estimate\_seconds | integer | |
| time\_worked | integer | |
| is\_working\_on | boolean | |
| is\_overdue | boolean | |
| project\_id | integer | |
| user\_id | integer | |
| type\_id | integer | |
| board\_id | integer | |
| board\_stage\_id | integer | |
| created\_at | timestamp | |
| updated\_at | timestamp | ✓ |
### teams
Sync type availability: Full-refresh
| Field | Type |
| ----------- | --------- |
| id | integer |
| name | text |
| created\_at | timestamp |
| updated\_at | timestamp |
### users
Sync type availability: Full-refresh
| Field | Type |
| ----------- | --------- |
| id | integer |
| name | text |
| email | text |
| avatar\_url | text |
| is\_active | boolean |
| is\_admin | boolean |
| is\_master | boolean |
| type | text |
| language | text |
| timezone | text |
| created\_at | timestamp |
| updated\_at | timestamp |
## Entity Relationships
```mermaid
erDiagram
boards ||--o{ board_stages : "id = board_id"
clients ||--o{ projects : "id = client_id"
projects ||--o{ tasks : "id = project_id"
users ||--o{ tasks : "id = user_id"
boards ||--o{ tasks : "id = board_id"
board_stages ||--o{ tasks : "id = board_stage_id"
users ||--o{ manual_work_periods : "id = user_id"
tasks ||--o{ manual_work_periods : "id = task_id"
boards { integer id PK }
board_stages { integer id PK }
clients { integer id PK }
projects { integer id PK }
tasks { integer id PK }
users { integer id PK }
manual_work_periods { integer id PK }
tags { integer id PK }
teams { integer id PK }
task_types { integer id PK }
```
# Sankhya
Find out how to connect Sankhya to your data warehouse effortlessly.
## Using the Erathos platform
When selecting Sankhya as a new connector on the Erathos platform, you will need to name your connection and fill in the following form:
## How to find the API Token?
1. Access the "Gateway Settings" page.
2. In the "Endereço Sankhya" field, inform the external access adress to Sankhya OM.
3. In the "Name" field, it is recommended to specify the environment type (Production, Test, Training).
4. In "Application," specify the application that will be integrated.
5. Enter a user linked to the Sankhya ID in the "User Code" field. Once saved, the TOKEN will be generated.
Don't forget to click on **Save and close** to advance to the next steps! With this connection created you can seemlessly move your Sankhya data to your BigQuery, Redshift or Postgres data-warehouse.
## What endpoints can I access with the Erathos platform?
* Usuario
* TipoNegociacao
* TipoTitulo
* Parceiro
* Natureza
* Empresa
* EmpresaProdutoImpostos
* ContaBancaria
* Banco
* Financeiro
* BaixaBancaria
# Sentry
Find out how to connect Sentry to your data warehouse effortlessly.
## Using the Erathos platform
When selecting Sentry as a new connector on the Erathos platform, you will need to name your connection and fill in the following form:

1. Lon in to your Sentry account
2. Click **Settings** in the left-side menu;
3. Open the **Organization Settings** page;
4. Click **Custom Integrations** in the left panel to create a new internal integration and generate the auth token;
5. Select **Create New Integration**;
6. Ensure that **Internal Integration** is selected before proceeding to **Next**;
7. Name your integration;
8. In **Permissions**, set the desired permissions for API requests;
9. Click **Save Changes**;
10. At the bottom of the page, copy the generated token found under **Tokens**;
11. Paste the Token value on the Erathos platform connection form.
Don't forget to click on **Save and close** to advance to the next steps! With this connection created you can seemlessly move your Sentry data to your BigQuery, Redshift or Postgres data-warehouse.
## What endpoints can I access with the Erathos platform?
* organizations
* organization\_users
* organization\_trusted\_relays
* organization\_repositories
* organization\_projects
* organization\_metric\_alert\_rules
* spike\_protection\_notifications
* organization\_releases
* organization\_replays
* organization\_selectors
* organization\_teams
* projects
* project\_issue\_alert\_rules
* project\_users
* project\_user\_feedback
* project\_service\_hooks
* project\_issues
* project\_events
# Sienge
### Using the Erathos platform
When selecting Sienge as a new connector on the Erathos platform, you will need to name your connection and fill in the following form:
* **Subdomain** — your company's Sienge subdomain (the identifier that appears in your Sienge API URLs, e.g. `mycompany`)
* **User** — your Sienge user email (e.g. `your@email.com`)
* **Password** — your Sienge user password
With this connection created you can seamlessly move your Sienge data to your BigQuery, Redshift or Postgres data warehouse.
### What endpoints can I access with the Erathos platform?
* accountancy\_accounts
* accountancy\_entries
* accountancy\_entry\_generator\_entry\_batches
* accountancy\_entry\_generator\_entries
* accountancy\_entry\_generator\_entry\_batch\_entries
* accounts\_balances
* accounts\_receivable\_receivable\_bills
* accounts\_receivable\_receivable\_bill\_installments
* accounts\_receivable\_receivable\_bill\_budget\_categories
* accounts\_statements
* accountancy\_batch
* bearers\_receivable
* bills
* bills\_by\_change\_date
* bills\_installments
* bills\_taxes
* bills\_budget\_categories
* bills\_departments\_cost
* bills\_buildings\_cost
* bills\_attachments
* bills\_units
* building\_cost\_estimations\_cost\_estimate\_resources
* building\_cost\_estimations\_resources
* building\_cost\_estimations\_resource\_units\_of\_movement
* building\_cost\_estimations\_sheets
* building\_projects\_calendar\_days\_off
* building\_projects\_progress\_logs
* checking\_accounts
* cities
* civil\_status
* closing\_accountancy
* commissions
* commissions\_configurations\_brokers
* sales\_commissions
* companies
* construction\_daily\_report
* construction\_daily\_report\_event\_types
* construction\_daily\_report\_types
* cost\_centers
* cost\_databases
* cost\_databases\_resources
* cost\_databases\_work\_items
* cost\_databases\_work\_items\_assemblies
* creditors
* creditors\_bank\_informations
* creditors\_pix\_informations
* customer\_types
* customers
* customers\_attachments
* departments
* enterprises
* indexers
* inventory\_movements
* stock\_reservations
* stock\_inventories\_items
* nfes
* nfes\_payments
* nfes\_linked\_nfes
* payment\_condition\_types
* patrimony\_fixed
* patrimony\_movable
* price\_tables
* professions
* property\_rental
* property\_types
* purchase\_quotations\_negotiations
* purchase\_requests\_items
* real\_estate\_map
* resource\_groups
* sales\_contracts
* sales\_contracts\_attachments
* sales\_contracts\_guarantors
* sites
* supply\_contracts\_measurements
* supply\_contracts\_measurements\_items
* supply\_contracts\_measurements\_attachments
* trademarks
* units
* units\_characteristics
* units\_situations
* units\_of\_measure
* work\_item\_groups
* bulk\_accountancy\_account\_balance
* bulk\_accountancy\_account\_cost\_center\_balance
* bulk\_bank\_movement
* bulk\_building\_cost\_estimation\_items
* bulk\_building\_resources
* bulk\_business\_budget
* bulk\_customer\_debt\_balance
* bulk\_customer\_extract\_history
* bulk\_defaulters\_receivable\_bills
* bulk\_defaulters\_receivable\_bills\_by\_aging
* bulk\_income
* bulk\_invoice\_items
* bulk\_outcome
* bulk\_purchase\_quotations
* bulk\_sales
# Shopify
Find out how to connect Shopify to your data warehouse effortlessly.
## Using the Erathos platform:
The rate limit for Shopify API is based on the complexity of the requested data. The more fields are queried the higher the consumption and potential wait required to complete the extraction.
In order to create a Shopify connection with its own isolated rate limit usage, our platform requires the credentials of your own OAuth App. Follow the steps bellow to create a new app.
## Credentials
1. After selecting the Shopify connector, navigate to its credentials page on Erathos platform.
1. Copy the Redirect URL.
2. Go to [Shopify dev dashboard](https://dev.shopify.com/dashboard/).
1. On Apps tab, click on the **Create App** button. Two options will be shown: Get started with Shopify CLI or Start with Dev Dashboard.
2. Choose Dev Dashboard by typing a name and clicking Create.
3. Upon creation you will be redirected to the App **Versions** tab.
1. Use `https://app.erathos.com` as **App URL**.
2. Disable the option **Incorporate app in Shopify admin**.
3. Choose the permission **Scopes** to concede to the App: `read_all_orders,read_orders,read_products,read_shipping,read_inventory,read_customers,read_assigned_fulfillment_orders`.
4. Enable the option **Use Legacy Install Flow**.
5. Paste Erathos Redirect URL copied during step 1.a in the field **Redirect URLs**.
6. Click **Launch** to finish the version creation.
4. Use the sidebar to go to the **Settings** tab. There you will find the **Client ID** and **Secret Key** that needs to be filled in Erathos credential page acessed during step 1.
3. Back on Erathos, continue from the connection credentials page in step 1:
1. Paste the **Client ID**.
2. Paste the Secret Key in the field **Client Secret**.
3. Type your **shop name** omiting shopify.com (e.g. yourstore for **yourstore**.shopify.com).
4. Click on **Save and test.**
4. After being redirected to the Connection settings page, go back the credentials page.
1. There click on **Authorize integration** in order to be redirected to Shopify.
2. Read the permissions being conceded and confirm the authorization.
3. After being redirected back to Erathos, click on **Save and test** to finish.
5. Your connection is now ready be used. Proceed to the manage jobs option to choose which endpoints and fields you wish to extract.
## What endpoints can I access with the Erathos platform?
* customers
* inventory\_items
* orders
* products
* shipping
* shop
# Slack
Connect your Slack workspace to your data warehouse. Sync messages, channels, users, and files to BigQuery, Redshift, Postgres, Databricks, and more.
## Using the Erathos platform
When selecting Slack as a new connector on the Erathos platform, you will need to name your connection and fill in the following form:
* **Token** — your Slack Bot User OAuth Token (starts with `xoxb-`), used to authenticate all requests to the Slack Web API
With this connection created you can seamlessly move your Slack data to your BigQuery, Redshift or Postgres data warehouse.
### How to find my token?
To generate a Slack token, go to and click **Create New App** (or select an existing app). Under **OAuth & Permissions**, add the bot token scopes required by the endpoints you want to sync — for example `channels:read`, `channels:history`, `groups:read`, `groups:history`, `im:read`, `im:history`, `mpim:read`, `mpim:history`, `users:read`, `files:read`, `emoji:read`, `pins:read`, `reactions:read`, `bookmarks:read`, `reminders:read`, `dnd:read`, `search:read`, `team:read` and `usergroups:read` — then click **Install to Workspace** (or **Reinstall to Workspace**).
On the same **OAuth & Permissions** page, copy the **Bot User OAuth Token** shown under *Tokens for your workspace*. It starts with `xoxb-`.
Paste the token into the **Token** field on the Erathos platform and click **Save and close** to complete the setup. Erathos validates the credentials against Slack's `auth.test` endpoint before saving the connection.
## Endpoints and fields
### conversations
Sync type availability: Full-refresh
Parent of [conversation\_members](#conversation-members), [messages](#messages), [bookmarks](#bookmarks), [pins](#pins)
| Field | Type |
| ----------------------------- | --------- |
| id | text |
| name | text |
| name\_normalized | text |
| is\_channel | boolean |
| is\_group | boolean |
| is\_im | boolean |
| is\_mpim | boolean |
| is\_private | boolean |
| is\_archived | boolean |
| is\_shared | boolean |
| is\_org\_shared | boolean |
| is\_ext\_shared | boolean |
| is\_default\_shared | boolean |
| is\_member | boolean |
| is\_pending\_ext\_shared | boolean |
| pending\_shared | json |
| pending\_connected\_team\_ids | json |
| unlinked | integer |
| num\_members | integer |
| priority | integer |
| user | text |
| created | timestamp |
| creator | text |
| topic | json |
| purpose | json |
| previous\_names | json |
| locale | text |
| conversation\_host\_id | text |
### conversation\_members
Sync type availability: Full-refresh
Child of [conversations](#conversations)
| Field | Type |
| -------- | ---- |
| user\_id | text |
### messages
Sync type availability: Full and incremental refresh
[Cursor](https://docs.erathos.com/platform/connections/sync-types#understanding-cursors): `ts`
Child of [conversations](#conversations)
Parent of [thread\_replies](#thread-replies)
| Field | Type | Cursor |
| ------------------- | --------- | ------ |
| type | text | |
| subtype | text | |
| text | text | |
| user | text | |
| ts | timestamp | ✓ |
| thread\_ts | timestamp | |
| reply\_count | integer | |
| reply\_users | json | |
| reply\_users\_count | integer | |
| latest\_reply | timestamp | |
| blocks | json | |
| attachments | json | |
| reactions | json | |
| edited | json | |
| permalink | text | |
| is\_locked | boolean | |
| subscribed | boolean | |
| bot\_id | text | |
| app\_id | text | |
| files | json | |
| upload | boolean | |
| display\_as\_bot | boolean | |
| client\_msg\_id | text | |
| hidden | boolean | |
### thread\_replies
Sync type availability: Full and incremental refresh
[Cursor](https://docs.erathos.com/platform/connections/sync-types#understanding-cursors): `ts`
Child of [messages](#messages)
| Field | Type | Cursor |
| ------------------- | --------- | ------ |
| type | text | |
| subtype | text | |
| text | text | |
| user | text | |
| ts | timestamp | ✓ |
| thread\_ts | timestamp | |
| parent\_user\_id | text | |
| reply\_count | integer | |
| reply\_users | json | |
| reply\_users\_count | integer | |
| latest\_reply | timestamp | |
| blocks | json | |
| attachments | json | |
| reactions | json | |
| edited | json | |
| is\_locked | boolean | |
| subscribed | boolean | |
| permalink | text | |
### bookmarks
Sync type availability: Full-refresh
Child of [conversations](#conversations)
| Field | Type |
| --------------------------- | --------- |
| id | text |
| channel\_id | text |
| date\_created | timestamp |
| date\_updated | timestamp |
| type | text |
| title | text |
| link | text |
| user\_id | text |
| last\_updated\_by\_user\_id | text |
### pins
Sync type availability: Full-refresh
Child of [conversations](#conversations)
| Field | Type |
| ----------- | --------- |
| type | text |
| channel | text |
| created | timestamp |
| created\_by | text |
| message | json |
| file | json |
| comment | json |
### conversation\_connect\_invites
Sync type availability: Full-refresh
| Field | Type |
| ------------------- | --------- |
| id | text |
| date\_created | timestamp |
| date\_expires | timestamp |
| inviting\_team\_id | text |
| inviting\_channel | json |
| invite\_type | text |
| recipient\_user\_id | text |
### conversation\_connect\_invite\_requests
Sync type availability: Full-refresh
| Field | Type |
| --------------------------- | --------- |
| id | text |
| date\_created | timestamp |
| date\_expires | timestamp |
| date\_denied | timestamp |
| date\_last\_updated | timestamp |
| status | text |
| requesting\_user\_id | text |
| requesting\_team\_id | text |
| recipient\_channel\_id | text |
| channel\_names\_to\_approve | json |
### users
Sync type availability: Full-refresh
Parent of [users\_get\_presence](#users-get-presence)
| Field | Type |
| ------------------------------ | --------- |
| id | text |
| team\_id | text |
| name | text |
| deleted | boolean |
| color | text |
| real\_name | text |
| tz | text |
| tz\_label | text |
| tz\_offset | integer |
| profile | json |
| is\_admin | boolean |
| is\_owner | boolean |
| is\_primary\_owner | boolean |
| is\_restricted | boolean |
| is\_ultra\_restricted | boolean |
| is\_bot | boolean |
| is\_app\_user | boolean |
| is\_email\_confirmed | boolean |
| updated | timestamp |
| who\_can\_share\_contact\_card | text |
| Favorite programming language | text |
| Start date | date |
In addition to the fields above, workspace-specific custom profile fields (defined in Slack and listed in the [users\_profile\_fields](#users-profile-fields) endpoint) are appended to this table.
### users\_get\_presence
Sync type availability: Full-refresh
Child of [users](#users)
| Field | Type |
| ----------------- | --------- |
| presence | text |
| online | boolean |
| auto\_away | boolean |
| manual\_away | boolean |
| connection\_count | integer |
| last\_activity | timestamp |
### users\_conversations
Sync type availability: Full-refresh
| Field | Type |
| ----------------------------- | --------- |
| id | text |
| name | text |
| name\_normalized | text |
| is\_channel | boolean |
| is\_group | boolean |
| is\_im | boolean |
| is\_mpim | boolean |
| is\_private | boolean |
| is\_archived | boolean |
| is\_shared | boolean |
| is\_org\_shared | boolean |
| is\_ext\_shared | boolean |
| is\_default\_shared | boolean |
| is\_member | boolean |
| is\_pending\_ext\_shared | boolean |
| pending\_shared | json |
| pending\_connected\_team\_ids | json |
| unlinked | integer |
| num\_members | integer |
| priority | integer |
| user | text |
| created | timestamp |
| creator | text |
| topic | json |
| purpose | json |
| previous\_names | json |
| locale | text |
| conversation\_host\_id | text |
### users\_profile\_fields
Sync type availability: Full-refresh
| Field | Type |
| ---------------- | ------- |
| id | text |
| team\_id | text |
| ordering | integer |
| label | text |
| hint | text |
| type | text |
| possible\_values | json |
| is\_hidden | boolean |
| is\_protected | boolean |
| is\_global | boolean |
### files
Sync type availability: Full and incremental refresh
[Cursor](https://docs.erathos.com/platform/connections/sync-types#understanding-cursors): `created`
Parent of [file\_comments](#file-comments)
| Field | Type | Cursor |
| ---------------------- | --------- | ------ |
| id | text | |
| created | timestamp | ✓ |
| timestamp | timestamp | |
| name | text | |
| title | text | |
| mimetype | text | |
| filetype | text | |
| pretty\_type | text | |
| user | text | |
| user\_team | text | |
| editable | boolean | |
| size | integer | |
| mode | text | |
| is\_external | boolean | |
| external\_type | text | |
| is\_public | boolean | |
| public\_url\_shared | boolean | |
| display\_as\_bot | boolean | |
| url\_private | text | |
| url\_private\_download | text | |
| permalink | text | |
| comments\_count | integer | |
| shares | json | |
| channels | json | |
| groups | json | |
| ims | json | |
| has\_rich\_preview | boolean | |
| file\_access | text | |
### file\_comments
Sync type availability: Full-refresh
Child of [files](#files)
| Field | Type |
| --------- | --------- |
| id | text |
| created | timestamp |
| timestamp | timestamp |
| user | text |
| comment | text |
| is\_intro | boolean |
| reactions | json |
### files\_remote
Sync type availability: Full and incremental refresh
[Cursor](https://docs.erathos.com/platform/connections/sync-types#understanding-cursors): `created`
| Field | Type | Cursor |
| -------------- | --------- | ------ |
| id | text | |
| created | timestamp | ✓ |
| timestamp | timestamp | |
| name | text | |
| title | text | |
| mimetype | text | |
| filetype | text | |
| pretty\_type | text | |
| user | text | |
| url | text | |
| permalink | text | |
| is\_external | boolean | |
| external\_type | text | |
| app\_id | text | |
| app\_name | text | |
| size | integer | |
### usergroups
Sync type availability: Full-refresh
Parent of [usergroup\_members](#usergroup-members)
| Field | Type |
| ----------------------- | --------- |
| id | text |
| team\_id | text |
| name | text |
| description | text |
| handle | text |
| is\_external | boolean |
| date\_create | timestamp |
| date\_update | timestamp |
| date\_delete | timestamp |
| auto\_type | text |
| enterprise\_subteam\_id | text |
| created\_by | text |
| updated\_by | text |
| deleted\_by | text |
| prefs | json |
| user\_count | integer |
### usergroup\_members
Sync type availability: Full-refresh
Child of [usergroups](#usergroups)
| Field | Type |
| -------- | ---- |
| user\_id | text |
### team\_info
Sync type availability: Full-refresh
| Field | Type |
| ----------------- | ------- |
| id | text |
| name | text |
| url | text |
| domain | text |
| email\_domain | text |
| icon | json |
| avatar\_base\_url | text |
| is\_verified | boolean |
| enterprise\_id | text |
| enterprise\_name | text |
### auth\_teams
Sync type availability: Full-refresh
| Field | Type |
| ----------------- | ------- |
| id | text |
| name | text |
| url | text |
| domain | text |
| avatar\_base\_url | text |
| is\_verified | boolean |
| enterprise\_id | text |
| icon | json |
### team\_preferences
Sync type availability: Full-refresh
| Field | Type |
| ------------------------------ | ------- |
| allow\_message\_deletion | boolean |
| disable\_file\_editing | boolean |
| disable\_file\_pasting | boolean |
| display\_real\_names | boolean |
| log\_to\_channels | boolean |
| who\_can\_manage\_integrations | json |
| who\_can\_manage\_channels | json |
| default\_channels | json |
### team\_billable\_info
Sync type availability: Full-refresh
| Field | Type |
| -------- | ------- |
| user\_id | text |
| billable | boolean |
### team\_access\_logs
Sync type availability: Full-refresh
| Field | Type |
| ----------- | --------- |
| user\_id | text |
| username | text |
| date\_first | timestamp |
| date\_last | timestamp |
| count | integer |
| ip | text |
| user\_agent | text |
| isp | text |
| country | text |
| region | text |
### team\_integration\_logs
Sync type availability: Full-refresh
| Field | Type |
| ------------- | --------- |
| user\_id | text |
| user\_name | text |
| service\_id | integer |
| service\_type | text |
| date | timestamp |
| change\_type | text |
| app\_type | text |
| app\_id | text |
| scope | text |
| channel | text |
| rss\_feed | json |
### team\_external\_teams
Sync type availability: Full-refresh
| Field | Type |
| ----------------- | --------- |
| id | text |
| name | text |
| url | text |
| domain | text |
| avatar\_base\_url | text |
| is\_verified | boolean |
| date\_created | timestamp |
| date\_updated | timestamp |
### apps\_activities
Sync type availability: Full and incremental refresh
[Cursor](https://docs.erathos.com/platform/connections/sync-types#understanding-cursors): `created`
| Field | Type | Cursor |
| ------------ | --------- | ------ |
| id | text | |
| app\_id | text | |
| team\_id | text | |
| user\_id | text | |
| created | timestamp | ✓ |
| entity\_type | text | |
| entity\_id | text | |
| event\_type | text | |
| source | json | |
### apps\_event\_authorizations
Sync type availability: Full-refresh
| Field | Type |
| ----------------------- | ------- |
| enterprise\_id | text |
| team\_id | text |
| user\_id | text |
| is\_bot | boolean |
| is\_enterprise\_install | boolean |
### apps\_datastore\_query
Sync type availability: Full-refresh
| Field | Type |
| ------- | --------- |
| id | text |
| created | timestamp |
| updated | timestamp |
| name | text |
### emoji
Sync type availability: Full-refresh
| Field | Type |
| ----- | ---- |
| name | text |
| url | text |
### reactions
Sync type availability: Full-refresh
| Field | Type |
| ------- | ---- |
| type | text |
| channel | text |
| user | text |
| message | json |
| file | json |
| comment | json |
### stars
Sync type availability: Full-refresh
| Field | Type |
| ------------ | --------- |
| type | text |
| channel | text |
| date\_create | timestamp |
| message | json |
| file | json |
| comment | json |
### reminders
Sync type availability: Full-refresh
| Field | Type |
| ------------ | --------- |
| id | text |
| creator | text |
| user | text |
| text | text |
| recurring | boolean |
| time | timestamp |
| complete\_ts | timestamp |
### scheduled\_messages
Sync type availability: Full and incremental refresh
[Cursor](https://docs.erathos.com/platform/connections/sync-types#understanding-cursors): `post_at`
| Field | Type | Cursor |
| ------------- | --------- | ------ |
| id | text | |
| channel\_id | text | |
| text | text | |
| post\_at | timestamp | ✓ |
| date\_created | timestamp | |
| thread\_ts | timestamp | |
### search\_messages
Sync type availability: Full-refresh
| Field | Type |
| ------------- | --------- |
| score | float |
| type | text |
| user | text |
| ts | timestamp |
| text | text |
| permalink | text |
| channel | json |
| attachments | json |
| blocks | json |
| no\_reactions | boolean |
### search\_files
Sync type availability: Full-refresh
| Field | Type |
| -------------- | --------- |
| score | float |
| id | text |
| created | timestamp |
| timestamp | timestamp |
| name | text |
| title | text |
| mimetype | text |
| filetype | text |
| pretty\_type | text |
| user | text |
| size | integer |
| mode | text |
| is\_external | boolean |
| external\_type | text |
| is\_public | boolean |
| permalink | text |
| channels | json |
| groups | json |
| ims | json |
### search\_all
Sync type availability: Full-refresh
| Field | Type |
| ------------- | --------- |
| score | float |
| type | text |
| user | text |
| ts | timestamp |
| text | text |
| permalink | text |
| channel | json |
| attachments | json |
| blocks | json |
| no\_reactions | boolean |
### assistant\_search\_context
Sync type availability: Full-refresh
| Field | Type |
| -------- | ---- |
| query | text |
| messages | json |
| files | json |
| channels | json |
| users | json |
### list\_items
Sync type availability: Full-refresh
| Field | Type |
| ------------- | --------- |
| id | text |
| list\_id | text |
| date\_created | timestamp |
| created\_by | text |
| date\_updated | timestamp |
| updated\_by | text |
| archived | boolean |
| fields | json |
### workflows\_featured
Sync type availability: Full-refresh
| Field | Type |
| ------------- | --------- |
| id | text |
| name | text |
| date\_created | timestamp |
| date\_updated | timestamp |
| channel\_ids | json |
### functions\_workflows\_steps
Sync type availability: Full-refresh
| Field | Type |
| -------- | ---- |
| step\_id | text |
| version | text |
| inputs | json |
| outputs | json |
### dnd\_team\_info
Sync type availability: Full-refresh
| Field | Type |
| -------------------- | --------- |
| user\_id | text |
| dnd\_enabled | boolean |
| next\_dnd\_start\_ts | timestamp |
| next\_dnd\_end\_ts | timestamp |
## Entity Relationships
```mermaid
erDiagram
conversations ||--o{ conversation_members : "id = channel"
conversations ||--o{ messages : "id = channel"
conversations ||--o{ bookmarks : "id = channel"
conversations ||--o{ pins : "id = channel"
messages ||--o{ thread_replies : "ts = thread_ts"
files ||--o{ file_comments : "id = file_id"
usergroups ||--o{ usergroup_members : "id = usergroup_id"
users ||--o{ users_get_presence : "id = user_id"
users ||--o{ apps_activities : "id = user_id"
users ||--o{ apps_event_authorizations : "id = user_id"
users ||--o{ bookmarks : "id = user_id"
users ||--o{ conversation_members : "id = user_id"
users ||--o{ dnd_team_info : "id = user_id"
users ||--o{ team_access_logs : "id = user_id"
users ||--o{ team_billable_info : "id = user_id"
users ||--o{ team_integration_logs : "id = user_id"
users ||--o{ usergroup_members : "id = user_id"
conversations { text id PK }
bookmarks { text id PK }
messages { timestamp ts PK }
thread_replies { timestamp ts PK }
pins { timestamp created PK }
files { text id PK }
file_comments { text id PK }
usergroups { text id PK }
users { text id PK }
```
# Stripe
Find out how to connect Stripe to your data warehouse effortlessly.
## Using the Erathos platform
When selecting Stripe as a new connector on the Erathos platform, you will need to name your connection and fill in the following form:

## How to find Stripe's API Token?
A restricted API Key allows only the access level that has been specified.
To create a restricted API Key:
1. Access the **API Keys** page
2. You can either create a restricted key form scratch or clone an already existent key.
* To create a key form scratch, click on **Create restricted key.** In this case, the standard value for all permissions is **None.**
* To clone an already existent key: on the line of the key that you want to clone, click on the navigation menu and select **Duplicate key.** In this case, the standard value for each permisison is equivalent to its value in the now cloned key.
3. In the **Key name** field, insert a name. If you cloned an existent key, the standand name is the cloned key's name.
4. For each resouce that the new key should be able to access, select the correspondent permission. If you use Connect, you can also select the key permission when accessing connected accounts. The availabe permissions are **None**, **Reader** or **Recorder**.
5. Click on **Create key**.
6. Stripe will send a verification code to your email inbox ou through a text message. It may not be sent immediatly, be patient! When received, insert the code in the text box. If the text box doesn't advance to the next step automatically, click on **Continue**.
7. The text box will exhibit **the new key value**. Click to copy and **save** it, you won't be able to retrieve it.
8. In the Add an observation field, indicate where you saved the key value and click on **Concluded**.
Now paste the informations in the correct fields in the Erathos platform. Don't forget to click on **Save and close** to advance to the next steps of the integration.
With this connection created you can seemlessly move your Stripe data to your BigQuery, Redshift or Postgres data-warehouse.
## What endpoints can I access with the Erathos platform?
* files
* payouts
* refunds
* payment\_method\_domains
* products
* prices
* tax\_rates
* shipping\_rates
* checkout\_sessions
* payment\_links
* credit\_notes
* invoices
* invoice\_items
* plans
* quotes
* subscriptions
* subscription\_items
* schedules
* connected\_accounts
* external\_bank\_accounts
* persons
* application\_fees
* transfers
* early\_fraud\_warnings
* open\_reviews
* authorizations
* cardholders
* issuing\_disputes
* issuing\_transactions
* locations
* readers
* report\_runs
* financial\_connections\_accounts
# Superlógica
Find out how to connect Superlogica to your data warehouse effortlessly.
## Using the Erathos platform
When selecting Superlógica as a new connector on the Erathos platform, you will need to name your connection and fill in the following form:

## How to find my Superlógica Access Token?
The access token is a code that informs each integration user's permissions. These permissions can be altered.
1. To create the access tokens, enter the users page in or pass your mouse along your user and click on **All users** as the attechment below:
.png)
2. Scroll down and select the **Apps (your e-mail)** option.
.png)
3. Then, click in **New App Token**
.png)
4. Now, fill in the name and description fields regarding your app and click on **Save**.
.png)
5. In the next page, the system wil, display the App token, Secret and Access token values. Only the App Token and Access token values are necessary for the connection.
.png)
6. In the **Released Apps** field No campo **Aplicativos liberados** above the creation interface you will see all the available for integration apps.
.png)
**P.S.: The App Token and the Access Token expire within 1 year. After that, to continue using the API, you will need to generate a new token.**
Now paste the **App Token** and **Access Token** values in the correct fields of the Erathos platform. Don't forget to click on **Save and close** to advance to the next steps of the integration.
With this connection created you can seemlessly move your Superlógica data to your BigQuery, Redshift or Postgres data-warehouse.
## What endpoints can I access with the Erathos platform?
* clientes
* clientes\_vinculados
* contratos\_ativos
* contratos\_trial
* contratos\_pendentes
* cobrancas
* contas\_bancarias
* centro\_custos
* fornecedores
* adimplentes
* inadimplentes
* metricas
* movimentacoes\_bancarias
* produtos\_servicos
* cupons
* departamentos
* receitas\_eventuais
* assinaturas
* planos
* notafiscal
# TikTok Ads
Find out how to connect Tiktok Ads to your data warehouse effortlessly.
### Using the Erathos platform
Extracting data from TikTok Ads requires allowing Erathos App to access your TikTok account by simply logging into the Tiktok account associated with your browser and agreeing with the requested permission.
First, in the **Credentials** page click on the 🔄 button and you will be redirected a TikTok authorization page where you can confirm which account and which permissions are being granted to Erathos:
{% hint style="info" %}
The user account used must have the appropriate permissions to be able to see the advertiser accounts. You can assign one of the following roles (admin, operator, analyst) using [this guide](https://ads.tiktok.com/help/article/change-the-permissions-for-your-tiktok-business-center-partner?lang=en)
{% endhint %}
Click on **Confirm** and you will be redirected back to Erathos platform where you need to then click **Save and test** to proceed to the next step of the connection creation.
After selecting the desired endpoints and their job settings you will be able to seemlessly move your TikTok Ads data to your BigQuery, Databricks, PostgreSQL, or Redshift data-warehouse.
### What endpoints can I access with the Erathos platform?
* adgroups
* ads
* campaigns
* report\_ad\_audience\_attribute\_daily
* report\_ad\_audience\_attribution\_daily
* report\_ad\_audience\_basicdata\_daily
* report\_ad\_audience\_engagement\_daily
* report\_ad\_audience\_pageevent\_daily
* report\_ad\_audience\_videoplay\_daily
* report\_ad\_basic\_attribute\_daily
* report\_ad\_basic\_clicks\_daily
* report\_ad\_basic\_conversion\_app\_daily
* report\_ad\_basic\_conversion\_attribution\_daily
* report\_ad\_basic\_conversion\_messaging\_daily
* report\_ad\_basic\_conversion\_offline\_daily
* report\_ad\_basic\_conversion\_shop\_daily
* report\_ad\_basic\_conversion\_tiktok\_daily
* report\_ad\_basic\_conversion\_website\_daily
* report\_ad\_basic\_core\_daily
* report\_ad\_basic\_image\_daily
* report\_ad\_basic\_instantexperience\_daily
* report\_ad\_basic\_interactive\_daily
* report\_ad\_basic\_live\_daily
* report\_ad\_basic\_san\_daily
* report\_ad\_basic\_skan\_app\_daily
* report\_ad\_basic\_skan\_attribution\_daily
* report\_ad\_basic\_skan\_core\_daily
* report\_ad\_basic\_socials\_daily
* report\_ad\_basic\_video\_daily
* report\_ad\_daily\_by\_age\_gender
* report\_ad\_daily\_by\_country
* report\_ad\_daily\_by\_language
* report\_ad\_daily\_by\_platform
* report\_adgroup\_audience\_basicdata\_daily
* report\_adgroup\_audience\_engagement\_daily
* report\_adgroup\_basic\_core\_daily
* report\_adgroup\_daily\_by\_age\_gender
* report\_adgroup\_daily\_by\_country
* report\_adgroup\_daily\_by\_language
* report\_adgroup\_daily\_by\_platform
* report\_campaign\_audience\_basicdata\_daily
* report\_campaign\_audience\_engagement\_daily
* report\_campaign\_basic\_core\_daily
* report\_campaign\_daily\_by\_age\_gender
* report\_campaign\_daily\_by\_country
* report\_campaign\_daily\_by\_language
* report\_campaign\_daily\_by\_platform
# Tiny
Find out how to connect Tiny to your data warehouse effortlessly.
## Using the Erathos platform:
When selecting Tiny as a new connector on the Erathos platform, you will need to authorize the connection by simply logging into the Tiny account associated with your browser.
Just click on '**Authorize Tiny**' as shown in the attachment below:

Don't forget to click on **Save and close** to advance to the next steps of the integration.
With this connection created you can seemlessly move your Tiny data to your BigQuery, Redshift or Postgres data-warehouse.
## What endpoints can I access with the Erathos platform?
* dados\_da\_empresa
* categorias
* contatos
* contatos\_detalhes
* pessoas
* contatos\_tipos
* expedicao
* formas\_envio
* formas\_envio\_detalhes
* formas\_pagamento
* intermediadores
* listas\_precos
* marcas
* notas
* notas\_detalhes
* pedidos
* pedidos\_detalhes
* separacao
* separacao\_detalhes
* vendedores
* produtos
* produtos\_detalhes
* produto\_estoques
# Tiny V3
Find out how to connect Tiny V3 to your data warehouse effortlessly.
## Using the Erathos platform:
When selecting Tiny as a new connector on the Erathos platform, you will need to create an tiny app and authorize the connection.
{% hint style="info" %}
It is necessary to have the extension "**Gestão de Aplicativos**" enabled on your Tiny Account.
{% endhint %}
1. In your Tiny account:
1. Navigate to `Menu` > `Configurações` > `Aba geral` > `Aplicativos`.
2. Create a new app.
3. Give it a name.
4. In the **URLs de Redirecionamento** field paste the Redirect URL provided in the Erathos plataform (image above).
5. Save and copy the **`Client ID`** and **`Client Secret`**
2. On the Erathos plataform
1. Paste both **`Client ID`** and **`Client Secret`**.
2. Click Save and test.
3. Click the Authorize Integration and follow the Authorization process
4. Click Save and test
## What endpoints can I access with the Erathos platform?
* categorias
* categorias\_receita\_despesa
* contas\_pagar
* contas\_pagar\_detalhes
* contas\_receber
* contas\_receber\_detalhes
* contatos
* contatos\_detalhes
* contatos\_tipos
* dados\_da\_empresa
* expedicao
* expedicao\_detalhes
* formas\_envio
* formas\_envio\_detalhes
* formas\_pagamento
* intermediadores
* listas\_precos
* marcas
* notas
* notas\_detalhes
* ordem\_compras
* ordem\_compras\_detalhes
* ordem\_servicos
* ordem\_servicos\_detalhes
* pedidos
* pedidos\_detalhes
* pessoas
* produto\_estoques
* produtos
# Teamwork Desk
Find out how to connect Teamwork Desk to your data warehouse effortlessly.
## Using the Erathos platform
When selecting Teamwork Desk as a new connector on the Erathos platform, you will need to name your connection and fill in the following form:

## How to find the Domain URL?
1. Log in to your account
2. Copy the URL address shown in your navigation bar (until `desk...)`.
## How to find the API Token?
1. In your account, click on your profile, located in the bottom left corner;
2. Click on **View Profile**;
3. Access **API keys;**
4. In the upper right corner, select Create an API key\*\*;\*\*
5. Copy the value found and paste it on the Erathos platform connection form
Don't forget to click on **Save and close** to advance to the next steps of the integration! With this connection created you can seemlessly move your Teamwork Desk data to your BigQuery, Redshift or Postgres data-warehouse.
## What endpoints can I access with the Erathos platform?
* companies
* customers
* conversationmessages
* inboxes
* tickets
* messages
* permissions
* spamlists
* timelogs
* triggers
* notifications
* permissionusers
* users
* ticket\_priorities
* ticket\_reminders
* ticket\_activities
* ticket\_sources
* ticket\_read
* ticket\_statuses
* ticket\_templates
* ticket\_types
* ticket\_user\_decks
# Track.co
Find out how to connect Track.co to your data warehouse effortlessly.
## Using the Erathos platform
When selecting [Track.co](http://track.co) as a new connector on the Erathos platform, you will need to name your connection and fill in the following form:

## How to find my Organization UUID and API Token?
1. Log in to your account
2. In the main menu, locate the Settings section;
3. Click on Integrations and select the API option.
4. To enable API usage, click on the Activate API button. (This will allow you to generate the authentication token and UUID).
5. Place these informations somewhere safe, they are necessary for API requests.
6. Paste the found values on the Erathos platform connection form.
Don't forget to click on **Save and close** to advance to the next steps! With this connection created you can seemlessly move your [Track.co](http://track.co) data to your BigQuery, Redshift or Postgres data-warehouse.
## What endpoints can I access with the Erathos platform?
* surveys
* distributions
* distributions\_status
* attributes
* templates
* interactions\_exports
* interactions
# Trello
Find out how to connect Trello to your data warehouse effortlessly.
## Using the Erathos platform
When selecting [Trello.com](https://trello.com/) as a new connector on the Erathos platform, you will need to name your connection and fill in the following form:
## How to find my API Key and API Token?
1. Navigate to .
2. Create a new **Power-up**.
3. Fill the form with your information (you can leave the URL field blank).
4. Generate a new **API Key**.
5. Copy your **API Key** (1) and create a **token** (2) manually.
## What endpoints can I access with the Erathos platform?
* organizations
* members
* boards
* cards
* lists
* actions
# Trustvox
Connect your Trustvox review platform to your data warehouse. Sync product opinions, ratings, questions, seller reviews, and store data to BigQuery, Redshift, PostgreSQL, Databricks, and more.
## Using the Erathos platform
When selecting Trustvox as a new connector on the Erathos platform, you will need to name your connection and fill in the following form:
* **Token** — your Trustvox API token, used to authenticate all requests to the Trustvox API
* **Store URL** — the URL of your Trustvox store, used to identify which store's data to extract
* **Admin Email** — the administrator email associated with your Trustvox account
* **Store ID** — the numeric identifier of your store in Trustvox
With this connection created you can seamlessly move your Trustvox data to your BigQuery, Redshift or PostgreSQL data warehouse.
### How to find my token?
Log in to your Trustvox account at and go to the account/admin settings area. Under the API or integrations section, generate or copy your API token. This token is sent as a `Bearer` credential in the `Authorization` header of every request, alongside the `Accept: application/vnd.trustvox.com; version=1` header that selects the API version.
You will also need your store URL, the admin email for the account, and your store ID — these identify which store's opinions, orders, products, and reviews will be extracted.
Paste the token into the **Token** field on the Erathos platform, fill in the **Store URL**, **Admin Email** and **Store ID** fields, and click **Save and close** to complete the setup.
## Endpoints and fields
### opinions
Sync type availability: Full-refresh
| Field | Type |
| ---------------- | --------- |
| id | text |
| rate | integer |
| text | text |
| product | json |
| client | json |
| recommends | text |
| upvotes\_count | integer |
| downvotes\_count | integer |
| created\_at | timestamp |
| order | json |
| photos | json |
| survey | json |
### orders
Sync type availability: Full-refresh
| Field | Type |
| ------------------ | --------- |
| id | integer |
| order\_id | text |
| tags | json |
| client | json |
| delivery\_date | date |
| state | text |
| review\_url | text |
| store\_review\_url | text |
| store\_review | json |
| created\_at | timestamp |
| items | json |
### product\_by\_code
Sync type availability: Full-refresh
Child of [products](#products)
| Field | Type |
| ----------- | ------- |
| tags | json |
| product\_id | integer |
| store\_id | integer |
| skus | json |
### product\_opinions
Sync type availability: Full-refresh
Child of [products](#products)
| Field | Type |
| ---------------- | ------- |
| id | integer |
| opinion\_title | text |
| opinion | text |
| rate | integer |
| created\_at | date |
| upvotes\_count | integer |
| downvotes\_count | integer |
| third\_party | boolean |
| user | json |
| sale\_item | json |
| recommends | text |
| review\_photos | json |
| sale | json |
| comments | json |
| links | json |
### product\_opinions\_overview
Sync type availability: Full-refresh
Child of [products](#products)
| Field | Type |
| ----------------------------- | ------- |
| rate | json |
| top\_rated\_opinion | json |
| top\_rated\_negative\_opinion | json |
| opinions\_count | json |
| questions\_count | integer |
| clickable\_logo | boolean |
| store\_rate | json |
| overall\_opinions\_rate | json |
| features | json |
| store\_name | text |
| raw\_store\_name | text |
| store\_locale | text |
| prefetched\_opinions | json |
| prefetched\_questions | json |
| items | json |
| links | json |
### product\_question\_suggestions
Sync type availability: Full-refresh
Child of [products](#products)
| Field | Type |
| ------------ | ------- |
| answer | text |
| answered\_at | date |
| id | integer |
| links | json |
| origin | text |
| question | text |
### product\_questions
Sync type availability: Full-refresh
Child of [products](#products)
| Field | Type |
| ------------ | ------- |
| question | text |
| id | integer |
| origin | text |
| answer | text |
| answered\_at | date |
| links | json |
### product\_rate
Sync type availability: Full-refresh
Child of [products](#products)
| Field | Type |
| ------------- | ------- |
| product\_code | text |
| average | float |
| count | integer |
| product\_name | text |
### product\_recommendation\_summary
Sync type availability: Full-refresh
Child of [products](#products)
| Field | Type |
| ------------------ | ------- |
| averageAnswerCount | integer |
| percentage | float |
### product\_survey\_answers\_summary
Sync type availability: Full-refresh
Child of [products](#products)
| Field | Type |
| ----------------- | ------- |
| average | float |
| description | text |
| options | json |
| totalAnswersCount | integer |
### product\_survey\_question\_summaries
Sync type availability: Full-refresh
Child of [products](#products)
| Field | Type |
| ----------- | ------- |
| description | text |
| id | integer |
| kind | text |
| options | json |
### products
Sync type availability: Full-refresh
Parent of [product\_by\_code](#product_by_code), [product\_opinions](#product_opinions), [product\_opinions\_overview](#product_opinions_overview), [product\_question\_suggestions](#product_question_suggestions), [product\_questions](#product_questions), [product\_rate](#product_rate), [product\_recommendation\_summary](#product_recommendation_summary), [product\_survey\_answers\_summary](#product_survey_answers_summary), [product\_survey\_question\_summaries](#product_survey_question_summaries)
| Field | Type |
| ----------------- | ------- |
| id | text |
| name | text |
| average\_rate | text |
| total\_recommends | integer |
| total\_opinions | integer |
| ean | json |
| opinions | json |
| links | json |
### questions
Sync type availability: Full and incremental refresh
[Cursor](https://docs.erathos.com/platform/connections/sync-types#understanding-cursors): `updated_at`
| Field | Type | Cursor |
| ----------- | --------- | ------ |
| id | integer | |
| text | text | |
| created\_at | timestamp | |
| updated\_at | timestamp | ✓ |
| visible | boolean | |
| state | text | |
| consumer | json | |
| product | json | |
| answer | json | |
### seller\_detail
Sync type availability: Full-refresh
Child of [sellers](#sellers)
| Field | Type |
| --------------- | --------- |
| id | integer |
| name | text |
| store\_id | integer |
| external\_id | text |
| created\_at | timestamp |
| updated\_at | timestamp |
| average\_rate | float |
| total\_opinions | integer |
| photo\_url | text |
| nps | json |
| histogram | json |
| summaries | json |
### seller\_reviews
Sync type availability: Full-refresh
| Field | Type |
| ----------- | --------- |
| id | integer |
| rate | integer |
| text | text |
| client\_id | integer |
| sale\_id | integer |
| seller\_id | integer |
| created\_at | timestamp |
| updated\_at | timestamp |
| seller | json |
| client | json |
### sellers
Sync type availability: Full-refresh
Parent of [seller\_detail](#seller_detail)
| Field | Type |
| ------------ | --------- |
| id | integer |
| name | text |
| store\_id | integer |
| external\_id | text |
| created\_at | timestamp |
| updated\_at | timestamp |
| photo\_url | text |
### store\_by\_url
Sync type availability: Full-refresh
| Field | Type |
| ------------ | --------- |
| id | integer |
| name | text |
| created\_at | timestamp |
| cnpj | text |
| store\_token | text |
| links | json |
### store\_reviews
Sync type availability: Full-refresh
| Field | Type |
| ----------- | --------- |
| id | integer |
| text | text |
| rate | integer |
| created\_at | timestamp |
| client | json |
### tags
Sync type availability: Full-refresh
| Field | Type |
| ----- | ------- |
| id | integer |
| name | text |
## Entity Relationships
```mermaid
erDiagram
products ||--o{ product_by_code : "id = _pk_products"
products ||--o{ product_opinions : "id = _pk_products"
products ||--o{ product_opinions_overview : "id = _pk_products"
products ||--o{ product_question_suggestions : "id = _pk_products"
products ||--o{ product_questions : "id = _pk_products"
products ||--o{ product_rate : "id = _pk_products"
products ||--o{ product_recommendation_summary : "id = _pk_products"
products ||--o{ product_survey_answers_summary : "id = _pk_products"
products ||--o{ product_survey_question_summaries : "id = _pk_products"
sellers ||--o{ seller_detail : "id = _pk_sellers"
sellers ||--o{ seller_reviews : "id = seller_id"
opinions {
text id PK
}
orders {
integer id PK
}
products {
text id PK
}
product_by_code {
text _pk_products PK
integer product_id PK
}
product_opinions {
text _pk_products PK
integer id PK
}
product_opinions_overview {
text _pk_products PK
}
product_question_suggestions {
text _pk_products PK
integer id PK
}
product_questions {
text _pk_products PK
integer id PK
}
product_rate {
text _pk_products PK
text product_code PK
}
product_recommendation_summary {
text _pk_products PK
}
product_survey_answers_summary {
text _pk_products PK
}
product_survey_question_summaries {
text _pk_products PK
integer id PK
}
questions {
integer id PK
}
seller_detail {
text _pk_sellers PK
integer id PK
}
seller_reviews {
integer id PK
}
sellers {
integer id PK
}
store_by_url {
integer id PK
}
store_reviews {
integer id PK
}
tags {
integer id PK
}
```
# Twitch.tv
Find out how to connect Twitch.tv to your data warehouse effortlessly.
## Using the Erathos platform:
When selecting [Twitch.tv](http://twitch.tv) as a new connector on the Erathos platform, you will need to authorize the connection by simply logging into the [Twitch.tv](http://twitch.tv) account associated with your browser.
Just click on '**Authorize** [**Twitch.tv**](http://twitch.tv)' as shown in the attachment below:

Don't forget to click on **Save and close** to advance to the next steps of the integration.
With this connection created you can seemlessly move your [Twitch.tv](http://twitch.tv) data to your BigQuery, Redshift or Postgres data-warehouse.
## What endpoints can I access with the Erathos platform?
* user
* banned\_users
* moderators
* vips
* polls
* videos
* clips
* goals
* subscriptions
* channels
* followers
# Twygo
Find out how to connect Twygo to your data warehouse effortlessly.
## Using the Erathos platform
When selecting Twygo as a new connector on the Erathos platform, you will need to name your connection and fill in the following form:
## How to generate Twygo's credentials?
Fill out the form with your own credentials. Erathos will use this information to generate an access token as explained on [Twygo's documentation](https://documenter.getpostman.com/view/10208526/SWTA9dne#4e2e0cfd-5ad5-496b-a52d-b65fbea3d784).
## What endpoints can I access with Erathos platform?
| Endpoints |
| ---------------- |
| courses |
| portfolio |
| students |
| students\_events |
# Typeform
Find out how to connect Typeform to your data warehouse effortlessly.
## Using the Erathos platform
When selecting Typeform as a new connector on the Erathos platform, you will need to name your connection and fill in the following form:

## How to find my Typeform Token?
1. Log in to your account
2. In the upper left corner of the page, in the drop-down menu beside your username, click on **Account**.
3. In the left menu, enter the Personal Tokens page.
4. Select Generate new token.
5. In the token's fielnd name, type in a name that can help you identify it later.
6. Define the necessary permissions and level of access for this API Token.
7. Click on Generate Token.
Now, copy the token value and paste it on the Erathos platform's Token field. Don't forget to click on **Save and close** to advance to the next steps of the integration.
With this connection created you can seemlessly move your Typeform data to your BigQuery, Redshift or Postgres data-warehouse.
## What endpoints can I access with the Erathos platform?
* workspaces
* forms
* forms\_insights
* forms\_fields\_insights
* forms\_responses
# Vhsys
Connect your Vhsys ERP to your data warehouse. Sync sales orders, invoices, customers, products, and financial data to BigQuery, Redshift, PostgreSQL, Databricks, and more.
## Using the Erathos platform
When selecting Vhsys as a new connector on the Erathos platform, you will need to name your connection and fill in the following form:
* **Access token** — your Vhsys API access token, sent in the `access-token` header of every request
* **Secret access token** — your Vhsys API secret access token, sent in the `secret-access-token` header of every request
With this connection created you can seamlessly move your Vhsys data to your BigQuery, Redshift or Postgres data warehouse.
### How to find my token?
To generate your API credentials, log in to your Vhsys account and go to **Configurações → API** (Settings → API). There you will find your **access token** and your **secret access token** for the API v2 endpoints.
Copy both values and paste them into the **Access token** and **Secret access token** fields on the Erathos platform.
Click **Save and close** to complete the setup.
## Endpoints and fields
### autoshop\_dados\_veiculos
Sync type availability: Full-refresh
| Field | Type |
| ------------ | ---- |
| combustiveis | json |
| cores | json |
| marcas | json |
| modelos | json |
| tipos | json |
### categorias
Sync type availability: Full and incremental refresh
[Cursor](https://docs.erathos.com/platform/connections/sync-types#understanding-cursors): `data_mod_categoria`
| Field | Type | Cursor |
| -------------------- | --------- | ------ |
| id\_categoria | integer | |
| nome\_categoria | text | |
| atalho\_categoria | text | |
| status\_categoria | text | |
| data\_cad\_categoria | timestamp | |
| data\_mod\_categoria | timestamp | ✓ |
| lixeira | text | |
| subcategorias | json | |
### categorias\_clientes
Sync type availability: Full and incremental refresh
[Cursor](https://docs.erathos.com/platform/connections/sync-types#understanding-cursors): `data_mod_categoria`
| Field | Type | Cursor |
| -------------------- | --------- | ------ |
| id\_categoria | integer | |
| nome\_categoria | text | |
| status\_categoria | text | |
| data\_cad\_categoria | timestamp | |
| data\_mod\_categoria | timestamp | ✓ |
| lixeira | text | |
### categorias\_financeiras
Sync type availability: Full-refresh
| Field | Type |
| ----------------- | ------- |
| id\_categoria | integer |
| tipo\_categoria | text |
| desc\_categoria | text |
| lixeira | text |
| visivel\_dre | text |
| grupo\_financeiro | text |
| categoria\_pai | text |
### centros\_custo
Sync type availability: Full and incremental refresh
[Cursor](https://docs.erathos.com/platform/connections/sync-types#understanding-cursors): `data_mod_centro`
| Field | Type | Cursor |
| ---------------------- | --------- | ------ |
| id\_centro\_custos | integer | |
| desc\_centro\_custos | text | |
| status\_centro\_custos | text | |
| data\_cad\_centro | timestamp | |
| data\_mod\_centro | timestamp | ✓ |
| lixeira | text | |
### clientes
Sync type availability: Full and incremental refresh
Parent of [clientes\_detalhe](#clientes_detalhe), [clientes\_veiculos](#clientes_veiculos)
[Cursor](https://docs.erathos.com/platform/connections/sync-types#understanding-cursors): `data_mod_cliente`
| Field | Type | Cursor |
| ----------------------------- | --------- | ------ |
| id\_cliente | integer | |
| id\_registro | integer | |
| tipo\_pessoa | text | |
| tipo\_cadastro | text | |
| cnpj\_cliente | text | |
| rg\_cliente | text | |
| data\_emissao\_rg\_cliente | date | |
| orgao\_expedidor\_rg\_cliente | text | |
| passaporte\_cliente | text | |
| estrangeiro\_cliente | text | |
| razao\_cliente | text | |
| fantasia\_cliente | text | |
| endereco\_cliente | text | |
| numero\_cliente | text | |
| bairro\_cliente | text | |
| complemento\_cliente | text | |
| referencia\_cliente | text | |
| cep\_cliente | text | |
| cidade\_cliente | text | |
| cidade\_cliente\_cod | integer | |
| uf\_cliente | text | |
| tel\_destinatario\_cliente | text | |
| doc\_destinatario\_cliente | text | |
| nome\_destinatario\_cliente | text | |
| contato\_cliente | text | |
| fone\_cliente | text | |
| fone\_contato\_cliente | text | |
| fone\_ramal\_cliente | text | |
| fax\_cliente | text | |
| celular\_cliente | text | |
| email\_cliente | text | |
| email\_contato\_cliente | text | |
| celular\_contato\_cliente | text | |
| estado\_civil\_cliente | text | |
| website\_cliente | text | |
| aposentado\_cliente | text | |
| empregador\_cliente | text | |
| profissao\_cliente | text | |
| genero\_cliente | text | |
| insc\_estadual\_cliente | text | |
| insc\_municipal\_cliente | text | |
| insc\_produtor\_cliente | text | |
| insc\_suframa\_cliente | text | |
| nif | text | |
| situacao\_cliente | text | |
| vendedor\_cliente | text | |
| vendedor\_cliente\_id | integer | |
| modalidade\_frete | integer | |
| id\_transportadora | integer | |
| desc\_transportadora | text | |
| observacoes\_cliente | text | |
| listapreco\_cliente | integer | |
| condicaopag\_cliente | integer | |
| limite\_credito | text | |
| ultrapassar\_limite\_credito | integer | |
| consumidor\_final | text | |
| contribuinte\_icms | integer | |
| atividade\_encerrada\_cliente | text | |
| data\_nasc\_cliente | date | |
| data\_cad\_cliente | timestamp | |
| data\_mod\_cliente | timestamp | ✓ |
| lixeira | text | |
| tpEnteGov | text | |
| pRedutor | text | |
| veiculos | json | |
### clientes\_detalhe
Sync type availability: Full-refresh
Child of [clientes](#clientes)
| Field | Type |
| ----------------------------- | --------- |
| id\_cliente | integer |
| id\_registro | integer |
| tipo\_pessoa | text |
| tipo\_cadastro | text |
| cnpj\_cliente | text |
| rg\_cliente | text |
| data\_emissao\_rg\_cliente | date |
| orgao\_expedidor\_rg\_cliente | text |
| passaporte\_cliente | text |
| estrangeiro\_cliente | integer |
| razao\_cliente | text |
| fantasia\_cliente | text |
| endereco\_cliente | text |
| numero\_cliente | text |
| bairro\_cliente | text |
| complemento\_cliente | text |
| referencia\_cliente | text |
| cep\_cliente | text |
| cidade\_cliente | text |
| cidade\_cliente\_cod | integer |
| uf\_cliente | text |
| tel\_destinatario\_cliente | text |
| doc\_destinatario\_cliente | text |
| nome\_destinatario\_cliente | text |
| contato\_cliente | text |
| fone\_cliente | text |
| fone\_contato\_cliente | text |
| fone\_ramal\_cliente | text |
| fax\_cliente | text |
| celular\_cliente | text |
| email\_cliente | text |
| email\_contato\_cliente | text |
| celular\_contato\_cliente | text |
| estado\_civil\_cliente | text |
| website\_cliente | text |
| aposentado\_cliente | integer |
| empregador\_cliente | text |
| profissao\_cliente | text |
| genero\_cliente | text |
| insc\_estadual\_cliente | text |
| insc\_municipal\_cliente | text |
| insc\_produtor\_cliente | text |
| insc\_suframa\_cliente | text |
| nif | text |
| id\_categoria | integer |
| situacao\_cliente | text |
| vendedor\_cliente | text |
| vendedor\_cliente\_id | integer |
| modalidade\_frete | integer |
| id\_transportadora | integer |
| desc\_transportadora | text |
| observacoes\_cliente | text |
| listapreco\_cliente | integer |
| condicaopag\_cliente | integer |
| limite\_credito | text |
| ultrapassar\_limite\_credito | integer |
| consumidor\_final | text |
| contribuinte\_icms | integer |
| atividade\_encerrada\_cliente | integer |
| data\_nasc\_cliente | date |
| data\_cad\_cliente | timestamp |
| data\_mod\_cliente | timestamp |
| lixeira | text |
| tpEnteGov | text |
| pRedutor | text |
| categoria | json |
| veiculos | json |
### clientes\_veiculos
Sync type availability: Full-refresh
Child of [clientes](#clientes)
| Field | Type |
| -------------------- | --------- |
| id\_cliente\_veiculo | integer |
| id\_veiculo | integer |
| id\_marca | integer |
| id\_modelo | integer |
| id\_combustivel | integer |
| id\_cor | integer |
| placa | text |
| renavam | text |
| ano\_fabricacao | text |
| ano\_modelo | text |
| km | text |
| chassi | text |
| data\_cad | timestamp |
| data\_mod | timestamp |
| usuario\_cad | integer |
| usuario\_mod | integer |
| status | text |
| lixeira | text |
### contas\_bancarias
Sync type availability: Full and incremental refresh
[Cursor](https://docs.erathos.com/platform/connections/sync-types#understanding-cursors): `data_mod_banco`
| Field | Type | Cursor |
| --------------------------------- | --------- | ------ |
| id\_banco\_cad | integer | |
| nome\_banco\_cad | text | |
| saldo\_inicial | text | |
| saldo\_inicial\_data | date | |
| saldo\_atual | text | |
| gerar\_boletos | integer | |
| id\_carteira | integer | |
| carteira\_banco | text | |
| convenio\_banco | text | |
| cedente\_banco | text | |
| agencia\_banco | text | |
| agencia\_dv\_banco | text | |
| conta\_banco | text | |
| conta\_dv\_banco | text | |
| codigo\_cedente | text | |
| instrucoes\_boleto | text | |
| dias\_multa | integer | |
| correcao\_dia | text | |
| taxa\_boleto | text | |
| cobrar\_juros | integer | |
| dias\_juros | integer | |
| msg\_juros | integer | |
| tipo\_desconto | text | |
| status\_banco | text | |
| com\_registro | integer | |
| especie\_cobranca | integer | |
| data\_cad\_banco | timestamp | |
| data\_mod\_banco | timestamp | ✓ |
| sequencia | integer | |
| padrao\_receita | integer | |
| padrao\_despesa | integer | |
| open\_finance | integer | |
| id\_item\_pluggy | text | |
| id\_conta\_pluggy | text | |
| trampolin | integer | |
| conta\_externa\_dda | integer | |
| gerencianet | integer | |
| layout\_cobranca\_cad | text | |
| protesto\_codigo | integer | |
| juros\_codigo | integer | |
| multa\_codigo | integer | |
| aceite\_banco | text | |
| lixeira | text | |
| id\_conta\_ob | text | |
| consentimento\_ob | text | |
| hash\_ob | text | |
| liquida\_taxa | integer | |
| id\_especie\_titulo | text | |
| criar\_conta\_stone | integer | |
| conta\_stone | integer | |
| data\_consentimento | text | |
| boleto\_facil\_observacao\_boleto | integer | |
| segmento\_S | integer | |
| open\_finance\_updated\_at | text | |
| numero\_banco | text | |
| multa\_atraso | text | |
### contas\_pagar
Sync type availability: Full and incremental refresh
[Cursor](https://docs.erathos.com/platform/connections/sync-types#understanding-cursors): `data_mod_pag`
| Field | Type | Cursor |
| ---------------------- | --------- | ------ |
| id\_conta\_pag | integer | |
| id\_empresa | integer | |
| id\_registro | integer | |
| identificacao | text | |
| nome\_conta | text | |
| id\_categoria | integer | |
| categoria\_pag | text | |
| id\_banco | integer | |
| id\_fornecedor | integer | |
| nome\_fornecedor | text | |
| vencimento\_pag | date | |
| valor\_pag | text | |
| valor\_pago | text | |
| codigo\_pagamento | text | |
| data\_emissao | date | |
| n\_documento\_pag | text | |
| observacoes\_pag | text | |
| id\_centro\_custos | integer | |
| centro\_custos\_pag | text | |
| liquidado\_pag | text | |
| data\_pagamento | date | |
| obs\_pagamento | text | |
| forma\_pagamento | text | |
| valor\_juros | text | |
| valor\_desconto | text | |
| valor\_acrescimo | text | |
| valor\_taxa | text | |
| vinculo\_dda | integer | |
| data\_cad\_pag | timestamp | |
| data\_mod\_pag | timestamp | ✓ |
| agrupado | integer | |
| agrupado\_data | text | |
| agrupado\_user | text | |
| agrupamento | integer | |
| lixeira | text | |
| situacao | text | |
| status | text | |
| id\_pagamento\_ob | text | |
| codigo\_barras | text | |
| descricao\_ob | text | |
| valor\_baixa | text | |
| lixeira\_int | integer | |
| liquidado\_pag\_int | integer | |
| agendamento\_vh\_conta | integer | |
| centro\_custo | json | |
| parciais | json | |
### contas\_receber
Sync type availability: Full and incremental refresh
[Cursor](https://docs.erathos.com/platform/connections/sync-types#understanding-cursors): `data_mod_rec`
| Field | Type | Cursor |
| -------------------- | --------- | ------ |
| id\_conta\_rec | integer | |
| id\_empresa | integer | |
| id\_registro | integer | |
| identificacao | text | |
| nome\_conta | text | |
| id\_categoria | integer | |
| categoria\_rec | text | |
| id\_banco | integer | |
| id\_cliente | integer | |
| id\_boleto | integer | |
| nome\_cliente | text | |
| vencimento\_rec | date | |
| valor\_rec | text | |
| valor\_pago | text | |
| data\_emissao | date | |
| vencimento\_original | date | |
| n\_documento\_rec | text | |
| observacoes\_rec | text | |
| id\_centro\_custos | integer | |
| centro\_custos\_rec | text | |
| praca\_pagamento | text | |
| liquidado\_rec | text | |
| data\_pagamento | date | |
| obs\_pagamento | text | |
| forma\_pagamento | text | |
| valor\_juros | text | |
| valor\_desconto | text | |
| valor\_acrescimo | text | |
| valor\_taxa | text | |
| retorno\_pagamento | integer | |
| tipo\_conta | text | |
| data\_cad\_rec | timestamp | |
| data\_mod\_rec | timestamp | ✓ |
| boleto\_enviado | integer | |
| boleto\_original | integer | |
| duplicata\_enviado | integer | |
| remetido | integer | |
| registrado | integer | |
| protestar | integer | |
| dias\_protestar | integer | |
| NossoNumero | text | |
| agrupado | integer | |
| agrupado\_data | text | |
| agrupado\_user | text | |
| agrupamento | integer | |
| fluxo | integer | |
| lixeira | text | |
| id\_pagamento\_ob | text | |
| situacao | text | |
| status | integer | |
| valor\_baixa | text | |
| link\_boleto | text | |
| brcode | text | |
### entradas\_mercadoria
Sync type availability: Full and incremental refresh
Parent of [entradas\_parcelas](#entradas_parcelas), [entradas\_produtos](#entradas_produtos), [entradas\_status](#entradas_status)
[Cursor](https://docs.erathos.com/platform/connections/sync-types#understanding-cursors): `data_mod_pedido`
| Field | Type | Cursor |
| ----------------------- | --------- | ------ |
| id\_entrada | integer | |
| id\_pedido | integer | |
| id\_cliente | integer | |
| nome\_cliente | text | |
| vendedor\_pedido | text | |
| valor\_total\_produtos | float | |
| desconto\_pedido | float | |
| peso\_total\_nota | float | |
| frete\_pedido | float | |
| valor\_total\_nota | float | |
| valor\_baseICMS | float | |
| valor\_ICMS | float | |
| valor\_baseST | float | |
| valor\_ST | float | |
| valor\_IPI | float | |
| valor\_PIS | float | |
| valor\_COFINS | float | |
| transportadora\_pedido | text | |
| id\_transportadora | integer | |
| data\_pedido | date | |
| id\_centro\_custos | integer | |
| centro\_custos\_pedido | text | |
| obs\_pedido | text | |
| obs\_interno\_pedido | text | |
| status\_pedido | text | |
| contas\_pedido | integer | |
| estoque\_pedido | integer | |
| nota\_numero | integer | |
| nota\_chave | text | |
| nota\_protocolo | text | |
| nota\_data\_autorizacao | date | |
| data\_cad\_pedido | timestamp | |
| data\_mod\_pedido | timestamp | ✓ |
| lixeira | text | |
### entradas\_parcelas
Sync type availability: Full-refresh
Child of [entradas\_mercadoria](#entradas_mercadoria)
| Field | Type |
| -------------------- | ------- |
| id\_entrada | integer |
| data\_parcela | date |
| valor\_parcela | text |
| forma\_pagamento | text |
| observacoes\_parcela | text |
### entradas\_produtos
Sync type availability: Full-refresh
Child of [entradas\_mercadoria](#entradas_mercadoria)
| Field | Type |
| --------------------- | ------- |
| id\_ped\_produto | integer |
| id\_entrada | integer |
| id\_produto | integer |
| id\_almoxarifado | integer |
| id\_lote | integer |
| desc\_produto | text |
| qtde\_produto | text |
| unidade\_produto | text |
| desconto\_produto | text |
| ipi\_produto | text |
| icms\_produto | text |
| cfop\_produto | text |
| ncm\_produto | text |
| valor\_unit\_produto | text |
| valor\_total\_produto | integer |
| peso\_produto | text |
| peso\_liq\_produto | text |
| json\_localizacoes | text |
### entradas\_status
Sync type availability: Full-refresh
Child of [entradas\_mercadoria](#entradas_mercadoria)
| Field | Type |
| ------------- | ------- |
| id\_status | integer |
| id\_entrada | integer |
| data\_status | date |
| obs\_status | text |
| tipo\_status | text |
| id\_usuario | integer |
| nome\_usuario | text |
### extratos
Sync type availability: Full and incremental refresh
[Cursor](https://docs.erathos.com/platform/connections/sync-types#understanding-cursors): `data_mod_fluxo`
| Field | Type | Cursor |
| --------------------- | --------- | ------ |
| id\_fluxo | integer | |
| id\_banco | integer | |
| nome\_conta | text | |
| id\_cliente | integer | |
| nome\_cliente | text | |
| data\_fluxo | date | |
| valor\_fluxo | text | |
| observacoes\_fluxo | text | |
| id\_centro\_custos | integer | |
| centro\_custos\_fluxo | text | |
| id\_categoria | integer | |
| categoria\_fluxo | text | |
| forma\_pagamento | text | |
| tipo\_fluxo | text | |
| data\_cad\_fluxo | timestamp | |
| data\_mod\_fluxo | timestamp | ✓ |
| lixeira | text | |
| id\_transferencia | integer | |
### lista\_servicos
Sync type availability: Full-refresh
| Field | Type |
| --------------------------------- | ------- |
| id\_lista | integer |
| codigo | text |
| codigo\_atividade | text |
| descricao | text |
| imposto\_nacional | float |
| imposto\_internacional | float |
| imposto\_municipal | integer |
| cnae\_secundario | text |
| codigo\_nbs | text |
| anexo\_cnae | text |
| codigo\_tributacao\_nacional\_iss | text |
### notas\_consumidor
Sync type availability: Full and incremental refresh
Parent of [notas\_consumidor\_parcelas](#notas_consumidor_parcelas), [notas\_consumidor\_produtos](#notas_consumidor_produtos), [notas\_consumidor\_status](#notas_consumidor_status)
[Cursor](https://docs.erathos.com/platform/connections/sync-types#understanding-cursors): `data_mod_pedido`
| Field | Type | Cursor |
| --------------------------- | --------- | ------ |
| id\_nfc | integer | |
| serie\_nota | integer | |
| id\_pedido | integer | |
| id\_cliente | integer | |
| nome\_cliente | text | |
| cliente\_inexistente | integer | |
| id\_local\_cobranca | integer | |
| vendedor\_pedido | text | |
| vendedor\_pedido\_id | integer | |
| valor\_total\_produtos | text | |
| desconto\_pedido | text | |
| peso\_total\_nota | text | |
| peso\_total\_nota\_liq | text | |
| frete\_pedido | text | |
| valor\_total\_nota | text | |
| valor\_baseICMS | text | |
| valor\_ICMS | text | |
| valor\_despesas | text | |
| valor\_total\_servicos | text | |
| condicao\_pagamento | integer | |
| frete\_por\_pedido | integer | |
| transportadora\_pedido | text | |
| id\_transportadora | integer | |
| volumes\_transporta | integer | |
| especie\_transporta | text | |
| marca\_transporta | text | |
| numeracao\_transporta | text | |
| placa\_transporta | text | |
| indPres\_pedido | integer | |
| natureza\_pedido | text | |
| cfop\_pedido | text | |
| obs\_pedido | text | |
| obs\_interno\_pedido | text | |
| status\_pedido | text | |
| contas\_pedido | integer | |
| comissao\_pedido | integer | |
| estoque\_pedido | integer | |
| nota\_emitida | integer | |
| nota\_chave | text | |
| nota\_protocolo | text | |
| nota\_recibo | text | |
| nota\_data\_autorizacao | timestamp | |
| nota\_usuario\_autorizacao | text | |
| nota\_data\_cancelamento | timestamp | |
| nota\_usuario\_cancelamento | text | |
| nota\_motivo\_cancelamento | text | |
| nota\_denegada | text | |
| id\_almoxarifado | integer | |
| data\_cad\_pedido | timestamp | |
| data\_mod\_pedido | timestamp | ✓ |
| ambiente | integer | |
| lixeira | text | |
| url\_qr\_code | text | |
| tipo\_intermediador | integer | |
| cnpj\_intermediador | text | |
| ident\_no\_intermediador | text | |
| id\_pedido\_ref | integer | |
| qBCMono | text | |
| vICMSMono | text | |
| qBCMonoReten | text | |
| vICMSMonoReten | text | |
| qBCMonoRet | text | |
| vICMSMonoRet | text | |
### notas\_consumidor\_inutilizadas
Sync type availability: Full-refresh
| Field | Type |
| --------------- | --------- |
| tipo\_inut | text |
| ano\_inut | integer |
| serie\_inut | text |
| inicial\_inut | integer |
| final\_inut | integer |
| motivo\_inut | text |
| protocolo\_inut | text |
| chave\_inut | text |
| data\_emissao | timestamp |
### notas\_consumidor\_parcelas
Sync type availability: Full-refresh
Child of [notas\_consumidor](#notas_consumidor)
| Field | Type |
| -------------------- | ------- |
| data\_parcela | date |
| valor\_parcela | text |
| forma\_pagamento | text |
| observacoes\_parcela | text |
| id\_nfc | integer |
### notas\_consumidor\_produtos
Sync type availability: Full-refresh
Child of [notas\_consumidor](#notas_consumidor)
| Field | Type |
| ------------------------- | ------- |
| id\_ped\_produto | integer |
| id\_nfc | integer |
| id\_produto | integer |
| id\_almoxarifado | integer |
| id\_lote | integer |
| cod\_produto | text |
| desc\_produto | text |
| qtde\_produto | text |
| icms\_produto | text |
| valor\_unit\_produto | text |
| valor\_custo\_produto | text |
| valor\_total\_produto | integer |
| vBC\_produto | text |
| vICMS\_produto | text |
| cfop\_produto | integer |
| ncm\_produto | text |
| unidade\_produto | text |
| unidade\_tributavel | text |
| beneficio\_fiscal | text |
| peso\_produto | text |
| tipo\_produto | integer |
| info\_adicional | text |
| ordem\_produto | text |
| codigo\_barras | text |
| valor\_tributos\_unit | text |
| valor\_tributos\_total | text |
| valor\_tributosEst\_unit | text |
| valor\_tributosEst\_total | text |
| json\_localizacoes | text |
| codigo\_cest | text |
| numero\_lote | text |
| data\_fab\_lote | date |
| data\_val\_lote | date |
### notas\_consumidor\_status
Sync type availability: Full-refresh
Child of [notas\_consumidor](#notas_consumidor)
| Field | Type |
| ------------- | --------- |
| id\_status | integer |
| id\_nfc | integer |
| data\_status | timestamp |
| obs\_status | text |
| tipo\_status | text |
| id\_usuario | integer |
| nome\_usuario | text |
### notas\_fiscais
Sync type availability: Full and incremental refresh
Parent of [notas\_fiscais\_parcelas](#notas_fiscais_parcelas), [notas\_fiscais\_produtos](#notas_fiscais_produtos), [notas\_fiscais\_status](#notas_fiscais_status)
[Cursor](https://docs.erathos.com/platform/connections/sync-types#understanding-cursors): `data_mod_pedido`
| Field | Type | Cursor |
| --------------------------- | --------- | ------ |
| id\_venda | integer | |
| tp\_nfe | integer | |
| serie\_nota | integer | |
| id\_pedido | integer | |
| id\_cliente | integer | |
| nome\_cliente | text | |
| id\_local\_cobranca | integer | |
| vendedor\_pedido | text | |
| vendedor\_pedido\_id | integer | |
| valor\_total\_produtos | text | |
| desconto\_pedido | text | |
| desconto\_pedido\_porc | text | |
| peso\_total\_nota | text | |
| peso\_total\_nota\_liq | text | |
| frete\_pedido | text | |
| valor\_total\_nota | text | |
| valor\_baseICMS | text | |
| valor\_ICMS | text | |
| valor\_vICMSDeson\_icms | text | |
| valor\_baseST | text | |
| valor\_ST | text | |
| valor\_IPI | text | |
| valor\_despesas | text | |
| valor\_desconto\_blocked | integer | |
| valor\_despesas\_blocked | integer | |
| valor\_frete\_blocked | integer | |
| condicao\_pagamento | integer | |
| frete\_por\_pedido | integer | |
| transportadora\_pedido | text | |
| id\_transportadora | integer | |
| volumes\_transporta | integer | |
| especie\_transporta | text | |
| marca\_transporta | text | |
| numeracao\_transporta | text | |
| placa\_transporta | text | |
| uf\_placa\_transporta | text | |
| uf\_embarque | text | |
| rntc\_transporta | text | |
| local\_embarque | text | |
| data\_pedido | date | |
| data\_pedido\_hora | time | |
| data\_emissao | date | |
| indPres\_pedido | integer | |
| natureza\_pedido | text | |
| finalidade\_nfe | integer | |
| obs\_pedido | text | |
| obs\_interno\_pedido | text | |
| status\_pedido | text | |
| contas\_pedido | integer | |
| comissao\_pedido | integer | |
| boletos\_pedido | integer | |
| estoque\_pedido | integer | |
| nota\_emitida | integer | |
| nota\_chave | text | |
| nota\_protocolo | text | |
| nota\_codigov | text | |
| nota\_recibo | text | |
| nota\_data\_autorizacao | timestamp | |
| nota\_usuario\_autorizacao | text | |
| nota\_data\_cancelamento | timestamp | |
| nota\_usuario\_cancelamento | text | |
| nota\_motivo\_cancelamento | text | |
| nota\_denegada | text | |
| nota\_importada | integer | |
| nota\_scan | integer | |
| xml\_importado | integer | |
| id\_almoxarifado | integer | |
| data\_cad\_pedido | timestamp | |
| data\_mod\_pedido | timestamp | ✓ |
| ambiente | integer | |
| seguro\_pedido | text | |
| lixeira | text | |
| valor\_seguro\_blocked | integer | |
| id\_pedido\_ref | integer | |
| chave\_ref\_produtos | integer | |
| cnpj\_intermediador | text | |
| ident\_no\_intermediador | text | |
| tipo\_intermediador | integer | |
| qBCMono | text | |
| vICMSMono | text | |
| qBCMonoReten | text | |
| vICMSMonoReten | text | |
| qBCMonoRet | text | |
| vICMSMonoRet | text | |
### notas\_fiscais\_cartas\_correcao
Sync type availability: Full-refresh
| Field | Type |
| -------------- | --------- |
| chave\_nfe | text |
| ambiente | integer |
| correcao\_cce | text |
| sequencia\_cce | integer |
| data\_cad\_cce | timestamp |
| chave\_cce | text |
| protocolo\_cce | text |
| nome\_usuario | text |
### notas\_fiscais\_inutilizadas
Sync type availability: Full-refresh
| Field | Type |
| --------------- | --------- |
| tipo\_inut | text |
| ano\_inut | integer |
| serie\_inut | text |
| inicial\_inut | integer |
| final\_inut | integer |
| motivo\_inut | text |
| protocolo\_inut | text |
| chave\_inut | text |
| data\_emissao | timestamp |
### notas\_fiscais\_parcelas
Sync type availability: Full-refresh
Child of [notas\_fiscais](#notas_fiscais)
| Field | Type |
| -------------------- | ------- |
| id\_venda | integer |
| data\_parcela | date |
| valor\_parcela | text |
| forma\_pagamento | text |
| observacoes\_parcela | text |
### notas\_fiscais\_produtos
Sync type availability: Full-refresh
Child of [notas\_fiscais](#notas_fiscais)
| Field | Type |
| -------------------------------------- | ------- |
| id\_ped\_produto | integer |
| id\_venda | integer |
| id\_produto | integer |
| cod\_produto | text |
| desc\_produto | text |
| qtde\_produto | text |
| desconto\_produto | text |
| ipi\_produto | text |
| icms\_produto | text |
| valor\_unit\_produto | text |
| valor\_custo\_produto | text |
| valor\_total\_produto | integer |
| vBC\_produto | text |
| vBC\_produto\_editado | text |
| vBC\_produto\_is\_editado | integer |
| vICMS\_produto | text |
| vICMS\_desoneracao | integer |
| vBCipi\_produto | text |
| vIPI\_produto | text |
| vBC\_ipi\_editado | text |
| vBC\_pis\_editado | text |
| vBC\_pis\_is\_editado | integer |
| vBC\_cofins\_editado | text |
| vBC\_cofins\_is\_editado | integer |
| vBC\_ipi\_is\_editado | integer |
| vBCST\_produto | text |
| vST\_produto | text |
| cfop\_produto | integer |
| ncm\_produto | text |
| unidade\_produto | text |
| unidade\_tributavel | text |
| qtde\_tributavel | text |
| valor\_unit\_tributavel | text |
| beneficio\_fiscal | text |
| origem\_produto | integer |
| peso\_produto | text |
| peso\_liq\_produto | text |
| info\_adicional | text |
| ordem\_produto | text |
| codigo\_barras | text |
| codigo\_barras\_internos | text |
| valor\_tributos\_unit | text |
| valor\_tributos\_total | text |
| valor\_tributos\_total\_is\_editado | integer |
| valor\_tributosEst\_unit | text |
| valor\_tributosEst\_total | text |
| valor\_tributosEst\_total\_is\_editado | integer |
| valor\_desconto | text |
| valor\_frete | text |
| valor\_outros | text |
| fci\_produto | text |
| valor\_seguro | text |
| id\_almoxarifado | integer |
| id\_lote\_almoxarifado | integer |
| numero\_lote\_almoxarifado | text |
| data\_fabricacao\_almoxarifado | date |
| data\_validade\_almoxarifado | date |
| extipi\_produto | text |
### notas\_fiscais\_status
Sync type availability: Full-refresh
Child of [notas\_fiscais](#notas_fiscais)
| Field | Type |
| ------------- | --------- |
| id\_status | integer |
| id\_venda | integer |
| data\_status | timestamp |
| obs\_status | text |
| tipo\_status | text |
| id\_usuario | integer |
| nome\_usuario | text |
### notas\_servico
Sync type availability: Full-refresh
| Field | Type |
| ----------------------------- | --------- |
| id\_servico | integer |
| serie\_nota | text |
| id\_pedido | integer |
| id\_cliente | integer |
| nome\_cliente | text |
| id\_local\_retirada | integer |
| id\_local\_entrega | integer |
| id\_local\_cobranca | integer |
| vendedor\_pedido | text |
| vendedor\_pedido\_id | integer |
| desc\_servicos | text |
| itemLista\_servico | integer |
| valor\_total\_servicos | text |
| valor\_deducoes | text |
| valor\_incondicionado | text |
| valor\_condicionado | text |
| valor\_base\_calculo | text |
| valor\_aliquota | text |
| valor\_imposto | text |
| reter\_iss | integer |
| aliq\_cofins | text |
| valor\_cofins | text |
| aliq\_pis | text |
| valor\_pis | text |
| aliq\_contribuicao | text |
| valor\_contribuicao | text |
| aliq\_ir | text |
| valor\_ir | text |
| reter\_cofins | integer |
| reter\_pis | integer |
| reter\_csll | integer |
| reter\_ir | integer |
| reter\_inss | integer |
| reter\_outros | text |
| valor\_total\_nota | text |
| valor\_aliq\_tributos | text |
| valor\_tributos | text |
| valor\_aliq\_tributos\_mun | text |
| valor\_tributos\_mun | text |
| valor\_material | text |
| condicao\_pagamento | integer |
| regime\_pedido | integer |
| natureza\_pedido | text |
| numero\_processo | text |
| local\_prestacao | integer |
| local\_prestacao\_cidade | text |
| local\_prestacao\_cidade\_cod | text |
| obs\_pedido | text |
| obs\_interno\_pedido | text |
| status\_pedido | text |
| contas\_pedido | integer |
| comissao\_pedido | integer |
| boletos\_pedido | integer |
| nota\_emitida | integer |
| nota\_chave | text |
| nota\_protocolo | text |
| nota\_numero\_nfse | integer |
| nota\_recibo\_lote | text |
| nota\_data\_autorizacao | timestamp |
| nota\_usuario\_autorizacao | text |
| nota\_data\_cancelamento | timestamp |
| data\_cad\_pedido | timestamp |
| data\_mod\_pedido | timestamp |
| ambiente | integer |
| lixeira | text |
| aliq\_inss | integer |
| valor\_inss | integer |
| lista\_servico | json |
### orcamentos
Sync type availability: Full and incremental refresh
Parent of [orcamentos\_parcelas](#orcamentos_parcelas), [orcamentos\_produtos](#orcamentos_produtos), [orcamentos\_status](#orcamentos_status)
[Cursor](https://docs.erathos.com/platform/connections/sync-types#understanding-cursors): `data_mod_pedido`
| Field | Type | Cursor |
| ----------------------- | --------- | ------ |
| id\_orcamento | integer | |
| id\_empresa | integer | |
| id\_pedido | integer | |
| id\_cliente | integer | |
| nome\_cliente | text | |
| id\_local\_entrega | integer | |
| id\_local\_retirada | integer | |
| id\_local\_cobranca | integer | |
| vendedor\_pedido | text | |
| vendedor\_pedido\_id | integer | |
| listapreco\_produtos | integer | |
| valor\_total\_produtos | text | |
| desconto\_pedido | text | |
| desconto\_pedido\_porc | text | |
| peso\_total\_nota | text | |
| peso\_total\_nota\_liq | text | |
| frete\_pedido | text | |
| valor\_total\_nota | text | |
| valor\_baseICMS | text | |
| valor\_ICMS | text | |
| valor\_baseST | text | |
| valor\_ST | text | |
| valor\_IPI | text | |
| condicao\_pagamento\_id | integer | |
| condicao\_pagamento | integer | |
| frete\_por\_pedido | integer | |
| transportadora\_pedido | text | |
| id\_transportadora | integer | |
| data\_pedido | date | |
| validade\_orcamento | date | |
| prazo\_orcamento | text | |
| referencia\_pedido | text | |
| obs\_pedido | text | |
| obs\_interno\_pedido | text | |
| status\_pedido | text | |
| contas\_pedido | integer | |
| comissao\_pedido | integer | |
| estoque\_pedido | integer | |
| pdv\_emitido | text | |
| pedido\_emitido | integer | |
| nota\_emitida | integer | |
| funil\_emitido | integer | |
| agrupado | integer | |
| id\_almoxarifado | integer | |
| data\_cad\_pedido | timestamp | |
| data\_mod\_pedido | timestamp | ✓ |
| lixeira | text | |
### orcamentos\_parcelas
Sync type availability: Full-refresh
Child of [orcamentos](#orcamentos)
| Field | Type |
| -------------------- | ------- |
| id\_orcamento | integer |
| data\_parcela | date |
| valor\_parcela | text |
| forma\_pagamento | text |
| observacoes\_parcela | text |
### orcamentos\_produtos
Sync type availability: Full-refresh
Child of [orcamentos](#orcamentos)
| Field | Type |
| --------------------- | ------- |
| id\_ped\_produto | integer |
| id\_orcamento | integer |
| id\_produto | integer |
| id\_almoxarifado | integer |
| id\_lote | integer |
| desc\_produto | text |
| qtde\_produto | text |
| ipi\_produto | text |
| icms\_produto | text |
| valor\_unit\_produto | text |
| valor\_custo\_produto | text |
| valor\_total\_produto | integer |
| valor\_desconto | text |
| peso\_produto | text |
| peso\_liq\_produto | text |
| info\_adicional | text |
| desconto\_produto | float |
### orcamentos\_status
Sync type availability: Full-refresh
Child of [orcamentos](#orcamentos)
| Field | Type |
| ------------- | ------- |
| id\_status | integer |
| id\_orcamento | integer |
| data\_status | date |
| obs\_status | text |
| tipo\_status | text |
| id\_usuario | integer |
| nome\_usuario | text |
### ordens\_compra
Sync type availability: Full and incremental refresh
Parent of [ordens\_compra\_parcelas](#ordens_compra_parcelas), [ordens\_compra\_produtos](#ordens_compra_produtos), [ordens\_compra\_status](#ordens_compra_status)
[Cursor](https://docs.erathos.com/platform/connections/sync-types#understanding-cursors): `data_mod_pedido`
| Field | Type | Cursor |
| ----------------------- | --------- | ------ |
| id\_ordem | integer | |
| id\_pedido | integer | |
| id\_cliente | integer | |
| solicitante | integer | |
| solicitante\_tipo | text | |
| nome\_cliente | text | |
| id\_vendedor | integer | |
| vendedor\_pedido | text | |
| valor\_total\_produtos | text | |
| desconto\_pedido | text | |
| peso\_total\_nota | text | |
| frete\_pedido | text | |
| valor\_total\_nota | text | |
| valor\_baseICMS | text | |
| valor\_ICMS | text | |
| valor\_baseST | text | |
| valor\_ST | text | |
| valor\_IPI | text | |
| condicao\_pagamento\_id | integer | |
| condicao\_pagamento | integer | |
| transportadora\_pedido | text | |
| id\_transportadora | integer | |
| data\_pedido | date | |
| prazo\_entrega | text | |
| obs\_pedido | text | |
| obs\_interno\_pedido | text | |
| status\_pedido | text | |
| contas\_pedido | integer | |
| estoque\_pedido | integer | |
| entrada\_emitida | integer | |
| usuario\_cad\_pedido | integer | |
| usuario\_mod\_pedido | integer | |
| data\_cad\_pedido | timestamp | |
| data\_mod\_pedido | timestamp | ✓ |
| lixeira | text | |
| peso\_total\_nota\_liq | float | |
| comissao\_pedido | integer | |
| entrada\_emitido | integer | |
### ordens\_compra\_parcelas
Sync type availability: Full-refresh
Child of [ordens\_compra](#ordens_compra)
| Field | Type |
| -------------------- | ------- |
| data\_parcela | date |
| valor\_parcela | text |
| forma\_pagamento | text |
| observacoes\_parcela | text |
| id\_ordem | integer |
### ordens\_compra\_produtos
Sync type availability: Full-refresh
Child of [ordens\_compra](#ordens_compra)
| Field | Type |
| --------------------- | ------- |
| id\_ped\_produto | integer |
| id\_ordem | integer |
| id\_produto | integer |
| desc\_produto | text |
| qtde\_produto | text |
| desconto\_produto | text |
| ipi\_produto | text |
| icms\_produto | text |
| valor\_unit\_produto | text |
| valor\_total\_produto | integer |
| peso\_produto | text |
| peso\_liq\_produto | text |
| obs\_produto | text |
| mostrar\_obs | text |
### ordens\_compra\_status
Sync type availability: Full-refresh
Child of [ordens\_compra](#ordens_compra)
| Field | Type |
| ------------- | ------- |
| id\_status | integer |
| id\_ordem | integer |
| data\_status | date |
| obs\_status | text |
| tipo\_status | text |
| id\_usuario | integer |
| nome\_usuario | text |
### ordens\_servico
Sync type availability: Full and incremental refresh
Parent of [ordens\_servico\_parcelas](#ordens_servico_parcelas), [ordens\_servico\_produtos](#ordens_servico_produtos), [ordens\_servico\_servicos](#ordens_servico_servicos), [ordens\_servico\_status](#ordens_servico_status)
[Cursor](https://docs.erathos.com/platform/connections/sync-types#understanding-cursors): `data_mod_pedido`
| Field | Type | Cursor |
| -------------------------------- | --------- | ------ |
| id\_ordem | integer | |
| id\_pedido | integer | |
| id\_cliente | integer | |
| nome\_cliente | text | |
| nome\_contato\_cliente | text | |
| id\_local\_retirada | integer | |
| id\_local\_cobranca | integer | |
| tipo\_atendimento | integer | |
| id\_tecnico | integer | |
| nome\_tecnico | text | |
| id\_cliente\_veiculo | integer | |
| tipo\_servico | text | |
| vendedor\_pedido | text | |
| vendedor\_pedido\_id | integer | |
| listapreco\_produtos | integer | |
| valor\_total\_servicos | text | |
| valor\_total\_pecas | text | |
| valor\_total\_despesas | text | |
| valor\_total\_desconto | text | |
| valor\_total\_os | text | |
| condicao\_pagamento\_id | integer | |
| condicao\_pagamento | integer | |
| data\_pedido | date | |
| data\_entrega | date | |
| data\_realizacao | date | |
| data\_realizacao\_hora | time | |
| garantia\_ordem | text | |
| equipamento\_ordem | text | |
| problema\_ordem | text | |
| recebimento\_ordem | text | |
| referencia\_ordem | text | |
| obs\_pedido | text | |
| obs\_interno\_pedido | text | |
| laudo\_ordem | text | |
| status\_pedido | text | |
| contas\_pedido | integer | |
| comissao\_pedido | integer | |
| estoque\_pedido | integer | |
| pdv\_emitido | text | |
| nota\_servico\_emitida | integer | |
| nota\_venda\_emitida | integer | |
| funil\_emitido | integer | |
| loja\_emitido | integer | |
| id\_almoxarifado | integer | |
| link\_pgto\_gerado | integer | |
| pagamento\_com\_vhpay | integer | |
| pagamento\_com\_conta\_integrada | integer | |
| data\_cad\_pedido | timestamp | |
| data\_mod\_pedido | timestamp | ✓ |
| lixeira | text | |
| km\_atual | text | |
### ordens\_servico\_parcelas
Sync type availability: Full-refresh
Child of [ordens\_servico](#ordens_servico)
| Field | Type |
| -------------------- | ------- |
| id\_ordem | integer |
| data\_parcela | date |
| valor\_parcela | text |
| forma\_pagamento | text |
| observacoes\_parcela | text |
### ordens\_servico\_produtos
Sync type availability: Full-refresh
Child of [ordens\_servico](#ordens_servico)
| Field | Type |
| --------------------- | ------- |
| id\_ped\_produto | integer |
| id\_ordem | integer |
| id\_produto | integer |
| id\_almoxarifado | integer |
| id\_lote | integer |
| desc\_produto | text |
| qtde\_produto | text |
| valor\_unit\_produto | text |
| valor\_custo\_produto | text |
| valor\_total\_produto | integer |
| json\_localizacoes | text |
| id\_motivo\_rejeicao | integer |
| item\_rejeitado | integer |
### ordens\_servico\_servicos
Sync type availability: Full-refresh
Child of [ordens\_servico](#ordens_servico)
| Field | Type |
| --------------------- | ------- |
| id\_ped\_servico | integer |
| id\_ordem | integer |
| id\_servico | integer |
| desc\_servico | text |
| horas\_servico | text |
| valor\_unit\_servico | text |
| valor\_total\_servico | integer |
| id\_motivo\_rejeicao | integer |
| item\_rejeitado | integer |
| json\_tecnicos | text |
### ordens\_servico\_status
Sync type availability: Full-refresh
Child of [ordens\_servico](#ordens_servico)
| Field | Type |
| ------------- | --------- |
| id\_status | integer |
| id\_ordem | integer |
| data\_status | timestamp |
| obs\_status | text |
| tipo\_status | text |
| id\_usuario | integer |
| nome\_usuario | text |
### pedidos
Sync type availability: Full and incremental refresh
Parent of [pedidos\_parcelas](#pedidos_parcelas), [pedidos\_produtos](#pedidos_produtos), [pedidos\_status](#pedidos_status)
[Cursor](https://docs.erathos.com/platform/connections/sync-types#understanding-cursors): `data_mod_pedido`
| Field | Type | Cursor |
| -------------------------------- | --------- | ------ |
| id\_ped | integer | |
| id\_pedido | integer | |
| id\_cliente | integer | |
| nome\_cliente | text | |
| id\_local\_retirada | integer | |
| id\_local\_cobranca | integer | |
| vendedor\_pedido | text | |
| vendedor\_pedido\_id | integer | |
| listapreco\_produtos | integer | |
| valor\_total\_produtos | text | |
| desconto\_pedido | text | |
| desconto\_pedido\_porc | text | |
| peso\_total\_nota | text | |
| peso\_total\_nota\_liq | text | |
| frete\_pedido | text | |
| valor\_total\_nota | text | |
| valor\_baseICMS | text | |
| valor\_ICMS | text | |
| valor\_baseST | text | |
| valor\_ST | text | |
| valor\_IPI | text | |
| condicao\_pagamento\_id | integer | |
| condicao\_pagamento | integer | |
| frete\_por\_pedido | integer | |
| transportadora\_pedido | text | |
| id\_transportadora | integer | |
| data\_pedido | date | |
| prazo\_entrega | text | |
| referencia\_pedido | text | |
| obs\_pedido | text | |
| obs\_interno\_pedido | text | |
| status\_pedido | text | |
| contas\_pedido | integer | |
| comissao\_pedido | integer | |
| estoque\_pedido | integer | |
| pdv\_emitido | text | |
| ordemc\_emitido | integer | |
| data\_cad\_pedido | timestamp | |
| data\_mod\_pedido | timestamp | ✓ |
| id\_aplicativo | integer | |
| id\_pedido\_aplicativo | integer | |
| id\_almoxarifado | integer | |
| pagamento\_com\_vhpay | integer | |
| pagamento\_com\_conta\_integrada | integer | |
| link\_pgto\_gerado | integer | |
| lixeira | text | |
### pedidos\_parcelas
Sync type availability: Full-refresh
Child of [pedidos](#pedidos)
| Field | Type |
| -------------------- | ------- |
| id\_parcela | integer |
| id\_pedido | integer |
| data\_parcela | date |
| valor\_parcela | text |
| forma\_pagamento | text |
| observacoes\_parcela | text |
### pedidos\_produtos
Sync type availability: Full-refresh
Child of [pedidos](#pedidos)
| Field | Type |
| --------------------- | ------- |
| id\_ped\_produto | integer |
| id\_pedido | integer |
| id\_produto | integer |
| id\_almoxarifado | integer |
| id\_lote | integer |
| desc\_produto | text |
| qtde\_produto | text |
| desconto\_produto | text |
| ipi\_produto | text |
| icms\_produto | text |
| valor\_unit\_produto | text |
| valor\_custo\_produto | text |
| valor\_total\_produto | text |
| valor\_desconto | text |
| peso\_produto | text |
| peso\_liq\_produto | text |
| info\_adicional | text |
| xPed\_produto | text |
| nItem\_produto | text |
| json\_localizacoes | text |
### pedidos\_status
Sync type availability: Full-refresh
Child of [pedidos](#pedidos)
| Field | Type |
| ------------- | ------- |
| id\_status | integer |
| id\_pedido | integer |
| data\_status | date |
| obs\_status | text |
| tipo\_status | text |
| id\_usuario | integer |
| nome\_usuario | text |
### produtos
Sync type availability: Full and incremental refresh
Parent of [produtos\_estoque](#produtos_estoque)
[Cursor](https://docs.erathos.com/platform/connections/sync-types#understanding-cursors): `data_mod_produto`
| Field | Type | Cursor |
| ----------------------------------- | --------- | ------ |
| id\_produto | integer | |
| id\_registro | integer | |
| id\_empresa | integer | |
| id\_categoria | integer | |
| cod\_produto | text | |
| marca\_produto | text | |
| desc\_produto | text | |
| atalho\_produto | text | |
| fornecedor\_produto | text | |
| fornecedor\_produto\_id | integer | |
| produto\_variado | integer | |
| id\_produto\_parent | integer | |
| minimo\_produto | text | |
| maximo\_produto | text | |
| estoque\_produto | text | |
| unidade\_produto | text | |
| valor\_produto | text | |
| valor\_custo\_produto | text | |
| peso\_produto | text | |
| peso\_liq\_produto | text | |
| icms\_produto | text | |
| ipi\_produto | text | |
| pis\_produto | text | |
| cofins\_produto | text | |
| unidade\_tributavel | text | |
| cest\_produto | text | |
| beneficio\_fiscal | text | |
| ncm\_produto | text | |
| origem\_produto | integer | |
| codigo\_barra\_produto | text | |
| codigo\_barras\_internos | text | |
| obs\_produto | text | |
| tipo\_produto | text | |
| tamanho\_produto | text | |
| localizacao\_produto | text | |
| kit\_produto | text | |
| baixar\_kit | integer | |
| desmembrar\_kit | integer | |
| loja\_visivel | integer | |
| loja\_video\_url | text | |
| valor\_tributos | text | |
| valor\_tributosEst | text | |
| status\_produto | text | |
| id\_comissionamento | integer | |
| id\_regra\_comissionamento\_servico | integer | |
| data\_cad\_produto | timestamp | |
| data\_mod\_produto | timestamp | ✓ |
| data\_mod\_estoque | timestamp | |
| lixeira | text | |
| endereco\_fixo | integer | |
| controla\_lote | integer | |
| controla\_validade | integer | |
| lista\_preco | json | |
| subcategoria | json | |
| grades | json | |
| variacoes | json | |
| imagens | json | |
### produtos\_estoque
Sync type availability: Full-refresh
Child of [produtos](#produtos)
| Field | Type |
| ------------------------- | --------- |
| id\_estoque | integer |
| id\_empresa | integer |
| id\_usuario\_cad\_estoque | integer |
| id\_produto | integer |
| id\_lote | integer |
| id\_almoxarifado | integer |
| tipo\_estoque | text |
| qtde\_estoque | text |
| valor\_estoque | text |
| obs\_estoque | text |
| identificacao | text |
| data\_cad\_estoque | timestamp |
### saldo\_bancos
Sync type availability: Full and incremental refresh
[Cursor](https://docs.erathos.com/platform/connections/sync-types#understanding-cursors): `data_mod_banco`
| Field | Type | Cursor |
| ---------------- | --------- | ------ |
| id\_banco\_cad | integer | |
| nome\_banco\_cad | text | |
| saldo\_entrada | text | |
| saldo\_saida | text | |
| saldo\_atual | text | |
| saldo | text | |
| data\_mod\_banco | timestamp | ✓ |
| lixeira | text | |
### subcategorias
Sync type availability: Full and incremental refresh
[Cursor](https://docs.erathos.com/platform/connections/sync-types#understanding-cursors): `data_mod_subcategoria`
| Field | Type | Cursor |
| ----------------------- | --------- | ------ |
| id\_subcategoria | integer | |
| id\_categoria | integer | |
| atalho\_subcategoria | text | |
| nome\_subcategoria | text | |
| status\_subcategoria | text | |
| data\_cad\_subcategoria | timestamp | |
| data\_mod\_subcategoria | timestamp | ✓ |
| lixeira | text | |
| nome\_categoria | text | |
### transportadoras
Sync type availability: Full and incremental refresh
[Cursor](https://docs.erathos.com/platform/connections/sync-types#understanding-cursors): `data_mod_transportadora`
| Field | Type | Cursor |
| --------------------------- | --------- | ------ |
| id\_transportadora | integer | |
| id\_registro | integer | |
| tipo\_pessoa | text | |
| desc\_transportadora | text | |
| fantasia\_transportadora | text | |
| cnpj\_transportadora | text | |
| ie\_transportadora | text | |
| endereco\_transportadora | text | |
| numero\_transportadora | text | |
| cep\_transportadora | text | |
| bairro\_transportadora | text | |
| complemento\_transportadora | text | |
| cidade\_transportadora | text | |
| cidade\_transportadora\_cod | text | |
| estado\_transportadora | text | |
| fone\_transportadora | text | |
| email\_transportadora | text | |
| rntc\_transportadora | text | |
| observacoes\_transportadora | text | |
| data\_cad\_transportadora | timestamp | |
| data\_mod\_transportadora | timestamp | ✓ |
| lixeira | text | |
### vendas\_balcao
Sync type availability: Full and incremental refresh
Parent of [vendas\_balcao\_parcelas](#vendas_balcao_parcelas), [vendas\_balcao\_produtos](#vendas_balcao_produtos), [vendas\_balcao\_status](#vendas_balcao_status)
[Cursor](https://docs.erathos.com/platform/connections/sync-types#understanding-cursors): `data_mod_pedido`
| Field | Type | Cursor |
| ------------------------ | --------- | ------ |
| id\_frente | integer | |
| id\_pedido | integer | |
| id\_cliente | integer | |
| nome\_cliente | text | |
| vendedor\_pedido | text | |
| vendedor\_pedido\_id | integer | |
| valor\_total\_produtos | text | |
| desconto\_pedido | text | |
| acrescimo\_pedido | text | |
| valor\_total\_nota | text | |
| tipo\_pagamento | integer | |
| forma\_pagamento | text | |
| doc\_pagamento | text | |
| valor\_recebido | text | |
| troco\_pedido | text | |
| condicao\_pagamento | integer | |
| id\_banco | integer | |
| obs\_pedido | text | |
| status\_pedido | text | |
| contas\_pedido | integer | |
| estoque\_pedido | integer | |
| pdv\_emitido | text | |
| pedido\_emitido | integer | |
| nfce\_emitido | integer | |
| versao\_pdv | integer | |
| pedido\_importado | integer | |
| data\_cad\_pedido | timestamp | |
| data\_mod\_pedido | timestamp | ✓ |
| lixeira | text | |
| desconto\_unitario\_item | text | |
| desconto\_total\_item | text | |
### vendas\_balcao\_parcelas
Sync type availability: Full-refresh
Child of [vendas\_balcao](#vendas_balcao)
| Field | Type |
| --------------------------- | --------- |
| id\_parcela | integer |
| id\_frente | integer |
| data\_parcela | date |
| valor\_parcela | text |
| forma\_pagamento | text |
| observacoes\_parcela | text |
| id\_banco | integer |
| id\_conta\_rec | integer |
| order\_ref | text |
| id\_carteira | integer |
| id\_pagamento\_invoice\_pdv | integer |
| data\_cad | timestamp |
| data\_mod | timestamp |
### vendas\_balcao\_produtos
Sync type availability: Full-refresh
Child of [vendas\_balcao](#vendas_balcao)
| Field | Type |
| ------------------------ | ------- |
| id\_ped\_produto | integer |
| id\_empresa | integer |
| id\_frente | integer |
| id\_produto | integer |
| cod\_produto | text |
| desc\_produto | text |
| qtde\_produto | text |
| valor\_unit\_produto | text |
| valor\_custo\_produto | text |
| valor\_total\_produto | integer |
| seq | integer |
| id\_almoxarifado | integer |
| id\_lote | integer |
| numero\_lote | text |
| desconto\_unitario\_item | text |
| desconto\_total\_item | text |
| tipo\_importacao | text |
| id\_importacao | integer |
| qtde\_troca | text |
| valor\_total\_troca | integer |
### vendas\_balcao\_status
Sync type availability: Full-refresh
Child of [vendas\_balcao](#vendas_balcao)
| Field | Type |
| ------------ | ------- |
| id\_status | integer |
| id\_frente | integer |
| data\_status | date |
| obs\_status | text |
| tipo\_status | text |
### vendedores
Sync type availability: Full and incremental refresh
[Cursor](https://docs.erathos.com/platform/connections/sync-types#understanding-cursors): `data_mod_vendedor`
| Field | Type | Cursor |
| --------------------- | --------- | ------ |
| id\_vendedor | integer | |
| id\_registro | integer | |
| tipo\_pessoa | text | |
| cnpj\_vendedor | text | |
| razao\_vendedor | text | |
| fantasia\_vendedor | text | |
| endereco\_vendedor | text | |
| numero\_vendedor | text | |
| bairro\_vendedor | text | |
| complemento\_vendedor | text | |
| cep\_vendedor | text | |
| cidade\_vendedor | text | |
| uf\_vendedor | text | |
| contato\_vendedor | text | |
| fone\_vendedor | text | |
| fone\_ramal\_vendedor | text | |
| celular\_vendedor | text | |
| email\_vendedor | text | |
| website\_vendedor | text | |
| listapreco\_vendedor | text | |
| banco\_vendedor | text | |
| banco\_agencia | text | |
| banco\_conta | text | |
| banco\_salario | text | |
| situacao\_vendedor | text | |
| comissao\_usuario | text | |
| comissao\_regra | integer | |
| usuario\_vendedor | text | |
| observacoes\_vendedor | text | |
| data\_cad\_vendedor | timestamp | |
| data\_mod\_vendedor | timestamp | ✓ |
| lixeira | text | |
### webhooks
Sync type availability: Full-refresh
| Field | Type |
| ------------------ | --------- |
| id\_webhook | integer |
| id\_parceiro | integer |
| entidade | text |
| url | text |
| user | text |
| data\_cad\_webhook | timestamp |
| data\_mod\_webhook | timestamp |
## Entity Relationships
```mermaid
erDiagram
clientes ||--o{ clientes_detalhe : "id_cliente = _pk_clientes"
clientes ||--o{ clientes_veiculos : "id_cliente = _pk_clientes"
entradas_mercadoria ||--o{ entradas_parcelas : "id_entrada = _pk_entradas_mercadoria"
entradas_mercadoria ||--o{ entradas_produtos : "id_entrada = _pk_entradas_mercadoria"
entradas_mercadoria ||--o{ entradas_status : "id_entrada = _pk_entradas_mercadoria"
notas_consumidor ||--o{ notas_consumidor_parcelas : "id_nfc = _pk_notas_consumidor"
notas_consumidor ||--o{ notas_consumidor_produtos : "id_nfc = _pk_notas_consumidor"
notas_consumidor ||--o{ notas_consumidor_status : "id_nfc = _pk_notas_consumidor"
notas_fiscais ||--o{ notas_fiscais_parcelas : "id_venda = _pk_notas_fiscais"
notas_fiscais ||--o{ notas_fiscais_produtos : "id_venda = _pk_notas_fiscais"
notas_fiscais ||--o{ notas_fiscais_status : "id_venda = _pk_notas_fiscais"
orcamentos ||--o{ orcamentos_parcelas : "id_orcamento = _pk_orcamentos"
orcamentos ||--o{ orcamentos_produtos : "id_orcamento = _pk_orcamentos"
orcamentos ||--o{ orcamentos_status : "id_orcamento = _pk_orcamentos"
ordens_compra ||--o{ ordens_compra_parcelas : "id_ordem = _pk_ordens_compra"
ordens_compra ||--o{ ordens_compra_produtos : "id_ordem = _pk_ordens_compra"
ordens_compra ||--o{ ordens_compra_status : "id_ordem = _pk_ordens_compra"
ordens_servico ||--o{ ordens_servico_parcelas : "id_ordem = _pk_ordens_servico"
ordens_servico ||--o{ ordens_servico_produtos : "id_ordem = _pk_ordens_servico"
ordens_servico ||--o{ ordens_servico_servicos : "id_ordem = _pk_ordens_servico"
ordens_servico ||--o{ ordens_servico_status : "id_ordem = _pk_ordens_servico"
pedidos ||--o{ pedidos_parcelas : "id_ped = _pk_pedidos"
pedidos ||--o{ pedidos_produtos : "id_ped = _pk_pedidos"
pedidos ||--o{ pedidos_status : "id_ped = _pk_pedidos"
produtos ||--o{ produtos_estoque : "id_produto = _pk_produtos"
vendas_balcao ||--o{ vendas_balcao_parcelas : "id_frente = _pk_vendas_balcao"
vendas_balcao ||--o{ vendas_balcao_produtos : "id_frente = _pk_vendas_balcao"
vendas_balcao ||--o{ vendas_balcao_status : "id_frente = _pk_vendas_balcao"
categorias ||--o{ subcategorias : "id_categoria = id_categoria"
clientes ||--o{ transportadoras : "id_transportadora = id_transportadora"
vendedores ||--o{ clientes : "id_vendedor = vendedor_cliente_id"
lista_servicos ||--o{ ordens_servico_servicos : "id_lista = id_servico"
produtos ||--o{ entradas_produtos : "id_produto = id_produto"
produtos ||--o{ notas_consumidor_produtos : "id_produto = id_produto"
produtos ||--o{ notas_fiscais_produtos : "id_produto = id_produto"
produtos ||--o{ orcamentos_produtos : "id_produto = id_produto"
produtos ||--o{ ordens_compra_produtos : "id_produto = id_produto"
produtos ||--o{ ordens_servico_produtos : "id_produto = id_produto"
produtos ||--o{ pedidos_produtos : "id_produto = id_produto"
produtos ||--o{ vendas_balcao_produtos : "id_produto = id_produto"
clientes {
integer id_cliente PK
}
clientes_detalhe {
text _pk_clientes PK
}
clientes_veiculos {
text _pk_clientes PK
}
entradas_mercadoria {
integer id_entrada PK
}
entradas_parcelas {
text _pk_entradas_mercadoria PK
}
entradas_produtos {
text _pk_entradas_mercadoria PK
}
entradas_status {
text _pk_entradas_mercadoria PK
}
notas_consumidor {
integer id_nfc PK
}
notas_consumidor_parcelas {
text _pk_notas_consumidor PK
}
notas_consumidor_produtos {
text _pk_notas_consumidor PK
}
notas_consumidor_status {
text _pk_notas_consumidor PK
}
notas_fiscais {
integer id_venda PK
}
notas_fiscais_parcelas {
text _pk_notas_fiscais PK
}
notas_fiscais_produtos {
text _pk_notas_fiscais PK
}
notas_fiscais_status {
text _pk_notas_fiscais PK
}
orcamentos {
integer id_orcamento PK
}
orcamentos_parcelas {
text _pk_orcamentos PK
}
orcamentos_produtos {
text _pk_orcamentos PK
}
orcamentos_status {
text _pk_orcamentos PK
}
ordens_compra {
integer id_ordem PK
}
ordens_compra_parcelas {
text _pk_ordens_compra PK
}
ordens_compra_produtos {
text _pk_ordens_compra PK
}
ordens_compra_status {
text _pk_ordens_compra PK
}
ordens_servico {
integer id_ordem PK
}
ordens_servico_parcelas {
text _pk_ordens_servico PK
}
ordens_servico_produtos {
text _pk_ordens_servico PK
}
ordens_servico_servicos {
text _pk_ordens_servico PK
}
ordens_servico_status {
text _pk_ordens_servico PK
}
pedidos {
integer id_ped PK
}
pedidos_parcelas {
text _pk_pedidos PK
}
pedidos_produtos {
text _pk_pedidos PK
}
pedidos_status {
text _pk_pedidos PK
}
produtos {
integer id_produto PK
}
produtos_estoque {
text _pk_produtos PK
}
vendas_balcao {
integer id_frente PK
}
vendas_balcao_parcelas {
text _pk_vendas_balcao PK
}
vendas_balcao_produtos {
text _pk_vendas_balcao PK
}
vendas_balcao_status {
text _pk_vendas_balcao PK
}
```
# Vindi
Find out how to connect Vindi to your data warehouse effortlessly.
## Using the Erathos platform
When selecting Vindi as a new connector on the Erathos platform, you will need to name your connection and fill in the following form:

## How to find the API Key?
1. Log in to your account
2. In the menu, select **Settings > Organization Data > Access keys**
3. Generate your private API key
Now simply copy and paste the value on the Erathos platform connection form to advance to the next steps. Don't forget to click on **Save and close**!
With this connection created you can seemlessly move your Vindi data to your BigQuery, Redshift or Postgres data-warehouse.
## What endpoints can I access with the Erathos platform?
* customers
* plans
* plan\_items
* products
* payment\_methods
* subscriptions
* product\_items
* periods
* period\_usages
* bills
* charges
* transactions
* payment\_profiles
* invoices
* messages
* export\_batches
* import\_batches
* issues
* notifications
* notification\_items
* merchants
* roles
* affiliates
* merchant\_users
# Zendesk
Find out how to connect Zendesk to your data warehouse effortlessly.
## Using the Erathos platform
When selecting Zendesk as a new connector on the Erathos platform, you will need to name your connection and fill in the following form:

## How to find the API Token?
It may be necessary to enable API token access. To do this:
1. In the Admin Center, click **Apps and Integrations** on the sidebar.
2. Select **APIs > Zendesk API**.
3. In the **Settings** tab, enable API token access.
## To generate the API token:
1. You must be an administrator, and API token access must be enabled in your account.
2. In the Admin Center, click **Apps and Integrations** on the sidebar.
3. Select **APIs > Zendesk API**.
4. Click the **Add API token** button to the right of **Active API Tokens**.
5. The token will be generated and displayed.
## How to find the Domain URL?
1. Go to the **Support Admin** home page.
2. The **Domain URL** will appear in the upper right corner of the screen, as shown below:
In this case, the Domain URL would be **yoursubdomain**.

#### How to find the Username?
The username is usually the email you use to log into your Zendesk account.
From here, simply copy and paste the information into the Erathos platform and click **Save and close** to advance to the next steps.
Once the connector is created, you can create your data pipeline from Zendesk to your data warehouse in BigQuery, Redshift, or Postgres.
## What endpoints can I access with the Erathos platform?
* ticket\_fields
* organization\_subscriptions
* groups
* group\_memberships
* satisfaction\_ratings
* comments
* audits
* metrics
* activities
* skips
* tickets
* suspended\_tickets
* users
* profiles
* events
* organizations
* organization\_memberships
* tickets\_export
# Databases
# Firebird
Find out how to connect Firebird to your data warehouse effortlessly.
In this page you will learn how to connect **Firebird** to **Erathos** to move your data seamlessly.
The available connections between databases and the Erathos platform are through **Open Connection**, **Static IP** and **SSH tunnel**.
{% hint style="info" %}
Erathos supports Firebird version 2.0 and higher.
{% endhint %}
## Connecting Firebird:
1. Log in to your Erathos account
2. Select Firebird as connector
3. Name your connection
4. Fill in the following form with the required information

On the Advanced config toggle button, you can select which connection you'd like to perform.

In this case, you can only choose between **Open Connection** and **Static IP.**
If you choose to connect through Static IP, you will need to follow the instuction below:

Don't forget to click on **Save and close** to advance to the next steps of the integration.
With this connection created you can seemlessly move your Firebird data to your BigQuery, Redshift or Postgres data-warehouse.
---
[Next Page](https://docs.erathos.com/llms-full.txt/1)

.png?alt=media&token=18597ab8-d76e-4b92-a9a8-7572ae55207c)